Will a Stud Finder Work Through Tile? Complete Guide
Yes, some stud finders can work through tile, but accuracy depends on the tile size, wall thickness, backing material, grout lines, and the detection technology used by the finder.
A tiled wall is usually more difficult to scan than ordinary drywall because the sensor may need to read through several materials before reaching the framing. A typical tiled wall can include tile, thinset or adhesive, waterproofing, cement board or drywall, and then the stud itself.
The type of tile also matters. Large, smooth tiles tend to provide a more uniform scanning surface than small mosaic tiles with many grout joints. A basic stud finder may work on a relatively simple tile-over-drywall wall, while thicker shower walls and tile over cement board may require Deep Scan, a multi-sensor finder, or a more advanced wall scanner.
Will a Stud Finder Work Through Tile?
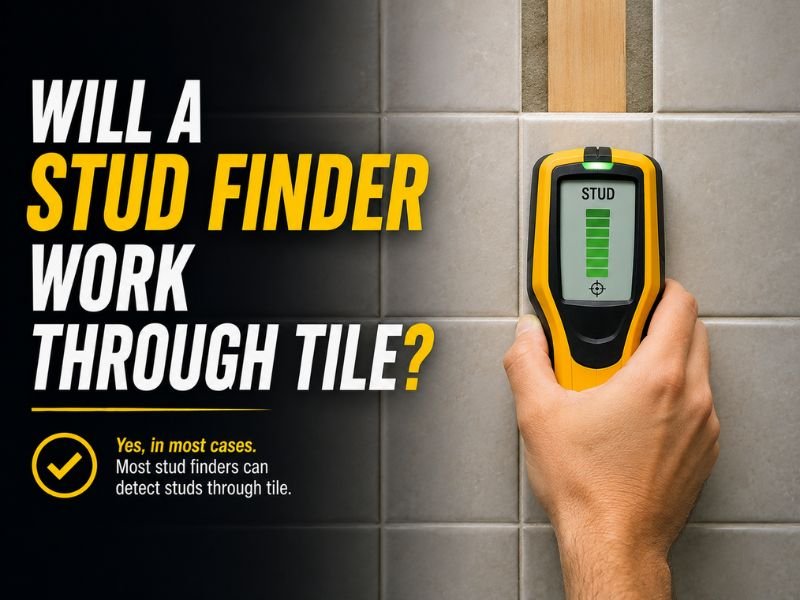
A stud finder can work through tile in some situations, but tile should not be treated like ordinary drywall.
The best conditions are usually:
- Large, smooth tiles
- A relatively thin wall assembly
- Studs close behind the surface
- A flat scanning area
- A finder with adequate detection depth
Detection becomes more difficult with:
- Small mosaic tiles
- Numerous grout joints
- Thick porcelain or stone
- Cement backer board
- Multiple wall layers
- Heavy mortar beds
- Deep framing
The important point is that the complete wall assembly matters more than the tile alone.
Two walls can use the same ceramic tile but produce completely different stud-finder results because one has drywall behind the tile while the other has thick cement board, waterproofing, and additional backing.
Why Is Tile Harder to Scan Through Than Drywall?
A normal interior wall might have a very simple construction:
Paint → drywall → stud
A tiled wall can be much more complicated:
Tile → thinset → cement board → waterproofing → stud
Each additional layer increases the distance between the sensor and the framing.
Some materials also change how the finder responds.
Potential problems include:
- Dense tile
- Grout joints
- Cement board
- Mortar
- Adhesive
- Waterproofing systems
- Metal fasteners
- Plumbing
- Multiple material transitions
A conventional electronic stud finder has to separate the framing signal from all those surrounding materials.
That is why a tool that works perfectly on painted drywall may behave differently when placed against a shower wall.
Do Grout Lines Affect Stud Finders?
Yes, grout lines can affect some stud-finder readings.
A large tile provides a relatively broad and uniform area for the sensor.
Mosaic tile is different.
A scanning path across mosaics may repeatedly pass through:
- Tile
- Grout
- Tile
- Grout
These constant changes can make it harder for some electronic finders to establish a consistent baseline.
This may result in:
- False edges
- Inconsistent centers
- Repeated alerts
- Different results on every pass
When possible, scan across the broad center of a larger tile rather than deliberately following a grout joint.
If you have small tiles with many seams, verify every apparent stud location carefully.
Can a Regular Stud Finder Work Through Tile?
Sometimes.
A basic electronic stud finder has the best chance when the tile wall is relatively simple.
For example:
Tile → thin adhesive layer → drywall → stud
may be easier to scan than:
Porcelain tile → mortar → waterproofing → cement board → stud
The total material thickness is one of the biggest differences.
A basic finder may simply lack enough scan depth to reliably reach the framing in the second example.
The surface also matters.
A smooth tile allows the tool to maintain consistent contact. Highly textured, curved, or uneven tile can cause the finder to rock or leave gaps between the sensor and the surface.
If your basic finder provides repeated, consistent readings, it may be sufficient.
If readings are erratic or disappear entirely, do not assume there are no studs. The wall may simply exceed the tool’s capabilities.
Will Deep Scan Work Through Tile?
Deep Scan can improve performance when depth is the main problem.
Normal Stud Scan is usually optimized for relatively shallow framing behind common wallboard.
Deep Scan is intended to look farther beneath the surface.
It can be useful when the wall contains:
- Thick tile
- Cement board
- Multiple wall layers
- Heavy mortar
- Additional backing
However, Deep Scan has an important limitation.
More depth does not automatically mean more accurate object identification.
If grout, metal fasteners, plumbing, or multiple dense materials are creating confusing readings, a deeper mode may still have difficulty separating the stud from the surrounding objects.
Think of Deep Scan primarily as a solution for distance, not as a cure for every tile-related scanning problem.
Can a Multi-Sensor Stud Finder Work Better Through Tile?
Often, yes.
A multi-sensor finder examines a wider section of the wall instead of relying on one narrow sensor area.
That can make it easier to identify:
- Stud width
- Stud center
- Multiple framing members
- Wider changes in density
Some multi-sensor tools also include modes intended for thicker or layered surfaces.
These can be particularly useful with:
- Large-format tile
- Tile over cement board
- Drywall plus backing
- Double-layer walls
The benefit is improved information and a wider sensing area.
It does not mean the tool will work perfectly through every tiled wall.
Will a Stud Finder Work Through Ceramic Tile?
It can.
Ceramic tile varies significantly in:
- Thickness
- Size
- Surface texture
- Installation method
A relatively thin ceramic tile installed over drywall may be easy enough for a suitable stud finder.
A thicker ceramic wall installed over cement board creates a much greater scanning challenge.
Large ceramic tiles also tend to provide a more uniform surface than mosaics.
When scanning ceramic tile, consider the entire wall rather than judging performance from the tile material alone.
Will a Stud Finder Work Through Porcelain Tile?
Possibly.
Porcelain tile can be dense, and the wall beneath it may add considerable thickness.
A porcelain shower wall may include:
- Porcelain tile
- Thinset
- Waterproofing
- Cement board or another tile substrate
- Stud framing
That places more material between the finder and the stud than a standard drywall wall.
A model with deeper scanning capability is generally more appropriate for this type of installation.
Do not assume that because a finder works through ceramic tile it will perform identically through every porcelain wall assembly.
Will a Stud Finder Work Through Stone Tile?
Some stud finders may work through stone tile, but performance can be less predictable.
Natural stone includes materials such as:
- Marble
- Granite
- Travertine
- Slate
Thickness and density vary widely.
Stone may also be installed over a heavier mortar bed or another substantial backing system.
That means total scan depth can become the limiting factor.
For complex stone walls, a more advanced wall scanner may provide more useful information than a basic drywall stud finder.
Will a Stud Finder Work Through Glass Tile?
It may, depending on the installation.
The glass itself is only one part of the wall.
Stud detection is also affected by:
- Adhesive
- Backing material
- Tile thickness
- Wall depth
- Surface shape
If the glass tiles are smooth and relatively large, maintaining good sensor contact may be easier.
Small decorative glass mosaics can create many seams and material changes that make readings harder to interpret.
Will a Stud Finder Work Through Mosaic Tile?
Mosaic tile is generally more difficult to scan than large-format tile.
A mosaic surface contains many individual pieces separated by grout.
As the finder moves across the wall, it may repeatedly cross material boundaries.
This can create:
- Inconsistent calibration
- False positive readings
- Wide stud indications
- Unstable edge detection
If possible, compare several scans at different heights and positions.
If every pass gives a significantly different result, the tile surface may simply be too inconsistent for that particular finder.
A deeper multi-sensor finder or advanced wall scanner may be more appropriate.
Will a Stud Finder Work Through Shower Tile?
It may, but shower walls deserve extra caution.
A shower wall can contain several layers that are absent from normal interior walls.
A typical assembly may include:
- Ceramic or porcelain tile
- Thinset
- Waterproofing
- Cement board or another substrate
- Studs
- Plumbing within the wall cavity
This combination makes both detection and drilling more complicated.
People commonly need to locate framing behind shower tile for:
- Grab bars
- Shower doors
- Shelving
- Seats
- Accessories
For these applications, a questionable single reading is not enough.
Confirm the framing location using several methods before drilling through finished tile.
Can a Stud Finder Find Studs Behind Tile and Cement Board?
Yes, some can, but this is more challenging than scanning tile installed directly over drywall.
Cement board adds another substantial layer between the scanner and framing.
The tool may therefore need to read through:
Tile + thinset + cement board
before it reaches the stud.
If the combined depth exceeds the finder’s normal detection range, standard Stud Scan may fail.
A deeper mode, multi-sensor tool, or advanced scanner is more appropriate.
Remember that cement board may also contain numerous screws attaching it to the framing. Metal detection can sometimes identify these fasteners, but isolated metal hits still need to be interpreted carefully.
How to Use a Stud Finder Through Tile
A systematic approach gives you a better chance of obtaining a reliable result.
1. Determine the Wall Construction
If possible, find out what is beneath the tile.
Common possibilities include:
- Drywall
- Cement board
- Plaster
- Waterproof wallboard
- Other tile substrates
Knowing the wall assembly helps you estimate whether a basic finder has enough detection depth.
2. Check the Finder’s Modes
Look for:
- Stud Scan
- Deep Scan
- Thick-wall mode
- Metal Scan
- Multi-material scan
Use the mode recommended for the wall thickness.
3. Choose a Flat Tile
Whenever possible, place the sensor near the center of a smooth, large tile.
Avoid starting directly over:
- Grout joints
- Decorative borders
- Strong surface texture
- Metal trim
4. Keep the Finder Flat
Maintain consistent contact with the tile.
Do not rock or tilt the sensor.
5. Scan Slowly
Move horizontally across the expected framing direction.
Fast scanning can make inconsistent readings even harder to interpret.
6. Mark the Reading
Use painter’s tape or another removable marking method that will not permanently mark the tile.
7. Scan From the Opposite Direction
Repeat the pass from the other side.
Compare the indicated position.
8. Scan at Another Height
Move higher or lower and test the same suspected framing line.
A stud should generally continue vertically.
9. Find Neighboring Studs
Locating additional framing members can help confirm the overall pattern.
Should You Scan Across Tile or Grout?
A broad, flat tile surface is usually preferable when your stud finder can operate there.
Grout joints introduce another material transition that may affect the sensor.
This becomes especially important with small tiles where grout makes up a large portion of the scanning path.
If you receive a questionable reading near a grout line:
- Move slightly onto the adjacent tile.
- Scan again.
- Repeat from the other direction.
- Compare the results.
A reading that appears only on one specific grout joint deserves more investigation.
Can You Use Metal Scan to Find Studs Behind Tile?
Metal Scan can sometimes provide valuable additional information.
Tile substrates such as drywall or cement board are usually attached to framing with screws or nails.
A metal scanner may detect those fasteners.
If you find several small metal signals aligned vertically, they may trace the framing member behind the wall.
A useful approach is:
- Switch to Metal Scan.
- Locate one small metal target.
- Move higher and lower.
- Look for additional aligned targets.
- Compare that line with your Stud Scan results.
However, one metal signal does not prove there is a stud.
The tool may instead be detecting:
- Pipe
- Conduit
- Nail plate
- Metal framing
- Other hardware
Pattern and context matter.
Can a Magnetic Stud Finder Work Through Tile?
Sometimes.
A strong magnet may detect ferrous fasteners beneath the tile if they are close enough to the surface.
The magnet may locate:
- Steel screws
- Nails
- Steel framing
But tile, mortar, and backer board can place those targets too far away for a small magnet to respond strongly.
A magnet can also respond to unrelated metal objects.
Therefore, one magnetic hit should not be treated as proof of stud location.
A vertical line of repeated fastener detections is much more useful.
Why Does My Stud Finder Give False Readings on Tile?
Several conditions can cause unstable readings.
Grout Lines
Frequent material transitions can confuse some sensors.
Small Tiles
Mosaics create many surface changes.
Cement Board
Adds density and depth.
Thick Mortar
Pushes framing farther from the sensor.
Metal Fasteners
Can create localized readings.
Plumbing
Especially common in bathroom and shower walls.
Metal Framing
May behave differently from wood framing.
Incorrect Mode
Normal Stud Scan may not be deep enough.
Uneven Surface
Can prevent full sensor contact.
If the indicated stud moves significantly every time you repeat the scan, do not drill based on the first mark.
Why Does My Stud Finder Find Nothing Through Tile?
A complete lack of useful readings does not necessarily mean there are no studs.
Possible explanations include:
- Framing is too deep
- Wall has several layers
- Basic finder lacks sufficient depth
- Tile surface interferes with calibration
- Finder is not designed for tile
- Wrong scan mode is selected
- Battery is weak
- Sensor contact is poor
Try:
- Confirming the finder works on an ordinary drywall wall.
- Rechecking its battery.
- Moving to another tile.
- Avoiding grout lines.
- Switching to Deep Scan.
- Repeating at another height.
If the results remain unreliable, use a more appropriate scanning method rather than guessing.
Can a Stud Finder Detect Metal Studs Behind Tile?
Potentially.
Many electronic finders are designed to locate both wood and metal framing.
Metal Scan can also help confirm that a suspected framing member is metallic.
But metal behind tile can represent many things.
Possible targets include:
- Metal stud
- Copper pipe
- Steel pipe
- Electrical conduit
- Protective plate
- Screw
A metal response alone is not enough to identify the object.
Follow the signal vertically and compare it with the surrounding framing pattern.
Can a Stud Finder Detect Pipes Behind Tile?
Some multi-mode scanners can detect metal plumbing.
This may include:
- Copper pipes
- Steel pipes
Plastic plumbing such as PEX or PVC is much harder for conventional metal scanning.
More advanced wall scanners may be able to detect a broader range of hidden materials.
This is particularly relevant in bathrooms because plumbing can run directly through the wall area where you may want to install:
- Grab bars
- Shelving
- Shower doors
- Accessories
Finding the stud should therefore be only one part of the investigation.
Can a Stud Finder Detect Electrical Wires Behind Tile?
Some stud finders include live-wire detection or AC warning features.
These can provide useful additional information, but they have limitations.
Wire detection can be affected by:
- Depth
- Shielding
- Wall construction
- Nearby metal
- Wire orientation
- Whether the circuit is energized
A wall may contain electrical wiring even when the finder gives no live-wire warning.
Do not interpret the absence of a warning as proof that the area is safe to drill.
Stud Finder vs. Wall Scanner for Tile
| Tool Type | Tile Performance | Best Use |
| Basic stud finder | Variable | Simple, thin tile walls |
| Deep-scan finder | Better | Thicker assemblies |
| Multi-sensor finder | Often better | Large tile and layered walls |
| Metal scanner | Useful | Finding fasteners and metal |
| Advanced wall scanner | Most versatile | Complex tiled walls |
If your only task is finding framing through a simple tiled wall, a good stud finder may be enough.
If you also need information about plumbing, metal, cables, or deeper hidden objects, a more advanced wall scanner can be more useful.
How to Confirm a Stud Behind Tile
Confirmation is especially important because drilling the wrong hole in finished tile can be difficult to repair.
Scan From Both Directions
Compare left-to-right and right-to-left results.
Scan at Several Heights
A stud should generally follow a vertical path.
Locate Neighboring Studs
A repeating framing pattern provides supporting evidence.
Use Metal Scan
Aligned fasteners may help trace the stud.
Scan From the Other Side of the Wall
This can be one of the best methods when the opposite wall is accessible.
Use a More Advanced Scanner
When several basic methods disagree, better sensing technology may be preferable to guessing.
Can You Find the Stud From the Other Side of a Tiled Wall?
Sometimes this is the easiest solution.
Imagine a tiled shower wall that shares a wall with a bedroom.
The shower side may contain:
- Tile
- Thinset
- Waterproofing
- Cement board
The bedroom side may contain only:
- Paint
- Drywall
Scanning from the bedroom side can therefore be much easier.
Once you locate the stud, carefully transfer the position to the tiled side.
Use fixed reference points such as:
- Wall corners
- Door openings
- Floor
- Ceiling
Account for differences in finish thickness.
Do not simply measure approximately and drill.
Is Stud Spacing Enough to Find Studs Behind Tile?
Stud spacing can help confirm a reading, but it should not be your only method.
Actual framing can change around:
- Doors
- Windows
- Corners
- Shower niches
- Plumbing
- Built-in fixtures
- Blocking
Bathrooms may also have additional blocking specifically installed for fixtures.
Therefore, do not locate one suspected stud and assume the next one must be at a particular measurement.
Verify each fastening location.
Finding Studs for a Shower Grab Bar
This deserves extra care because the mounting needs to support significant real-world forces.
If you are locating framing for a grab bar:
- Confirm each intended mounting point
- Scan from multiple directions
- Look for framing or installed blocking
- Use the mounting system specified for the wall construction
- Consider accessing or scanning the opposite side of the wall
- Avoid relying on one questionable detector reading
Some shower walls are intentionally built with blocking behind the tile, which may produce a wider solid area rather than a narrow stud indication.
Because tile holes are difficult to relocate cleanly, invest more effort in confirmation before drilling.
Can a Stud Finder Scratch Tile?
The finder itself normally should not damage a smooth tile surface when used properly.
However, grit trapped between the scanner and tile can cause scratches.
Before scanning:
- Wipe the tile clean
- Check the finder base
- Remove dust or abrasive debris
- Avoid dragging a contaminated sensor across glossy surfaces
This is especially important with polished tile or natural stone.
Is It Safe to Drill After Finding a Stud Through Tile?
Finding a stud does not prove the full drill path is clear.
Bathroom and shower walls can contain:
- Water supply pipes
- Drain or vent plumbing
- Electrical wiring
- Metal conduit
- Protective plates
If your drill encounters unexplained metal, stop rather than forcing through it.
Protective steel plates may be intentionally installed over wiring or plumbing where those services pass through framing.
The safest approach is to combine stud location with an understanding of what other utilities may be inside that wall.
Common Mistakes When Using a Stud Finder Through Tile
Assuming Every Tile Wall Is the Same
The backing system can completely change scanner performance.
Using a Basic Finder Beyond Its Depth
A thick shower wall may require deeper detection.
Scanning Only Over Grout
Grout transitions can interfere with some readings.
Moving Too Fast
Slow scanning provides more repeatable results.
Trusting One Pass
Always rescan.
Ignoring Cement Board
Backer board adds meaningful thickness.
Treating Every Metal Signal as a Stud
It may be plumbing or conduit.
Assuming Standard Stud Spacing Is Proof
Framing arrangements vary.
Assuming No Wire Warning Means Safe
Wire-detection features have limitations.
Drilling Before Confirming the Result
A misplaced hole in tile is much harder to correct than a pencil mark on drywall.
Quick Tile Stud-Finding Comparison
| Wall Assembly | Expected Difficulty | Better Approach |
| Large tile over drywall | Moderate | Compatible stud finder |
| Large tile over cement board | Moderate to High | Deep or multi-sensor mode |
| Mosaic tile | High | Multiple scans or advanced finder |
| Thick layered shower wall | High | Advanced/deep wall scanner |
| Tile with unknown backing | High | Confirm with several methods |
| Accessible drywall opposite tile | Lower | Scan from opposite side |
Frequently Asked Questions
Will a Stud Finder Work Through Tile?
Yes, some stud finders can work through tile, particularly on relatively simple wall assemblies. Thick tile walls and multiple backing layers make detection more difficult.
Can a Regular Stud Finder Find Studs Through Tile?
Sometimes. A basic finder is more likely to work through thin tile over drywall than through a thick shower wall with cement board.
Does a Stud Finder Work Through Ceramic Tile?
It can. Tile size, thickness, backing material, and total scan depth all affect performance.
Will a Stud Finder Work Through Porcelain Tile?
Some models can, but dense porcelain combined with cement board and mortar can make detection more challenging.
Can a Stud Finder Work Through Shower Tile?
Yes, depending on the finder and wall construction. Shower walls often require deeper or multi-sensor scanning because they contain several layers.
Can a Stud Finder Detect Through Tile and Cement Board?
Some can, but cement board adds enough thickness that a normal stud mode may struggle. Deep Scan or a more capable finder may be necessary.
Will Deep Scan Work Through Tile?
Deep Scan can help when the stud is farther from the surface, but it does not eliminate false readings caused by grout, fasteners, or complex wall materials.
Do Grout Lines Affect a Stud Finder?
They can. Numerous grout joints, particularly on mosaic surfaces, can create inconsistent readings for some electronic finders.
Can You Use Metal Scan to Find Studs Behind Tile?
Yes, Metal Scan can sometimes locate screws or nails that attach wall material to the framing. A vertical line of fasteners can help confirm the stud position.
Can a Magnetic Stud Finder Work Through Tile?
Possibly, if steel fasteners are close enough to the surface. Thick tile and backer board can make magnetic detection more difficult.
Why Does My Stud Finder Give False Readings on Tile?
Grout lines, cement board, fasteners, plumbing, multiple wall layers, and incorrect scan settings can all create confusing results.
Can a Stud Finder Find Pipes Behind Tile?
Some multi-mode finders can detect metal pipes. Plastic plumbing usually requires more advanced scanning technology.
Can a Stud Finder Find Metal Studs Behind Tile?
Potentially, if the finder supports metal framing and the stud is within its detection range. Confirm that the signal is not a pipe, conduit, or other metal object.
How Do I Confirm a Stud Behind Tile?
Scan from both directions, check the same position at several heights, locate neighboring framing, use Metal Scan if available, and consider scanning from the opposite side of the wall.
Can I Find the Stud From the Other Side of the Wall?
Yes. If the opposite side is ordinary drywall, locating the stud there may be much easier than scanning through tile.
Is It Safe to Drill After Finding a Stud Behind Tile?
A stud reading alone does not prove the drill path is clear of plumbing or electrical wiring. Confirm the location and consider other hidden utilities before drilling.
Conclusion
If you’re asking “will a stud finder work through tile,” the answer is yes with some models, but tile size, grout joints, backing material, total wall thickness, and finder technology can significantly affect the reliability of the reading.
Large, relatively uniform tile over a simple wall assembly gives a suitable stud finder a better chance of locating framing. Small mosaic tiles, cement board, thick mortar, waterproofing layers, and deeper wall assemblies make the task more difficult.
Deep Scan can help when the stud is farther behind the finished surface, while multi-sensor finders may provide more consistent information over layered walls. Metal Scan can also help by locating fasteners that follow the framing line.
When the opposite side of the tiled wall is accessible and finished with ordinary drywall, scanning from that side may be much easier.
Most importantly, confirm the suspected stud from several directions before drilling. Bathrooms and showers commonly contain plumbing and sometimes electrical wiring, so a positive stud reading does not mean the entire drill path is automatically clear.
A suitable stud finder may work through tile, but for thick shower walls, cement board, mosaics, or uncertain construction, use deeper scanning and multiple confirmation methods rather than trusting a single reading.