How Much Does a Stud Finder Cost? A Complete Price Guide
If you are planning to hang a TV, mount a shelf, install cabinets, or secure a large mirror, a stud finder can make the job much easier. The price can vary a lot, though. A simple magnetic tool may cost only a few dollars, while a wall scanner with several detection modes can cost well over $50.
So, how much does a stud finder cost for a typical homeowner? In the US, the right budget depends on the wall type, the job, and the features you need. You do not always need the most expensive tool. The key is to match the scanner to the task.
How Much Does a Stud Finder Cost by Type?
The easiest way to understand stud finder prices is to group them by type. Each type uses a different method to locate studs or objects behind a wall. That affects both the price and what the tool can do.
When asking how much does a stud finder cost, think about the tool as part of a price range rather than one fixed number. A simple magnetic finder and a multi-mode electronic wall scanner serve different needs.

- ✦ Magnetic stud finders
These are often the least expensive. Many cost around $5 to $15. They use a magnet to locate metal fasteners in or near a wall stud.
- ✦ Basic electronic stud finders
These commonly cost about $10 to $25. They can sense changes in wall density and are made for common home projects.
- ✦ Mid-range electronic models
These often cost about $25 to $50. They may offer wider scanning, better controls, deeper detection, or more than one detection mode.
- ✦ Advanced wall scanners
These can cost about $50 to $100 or more. They may detect studs, metal, and electrical wiring and can offer deeper or wider scans.
Why prices vary so much
The main difference is sensor technology. A simple tool has fewer parts and fewer detection modes. A more advanced scanner may use several sensors and software to read changes behind the wall.
Build quality also matters. A tool made for frequent job-site use may cost more than one made for a few projects each year.
- ✦ Simple job
A low-cost model may be enough for finding common wood studs before hanging a small shelf.
- ✦ Complex wall
A multi-mode scanner can be useful when you need to check for studs, metal, or possible electrical hazards.
What Is the Typical Stud Finder Price Range?
For many US shoppers, a budget of $15 to $40 covers a large part of the consumer market. This range can include basic electronic models and some better-equipped scanners.
If you only need to find studs once or twice, you may not need to spend much. If you do DIY work often, a stronger tool with more detection modes can save time and reduce guesswork.

- ✦ Under $10
You may find simple magnetic tools and very basic options in this range. They can work for simple tasks but may offer few features.
- ✦ $10 to $25
This is a common budget range for basic electronic stud finders. It suits many light home projects.
- ✦ $25 to $50
This range can provide a useful mix of price and features. You may find better displays, deeper scanning, and extra detection modes.
- ✦ $50 to $100
These models often target more demanding DIY work or frequent use. They may offer broader scans and more advanced detection.
- ✦ Over $100
Higher-priced wall scanners can include advanced sensing systems and features aimed at professional or specialized work.
Is a $10 stud finder enough?
It can be. If your goal is to locate common wall studs for a small project, a low-cost tool may do the job. Still, low price does not guarantee easy or accurate use.
Read the instructions and test the tool on a known area first. Good technique matters as much as the price tag.
- ✦ Good fit
Choose a low-cost model when the project is simple and you do not need advanced detection.
- ✦ Think twice
Consider a more capable scanner when the wall is thick, the project is costly, or you need to check for more than studs.
What Makes an Electronic Stud Finder More Expensive?
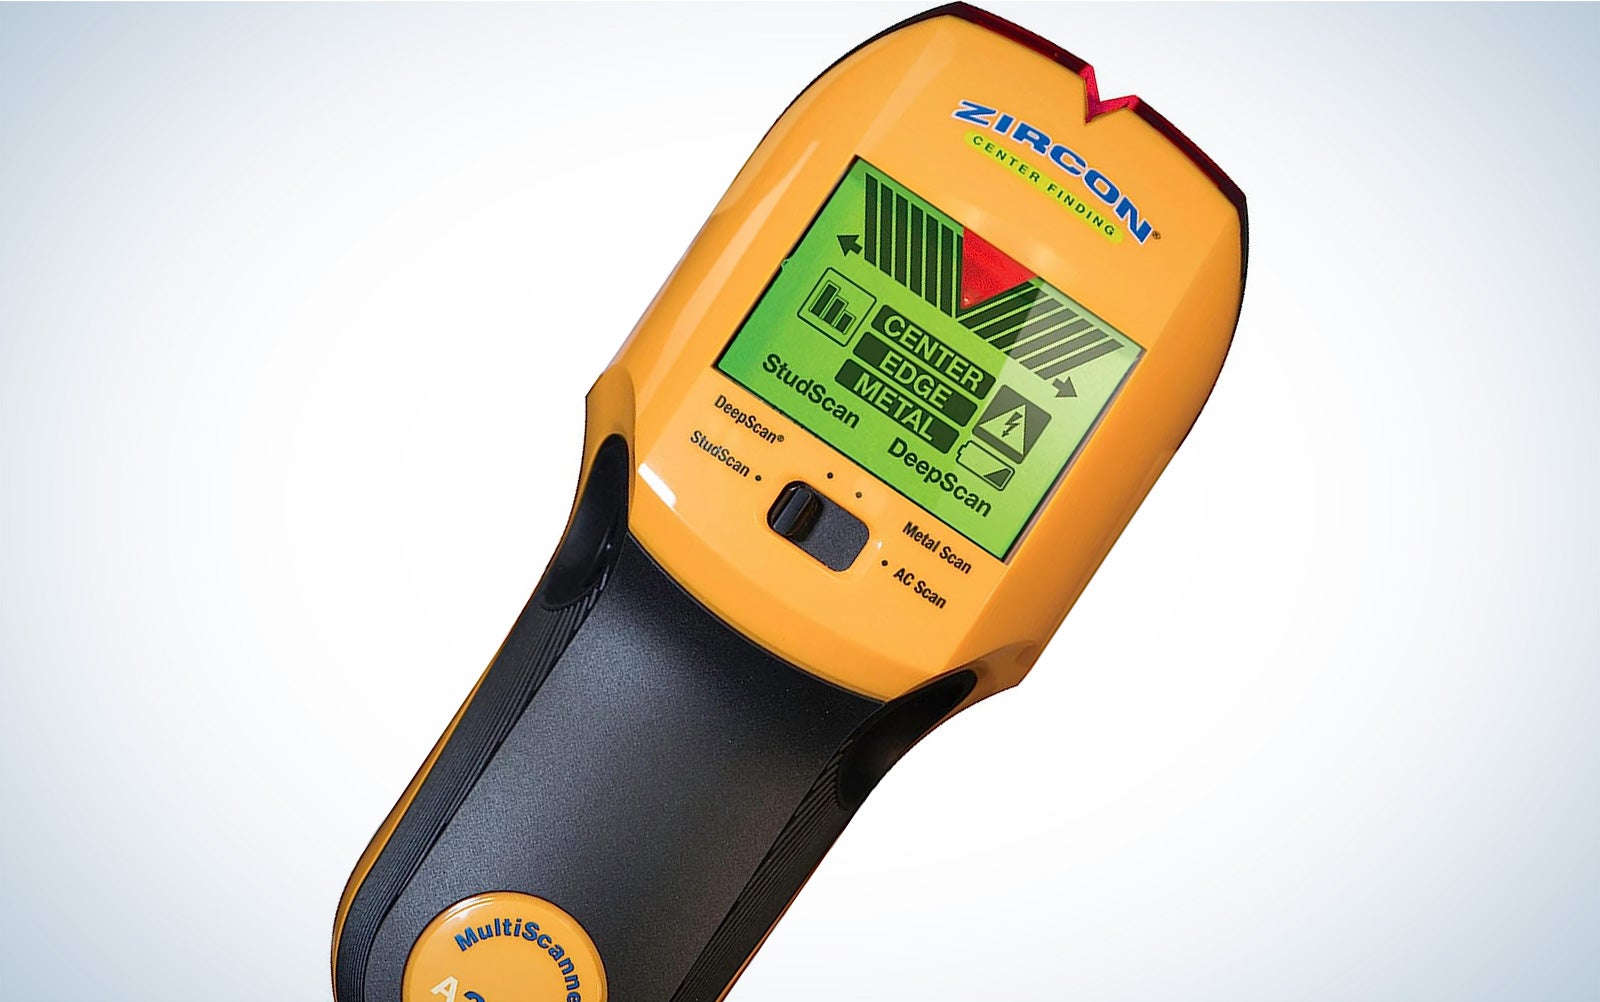
A higher price often comes from added functions. Some scanners can detect more than wood studs. They may also look for metal objects, electrical wiring, or changes deeper inside the wall.
A better display can also raise the price. Some models use lights, sound, bars, or digital screens to show what the sensor detects. These features can make scanning easier, but they are not needed for every job.
:max_bytes(150000):strip_icc()/bhg-product-mecurate-stud-finder-wall-scanner-amazon-hwortock-020-59373e5b3bb04713930ab758c823f0e7.jpg "Electronic wall scanner with multiple detection functions")
- ✦ Deep scanning
Some models are designed to detect objects farther behind the wall surface. This can help with thicker materials.
- ✦ Metal detection
A metal mode can help locate metal studs, pipes, or fasteners, depending on the tool and wall conditions.
- ✦ AC or live-wire detection
Some wall scanners include a mode that can warn about possible live electrical wiring. Treat this as a warning aid, not proof that a wall is safe to drill.
- ✦ Wide scanning
A wider sensor can help you scan more of the wall with each pass. This may speed up larger projects.
- ✦ Better display
A clear display can make it easier to see the center of a stud or follow the scanner’s signal.
Do more features mean better results?
Not always. Extra features can help, but they also add cost and can make a tool more complex. A simple scanner that you understand and use correctly may be more useful than an expensive tool that you rarely use.
Look for features that solve a real problem in your project. Do not pay more just because a model has a longer feature list.
- ✦ Useful feature
Choose a feature when it directly supports the type of wall or project you work with.
- ✦ Optional feature
Skip features that add cost but will rarely affect your work.
How Much Does a Stud Finder Cost for Common Home Projects?
Your project should guide your budget. You do not need the same tool to hang a small picture frame that you would use to mount a heavy TV or install cabinets.
Before you buy, think about the material you will scan, the weight of what you will mount, and whether you need to check for metal or electrical wiring. That simple check can help you avoid paying for features you will not use.

- ✦ Hanging pictures
A basic magnetic or electronic finder may be enough when the load is light and the wall is easy to scan.
- ✦ Installing shelves
A basic to mid-range electronic model can help locate studs and mark their center before you attach the shelf.
- ✦ Mounting a TV
A reliable electronic scanner can be useful because TV mounts can place a greater load on the wall. Check the wall structure and mounting instructions as well.
- ✦ Installing cabinets
A good stud finder can save time across a long wall. A wider scan or clear display may be worth the extra cost.
- ✦ Frequent DIY work
A durable mid-range or advanced scanner may offer better long-term value if you use it often.
A practical buying lesson
A useful rule is to buy for the wall and the job, not for the highest price. If you only need basic stud detection, a simple model can often meet that need.
For larger projects, the cost of the tool is small compared with the cost of repairing a damaged wall, misplaced mount, or failed installation. Spending a little more can make sense when the project has more risk or demands more information.
- ✦ Small project
Start with a basic model if you only need simple stud location.
- ✦ High-value project
Consider a better scanner when accurate layout and extra detection modes matter.
Are Expensive Stud Finders Worth the Money?
The answer depends on how often you use the tool and what you expect it to detect. A homeowner who hangs a few shelves each year may have little reason to buy a high-end scanner.
A contractor, remodeler, or active DIY user may get more value from a stronger model. In that case, speed, extra modes, a clear display, and durable construction can matter more than the lowest purchase price.
:strip_icc()/bhg-primary-stud-finders-hwortock-001-0177fc74890249c9b3fef96cda2b3b77.jpg "Stud finders compared for home improvement use")
- ✦ Pay more when you need more information
A more advanced scanner can make sense when you need stud, metal, and electrical detection in one tool.
- ✦ Pay more for frequent use
If you use a stud finder often, better controls and build quality may justify the added cost.
- ✦ Do not pay for unused features
Extra modes have little value if your projects only require basic stud detection.
- ✦ Check the tool before the project
Even an expensive stud finder needs proper calibration and correct use. Practice on a known area before you drill.
Value matters more than the sticker price
The best value is not always the cheapest model. A $20 tool that works well for your needs can be a better purchase than a $70 model filled with features you never use.
On the other hand, saving $20 on a tool can be a poor trade if the project requires deeper scanning or more detection options. Match the tool to the risk and cost of the work.
- ✦ Good value
The tool has the features you need, works with your wall type, and fits your budget.
- ✦ Poor value
The tool is either too limited for the job or includes costly features you do not need.
What Should You Look for When Buying a Stud Finder?
Price is only one part of the buying decision. A good stud finder should fit the wall, the project, and the way you plan to use it. Simple controls are also important because a tool is only useful when you can read and understand its signals.
Before deciding how much a stud finder costs, make a short list of the features you actually need. This helps keep the purchase focused and prevents you from paying for marketing features that do not add much value.

- ✦ Detection modes
Check whether the tool can detect wood studs, metal, electrical wiring, or other materials that matter to your project.
- ✦ Detection depth
Look at the stated detection depth and compare it with your wall material. Real results can vary with wall conditions.
- ✦ Calibration
A tool that is easy to calibrate can be simpler to use and may reduce false readings.
- ✦ Display and alerts
Lights, sound, or a screen can show when the tool approaches and reaches a stud.
- ✦ Size and grip
A comfortable tool is easier to move in a straight line and use for longer projects.
- ✦ Battery needs
Check which batteries the tool uses and whether the package includes them.
- ✦ Wall compatibility
Read the instructions for drywall, plaster, tile, wood paneling, or other surfaces before buying.
How to avoid common buying mistakes
Do not assume that every stud finder works equally well on every wall. Thick plaster, uneven surfaces, foil-backed materials, moisture, and other objects behind the wall can affect readings.
Also avoid treating a stud finder as a complete safety device. If you plan to drill or cut, use the scanner as one part of a careful check and follow safe electrical and construction practices.
- ✦ Read the manual
The manual explains the correct scanning method and the surfaces the tool supports.
- ✦ Scan more than once
Repeat the scan and confirm the location before making a hole.
- ✦ Mark the center
Use the tool’s center indication when available rather than assuming the first signal marks the stud center.
How to Get the Most Value From a Stud Finder
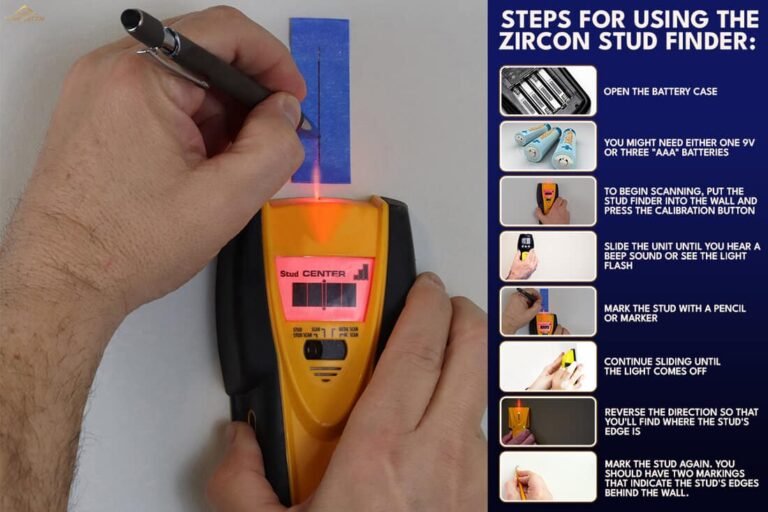
Once you buy a stud finder, correct use matters. Start by reading the instructions and learning how the tool signals a stud. Then test it on an area where you have a good idea of what is behind the wall.
Move the tool slowly and keep it in contact with the wall when the instructions call for that method. If a reading seems unclear, scan the area again from another direction and compare the results.
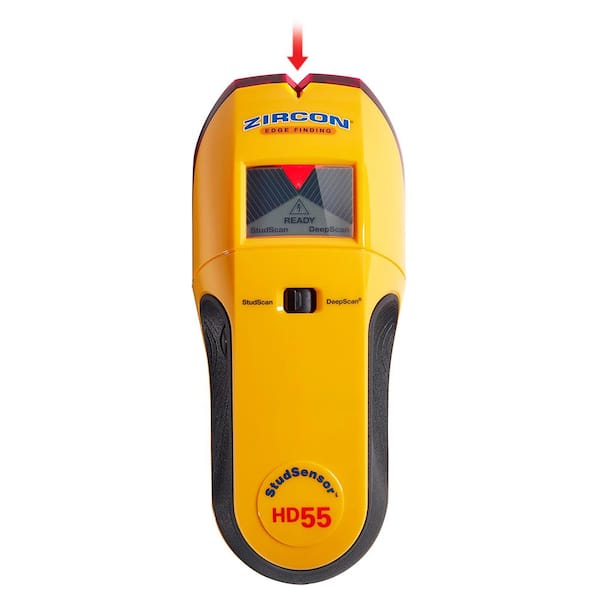
- ✦ Calibrate correctly
Use the recommended calibration process before scanning. Some tools need calibration away from a stud, while others use a different method.
- ✦ Move slowly
A slow, steady pass can make changes in the sensor reading easier to notice.
- ✦ Confirm the location
Scan back and forth to find the edges and center of the stud when the tool supports that method.
- ✦ Check for hazards
Use any available metal or electrical detection modes, but do not rely on a stud finder alone to prove an area is safe.
- ✦ Keep batteries fresh
Replace weak batteries when the tool behaves poorly or the manufacturer recommends replacement.
Why technique can matter more than price
A costly scanner cannot remove every source of error. Wall construction, hidden objects, surface texture, and user technique can all affect a reading.
That is why a careful scan with a modestly priced tool can be more useful than a rushed scan with a premium model. Take your time, confirm the result, and follow the manufacturer’s instructions.
- ✦ Use the right mode
Choose the detection mode that matches the material or object you are trying to locate.
- ✦ Confirm before drilling
Do not make a hole based on one uncertain reading. Recheck the area first.