How to Find Wall Stud: 7 Easy Methods That Work
If you want to hang a shelf, TV, cabinet, mirror, or heavy picture, knowing how to find wall stud locations can make the job much safer. A stud gives a screw a firm hold. Drywall alone may not support a heavy load.
The good news is that you do not always need a special tool. A stud finder is easy to use, but simple clues can help when you do not have one. In practice, the best results often come from using two methods and checking that they agree.
What Is a Wall Stud?
A wall stud is a vertical framing member inside a wall. In many U.S. homes, studs are made from wood. Some newer buildings use metal studs instead.
Studs support drywall and help form the wall frame. They also give you a solid place to drive screws for many wall-mounted items. The stud itself is hidden behind drywall, so you need clues or a tool to locate it.
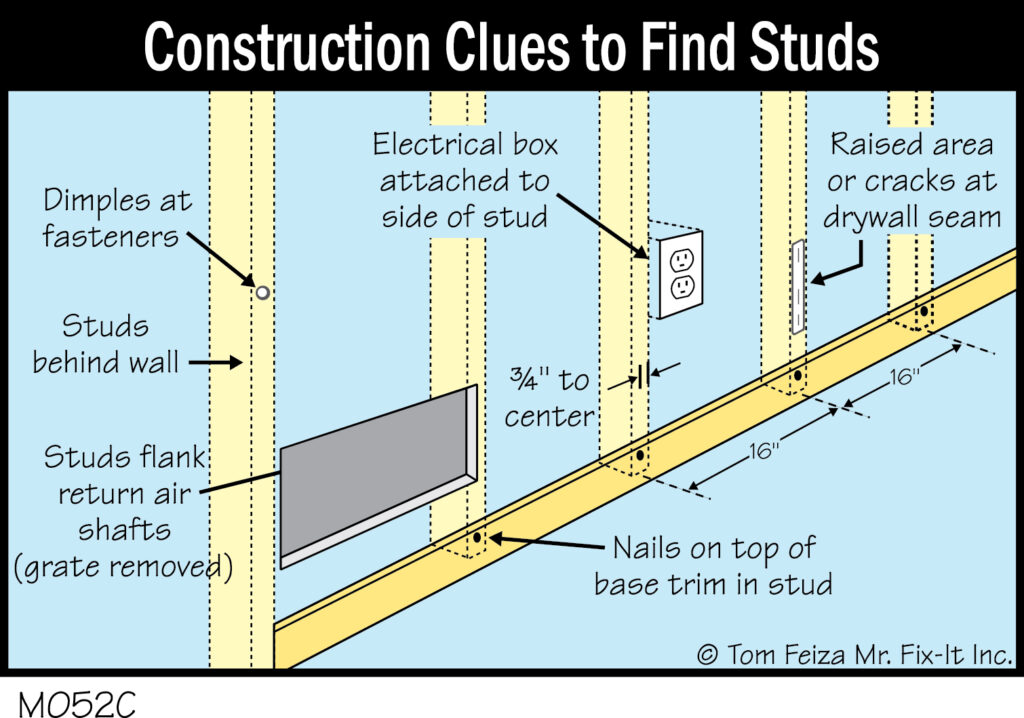
Stud spacing is often measured from the center of one stud to the center of the next. Sixteen inches on center is common in wood framing, but you may also find studs at 24-inch centers or in layouts that differ around doors, windows, corners, and other openings.
- ✦ Wood studs
Wood studs are common in houses with traditional wood framing. A screw driven into the center of a wood stud can provide a strong anchor.
- ✦ Metal studs
Metal studs are common in some apartments, offices, and commercial buildings. They can feel different when you drill and may need different anchors or screws.
- ✦ Why studs matter
A stud gives a fastener more material to grip than drywall alone. This matters most for heavy or safety-sensitive wall mounts.
How to Find Wall Stud With a Stud Finder
A stud finder is usually the simplest answer when learning how to find wall stud locations. Most electronic models detect changes in wall density. Some models also detect metal or live AC wiring.
Start by reading the tool instructions. Different models work in different ways. Some need calibration against the wall, while others can start scanning right away.
Place the finder flat against the wall and move it slowly from side to side. Mark the point where the tool indicates the stud. Then scan again from the other direction to help find the stud’s center.
- ✦ Calibrate first
If your model requires calibration, follow its instructions. Calibration on the wrong surface can lead to false readings.
- ✦ Move slowly
Slow, steady movement gives the sensor more time to detect a change behind the wall.
- ✦ Find the center
A stud finder may alert at both edges of a stud. Mark both points and use the middle as the likely center.
- ✦ Scan twice
Run the tool across the area again. A repeat reading in the same place gives you more confidence before you drill.
Can a Stud Finder Be Wrong?
Yes. Thick drywall, plaster, tile, insulation, moisture, wall texture, and other materials can affect some electronic stud finders. A tool can also detect something other than the stud you want.
For important mounts, treat the finder as a guide rather than proof. Confirm the location with another clue, such as an outlet, known stud spacing, a small test hole, or a magnetic reading.
- ✦ Use a second check
If the item is heavy, verify the location with another method before drilling a full-size hole.
How to Find Wall Stud Without a Stud Finder
You can still learn how to find wall stud locations without an electronic tool. Several simple methods use clues that already exist in most rooms.
The key is not to trust one clue too much. A nail, screw, outlet, sound change, or measurement can point you toward a stud, but walls are not always built in a perfect pattern.

- ✦ Use a strong magnet
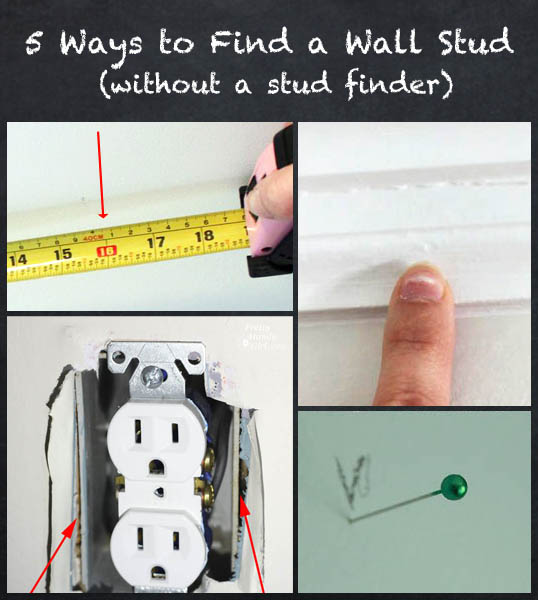
Move a strong magnet slowly across the wall. It may stick where it finds a drywall screw or nail. Follow a line of fasteners to trace the stud.
- ✦ Tap the wall
Tap lightly across the wall with your knuckle. A studded area often sounds more solid, while open drywall can sound hollow. This method takes practice and is not exact.
- ✦ Look for fasteners
In unfinished areas, exposed drywall edges, trim gaps, or damaged spots, visible nails and screws can reveal stud locations.
- ✦ Check outlets
Electrical boxes are often attached to a stud or framed opening. If an outlet box is securely mounted to one side of a stud, that can provide a useful starting point.
- ✦ Measure from a known point
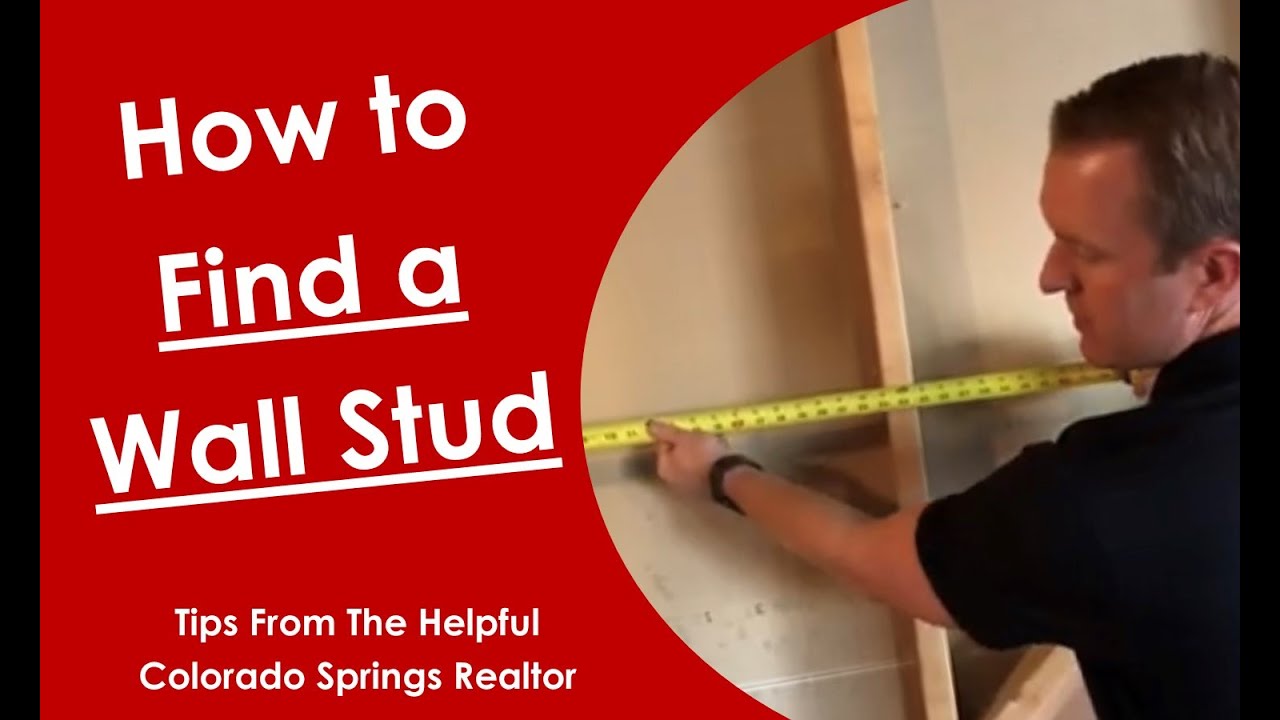
Once you confirm one stud, measure from its center to locate possible nearby studs. Sixteen inches on center is common, but verify the pattern instead of assuming it.
How to Find a Stud With a Magnet
A magnet can be one of the easiest low-cost ways to find a stud behind drywall. Drywall screws are made from steel, so a strong magnet can often detect their heads through a thin layer of joint compound and paint.
Move the magnet slowly in a horizontal or vertical path. When it pulls toward a fastener, mark the spot. Find several fasteners in a straight vertical line, and you can often map the stud behind them.
- ✦ Use several points
One magnetic spot may be a stray metal object. Several points lined up vertically are a stronger clue.
How to Find a Stud by Tapping
Tapping is quick and costs nothing. Tap gently across the wall and listen for changes in sound. A more solid sound may suggest framing behind the drywall.
Do not use tapping alone for a heavy mount. Sound can change because of insulation, pipes, wiring, wall construction, or other materials.
How to Find Wall Studs Using Outlets, Switches, and Corners
Existing wall features can help you narrow down a stud location. Electrical outlets and switches are often installed beside or attached to framing. A door or window opening also has framing around it.
Look at the outlet or switch plate and note where the electrical box sits. Do not remove the cover or touch wiring just to locate a stud. You can often use the visible box position as a clue from the outside.
Corners can also help. Framing usually exists where walls meet, though the exact layout depends on how the corner was built. From a confirmed stud, measure outward and check the expected spacing.

- ✦ Outlets
An outlet box can give you a useful clue about nearby framing. Do not assume every box has the same mounting arrangement.
- ✦ Switches
A switch box may also sit near framing. Use it as a clue, not as a guarantee of the stud center.
- ✦ Doors and windows
Wall openings require framing. Studs around an opening may not follow the normal 16-inch or 24-inch pattern.
- ✦ Corners
Corners usually contain framing members, but the visible corner does not tell you the exact center of every stud.
How Far Apart Are Wall Studs?
Knowing common stud spacing can make it easier to find wall studs. In many U.S. wood-framed homes, studs are installed 16 inches on center. Some walls use 24-inch spacing, while areas around doors, windows, corners, and special loads can have different spacing.
On center means the measurement runs from the center of one stud to the center of the next. It does not mean there is a full 16 inches of empty space between the edges of the studs.
If you confirm one stud, use a tape measure to test the likely next locations. If the pattern does not match, stop and check again rather than forcing the measurement to fit.

- ✦ 16 inches on center
This is a common spacing pattern in U.S. wood framing. It is a useful starting point, not a rule for every wall.
- ✦ 24 inches on center
Some walls use wider spacing. This can occur in certain framing designs and wall systems.
- ✦ Irregular areas
Framing around openings, corners, pipes, ducts, and structural features may not follow the normal spacing pattern.
Why You Should Not Assume Every Stud Is 16 Inches Apart
A common mistake is to find one stud and mark every 16 inches without checking. That can miss the target when the wall uses another spacing pattern or when framing changes around an opening.
Use the 16-inch pattern as a clue. Confirm at least one more location before relying on the pattern for a major project.
How to Confirm a Wall Stud Before Drilling
Finding a likely stud is only half the job. Before you drill, confirm that the mark makes sense for the type of wall and the item you plan to mount.
For a light picture, a small test may be enough. For a TV, cabinet, grab bar, shelf, or other heavy item, take extra care. You need to know both where the stud is and whether the fastener you plan to use is suitable.
A small drill bit can sometimes confirm wood behind drywall, but drilling itself carries risk. Electrical cables and plumbing can run inside walls. Never drill blindly when the area may contain hidden services.
:max_bytes(150000):strip_icc():format(webp)/find-a-stud-in-a-wall-182288-02a-aae36145598949d184d73248f4397979.jpg "7 Ways to Find Studs When You Don't Have a Stud Finder")
- ✦ Check the stud center
A screw near the edge of a stud has less material around it. Confirm the center as closely as you can.
- ✦ Check for utilities
Be alert for electrical wiring and plumbing. Use a detector with appropriate warning features when available, and follow safe drilling practices.
- ✦ Match the fastener to the load
The right screw or lag screw depends on the wall, stud material, mounting hardware, and weight of the item.
- ✦ Use multiple studs when needed
Large or heavy mounts may need more than one stud. Follow the mounting hardware instructions.
Where You Should Be Extra Careful
Use extra care near electrical outlets, switches, plumbing fixtures, radiators, and other utility paths. These areas can contain hidden wires or pipes.
If you are unsure about what is behind the wall, stop before drilling. A qualified professional can inspect the wall and help reduce the risk of damage.
- ✦ Wet areas
Walls near sinks, showers, toilets, and plumbing fixtures may contain water lines or drain pipes.
- ✦ Electrical areas
Walls around outlets, switches, and electrical equipment may contain energized wiring.
How to Find Wall Studs in Different Wall Types
The best method for how to find wall stud locations depends on the wall surface. Drywall is usually easy to scan, but plaster, tile, paneling, and other finishes can change how tools behave.
Older U.S. homes may have plaster over wood lath instead of modern drywall. The extra layers can make electronic detection less predictable. In these walls, a magnet, known framing point, or careful test may work better when used with caution.
Metal-stud walls also need special care. A magnetic tool may detect metal framing, but it can also react to metal screws and other objects. If you are unsure whether the wall uses metal or wood framing, identify the wall system before choosing the fastener.

- ✦ Drywall
Electronic stud finders and magnets often work well on drywall. Confirm the reading before drilling.
- ✦ Plaster
Thicker wall layers can make electronic tools less reliable. Use several clues instead of relying on one reading.
- ✦ Tile
Tile adds a hard surface and may make some stud finders less accurate. Avoid drilling until you have a clear plan for the wall and tile.
- ✦ Metal studs
Metal framing requires suitable fasteners and may not provide the same holding strength as a solid wood stud for every type of mount.
Common Mistakes When Finding Wall Studs
Learning how to find wall stud locations is simple, but small mistakes can lead to misplaced holes. The most common problem is treating a clue as proof.
Take a little extra time to confirm the location. A few seconds of checking can save you from a visible hole, a weak mount, or damage to something hidden inside the wall.
- ✦ Assuming 16-inch spacing
Sixteen inches on center is common, but it is not universal. Confirm the pattern before marking several locations.
- ✦ Trusting one stud finder reading
Tools can react to wall conditions and hidden objects. Scan again and confirm the result when the mount matters.
- ✦ Drilling at the edge
Finding the general stud area is not the same as finding its center. Mark both edges when possible and use the middle.
- ✦ Ignoring hidden utilities
A stud location does not guarantee that the drilling path is safe. Wires and pipes can run near framing.
- ✦ Using the wrong anchor
A wall anchor made for hollow drywall is not a substitute for a proper structural fastener when the load needs a stud.