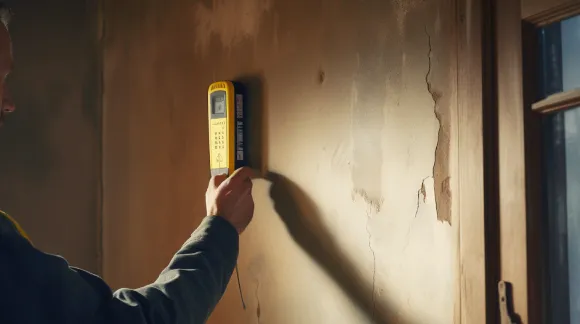
How to Find Horizontal Studs in Wall: Step-by-Step Instructions
To find horizontal studs in a wall, scan for changes in density with a stud finder, look for framing clues around doors and outlets, and confirm the suspected location with a tiny test hole or non-damaging probe. Horizontal framing members are often called blocking, nogging, plates, headers, or fire blocking, so they may not appear as consistently as vertical wall studs.
A wall can look perfectly flat while its framing varies behind the drywall. A faint seam, a line of fasteners, or a firm spot may suggest wood, but appearance alone cannot prove what is inside; a similar signal can come from a metal track, pipe, wire, patch, adhesive, or a change in drywall thickness. The main risk is not failing to find a horizontal member—it is drilling into a hidden utility or assuming that one signal reveals the full structure.
This guide separates useful evidence from false positives and explains how to search systematically. You will learn which horizontal members are likely in different parts of a wall, how to adjust a stud finder, where to scan first, how to verify a target safely, and when a professional should inspect the wall before you cut or drill.
What Counts as a Horizontal Stud?
“Horizontal stud” is common DIY language, but standard wall framing uses several more specific terms. A horizontal framing member may be installed between vertical studs to support drywall, block fire movement, reinforce a fixture, or frame an opening.
- Top and bottom plates: Horizontal boards at the top and bottom of a framed wall.
- Headers: Structural members above doors, windows, and other openings.
- Blocking: Short pieces installed between studs for support, fire blocking, cabinets, handrails, or other attachments.
- Nogging or bridging: Intermediate pieces that connect studs and help stiffen a wall.
- Furring channels and metal track: Horizontal or perimeter framing components used with some metal-stud, masonry, and ceiling systems.
These members do not form a continuous horizontal grid in every wall. A header may be easy to predict above a doorway, while blocking might occur only where a cabinet, grab bar, railing, or wall-mounted television was planned. Older homes, remodels, and walls built with nonstandard spacing can be especially difficult to map.
Why Horizontal Framing Is Harder to Detect
Most electronic stud finders are designed to locate the edges or center of vertical studs. A vertical stud creates a relatively narrow, repeated change in density, while a horizontal board may produce a wide signal that blends into nearby framing or causes the tool to beep along an extended area.
Drywall thickness, textured finishes, tile, paneling, wallpaper, insulation, and paint can also affect the reading. A deep horizontal board may be outside the tool’s effective range, while a shallow signal may be caused by a drywall seam or a metal fastener rather than wood.
Walls may also contain electrical cables, plumbing pipes, metal nail plates, conduit, and ductwork. A strong or unusual detector signal is not automatically evidence of a wooden support. Treat the signal as a location clue, not permission to drill.
Tools for Locating Horizontal Framing
A basic search needs only a few tools, but each has a different purpose. A stud finder helps identify density or metal changes; a tape measure helps compare positions; and a pencil lets you mark a pattern instead of relying on one beep.
- Electronic stud finder with deep-scan or metal-detection settings
- Strong magnet for locating drywall screws or nails
- Tape measure, level, pencil, and painter’s tape
- Bright flashlight held at a shallow angle
- Small drill bit or thin awl for cautious confirmation
- Noncontact voltage tester for an initial electrical check
- Inspection camera, if a small access hole is acceptable
A magnet is useful because drywall fasteners usually enter framing. However, a magnet will not identify the full width of a horizontal member, and some walls use adhesive, metal framing, or fasteners that do not respond strongly. Use it to find a line of fasteners, then combine that line with other evidence.
Step-by-Step Method for Finding Horizontal Studs
1. Identify the reason the member is likely to exist
Start with the wall’s layout rather than scanning randomly. A horizontal member is more likely above a door or window, below a window, behind a handrail, around a cabinet, near a wall-mounted fixture, or at a transition between different wall sections.
If the goal is to mount something heavy, first determine whether the wall needs a particular support location. A horizontal board may support one attachment point but not extend far enough for several screws. The framing plan matters as much as the first detected signal.
2. Inspect the wall surface
Turn off harsh overhead lighting and shine a flashlight across the wall at a shallow angle. Look for a subtle joint, a row of filled screw heads, a slight ridge, a paint change, or a repaired strip. These signs can indicate drywall edges or previous work, but they are not conclusive because finishing compound can hide or imitate them.
Check both sides of the wall if accessible. A receptacle, switch, vent, baseboard break, trim line, or cabinet on the opposite side may reveal the height of a framing member. Do not remove trim or electrical devices merely to search unless you understand the risks and can do so safely.
3. Locate the vertical studs first
Finding the vertical studs gives you a reference grid. Run the stud finder slowly across the wall, following the manufacturer’s calibration procedure, and mark both edges of each repeated signal. Confirm the approximate center rather than marking only the first beep.
Repeat the scan from a different direction or at a nearby height. Common framing spacing can help you form a hypothesis, but do not assume that every stud follows a standard interval. Corner framing, plumbing walls, partitions, and remodeled sections often disrupt regular spacing.
4. Scan vertically for a continuous horizontal signal
After marking the vertical studs, move the detector up and down at several points between them. Keep the tool flat against the wall and move slowly. A horizontal board may appear as a band that crosses several stud bays, while a fastener or isolated obstruction usually produces a small, inconsistent spot.
Try the tool’s normal, deep-scan, and metal modes separately. Recalibrate away from an existing stud, then scan toward the suspected area from above and below. A target that repeats at several adjacent stud bays is more credible than a single beep.
5. Use a magnet to trace drywall fasteners
Move a strong magnet in small horizontal and vertical passes. If it catches several fasteners in a straight row, mark the line with painter’s tape. A row may indicate a drywall edge or a framing member behind the panel, although the fasteners could also attach to a metal track.
Trace the line several inches to either side and compare it with the vertical-stud marks. A line that intersects known studs at a consistent height is more likely to reflect intentional framing. A single magnetic point is too little evidence to support drilling.
6. Compare readings and measure the pattern
Use a level to see whether the suspected member is truly horizontal. Check whether the signal continues across multiple bays, ends near an opening, or repeats at a matching height on another part of the wall. A header normally relates to the width of an opening, while blocking may stop at one or two stud bays.
Measure from fixed references such as the floor, ceiling, door trim, or window sill. Record the suspected height and the confidence level of the finding. This is especially helpful if the final installation will happen later or if several mounting points must line up.
7. Confirm with the least invasive method
Before making a hole, check the proposed location with a noncontact voltage tester and review the likely path of utilities. A voltage tester is only an additional precaution; it cannot reliably detect every energized wire, shielded cable, or plumbing line.
If confirmation is necessary, choose a location that will be hidden by the final hardware and make the smallest practical test hole. A thin awl may encounter drywall paper, a hollow cavity, wood, or metal, but resistance alone does not identify the material safely. Stop immediately if you meet unexpected resistance, metal, moisture, or a springy object.
An inspection camera can provide better information through a small opening, particularly when the wall is already being repaired. Do not enlarge a hole simply to investigate an uncertain signal. If the work involves a structural opening, plumbing wall, masonry surface, tile, or important finished area, professional inspection is usually the safer choice.
Where Horizontal Members Are Most Likely
Above doors and windows
A header is commonly located directly above a door or window opening. Its height depends on the framing design, wall height, and trim, so do not estimate from casing alone. The header may be deeper than ordinary blocking and may produce a broad detector response.
Below a window, a rough sill and additional framing may also create horizontal support. If the intended screw is close to the opening, map the vertical studs and the full perimeter rather than relying on a single horizontal reading.
Behind cabinets and wall-mounted fixtures
Builders often install blocking where cabinets, grab bars, shelves, sinks, handrails, and other fixtures will be attached. The member may be located at a practical installation height, but it can be absent in an unplanned area or in a wall that was later remodeled.
Existing hardware can provide useful clues. A row of sturdy fasteners or a fixture that has remained secure may point to framing, but its mounting method could also include anchors, adhesive, or a metal mounting rail.
Near the top, bottom, and transitions of the wall
Top and bottom plates are continuous parts of many wood-framed walls. They are usually close to the ceiling and floor, but trim, flooring, and the wall’s exact construction can hide their practical location.
Fire blocking may appear between floors, around chases, or at changes in wall geometry. It can be placed at different heights and may not align with visible architectural features. Do not cut into a suspected fire block merely to create a cable route without understanding the wall assembly and local requirements.
How to Tell Wood From a False Signal
A likely wood member usually produces a repeatable, broad signal that remains aligned as you scan across the wall. It often relates logically to known studs, an opening, a fixture, or a construction transition. Consistent resistance at a carefully selected test point can add confidence, but it is not proof of safe drilling.
A false or ambiguous signal may vanish when the detector is recalibrated, occur only at one small spot, or change dramatically with scan direction. Metal drywall corner bead, screws, conduit, pipes, dense plaster, foil-backed insulation, and patched areas can all confuse a detector.
- Mark the signal from both directions instead of trusting one pass.
- Compare the same height across several stud bays.
- Use normal and deep modes, but treat each as supporting evidence.
- Look for a logical relationship to openings, fixtures, and wall edges.
- Do not interpret a strong signal as confirmation that the target is wood.
Safety Before Drilling or Cutting
Never assume a horizontal board is clear of utilities. Wires may run horizontally through drilled holes in studs, and plumbing or ductwork can occupy the same wall cavity. Metal protection plates may signal a utility behind the drywall; do not drill through one or attempt to remove it.
Be especially cautious near outlets, switches, light fixtures, plumbing fixtures, radiators, vents, thermostats, and bathroom walls. Turn off the relevant circuit before creating even a small opening, verify the circuit status, and remember that shutting off one breaker does not address every possible source.
Stop and seek professional help if you find moisture, suspect mold, encounter unknown metal, hear water movement, detect a gas-related concern, or need to open a load-bearing wall. A licensed electrician, plumber, contractor, or qualified building professional can identify hazards that a consumer stud finder cannot distinguish.
FAQ: Finding Horizontal Studs in a Wall
Can a stud finder locate horizontal studs?
Some stud finders can detect horizontal framing, but none should be treated as definitive. A broad density change may indicate blocking or a header, while metal mode may detect fasteners or metal framing. Confirm repeated readings with layout clues and a cautious inspection method.
How do I find horizontal studs in wall drywall?
Scan for a repeated horizontal band, trace drywall fasteners with a magnet, and compare the result with nearby vertical studs. Check likely locations such as above openings and behind fixtures. Use a small confirmation hole only after considering hidden wires and pipes.
Are horizontal studs always installed between vertical studs?
No, horizontal framing is not present at every height or in every stud bay. Headers, plates, blocking, and fire blocks are installed for particular structural or functional reasons. An empty scan does not necessarily indicate a defective wall.
Will a magnet find a horizontal stud?
A magnet can find the metal fasteners that attach drywall to framing, but it cannot directly identify wood. Several fasteners in a straight line provide useful evidence. The same pattern can sometimes come from metal framing or a drywall seam, so combine the result with other checks.
How far above a door is the horizontal support?
The header is usually directly above the rough door opening, but its exact height varies. Door casing, drywall, shims, and the rough opening can make visual estimates inaccurate. Map the opening’s edges and scan above it rather than measuring from the finished trim alone.
Is a strong stud-finder signal safe to drill into?
No, a strong signal does not prove that the target is wood or that the area is free of utilities. It may indicate metal protection, conduit, a pipe, dense material, or another obstruction. Investigate cautiously and stop if the signal is unusual or the installation is important.
Conclusion: Confirm the Framing Before You Drill
Finding horizontal framing requires a pattern of evidence, not one beep or a visual guess. Start with likely locations, map the vertical studs, scan slowly across several bays, trace fasteners, and confirm the target with the least invasive method available.
The major limitation is that consumer tools cannot reliably distinguish every wood member from hidden metal, wiring, plumbing, or other materials. Mark the likely support, shut down relevant utilities, and have a professional inspect the wall when the signal is uncertain or the planned work involves a structural or high-risk area.