How to Find Studs Above Fireplace: A Practical Step-by-Step Guide
You can find studs above a fireplace by combining a stud finder with measurements from nearby walls, outlets, trim, or visible framing. Confirm each suspected location with a small test hole or finish-safe probing method before drilling for a mount, shelf, or mantel.
The area above a fireplace deserves extra caution because the wall may contain masonry, a fire-rated assembly, metal framing, electrical wiring, gas components, or a chimney chase. A stud finder can locate a change in density, but it cannot always distinguish a wood stud from other materials or warn you about every hidden hazard. This guide explains the useful signals, the limits of each detection method, and the safest way to verify a mounting point.
Suppose a television mount needs to sit several inches above the mantel, but the scanner shows inconsistent readings and one drill location feels unusually hard. Is that harmless plaster, a metal support, masonry, or a warning to stop? The steps below help you compare the wall layout, identify false positives, check for utilities, choose suitable hardware, and decide when a fireplace or building professional should take over.
Why Stud Location Above a Fireplace Can Be
Studs are usually spaced 16 inches on center, although 24-inch spacing and irregular framing are also common. That familiar pattern is helpful, but the wall above a fireplace may not follow the layout of an ordinary interior partition.
A fireplace can be surrounded by masonry, tile, stone veneer, brick, drywall, plaster, or a framed bump-out. The visible finish may conceal a chimney, metal firebox enclosure, gas line, electrical cable, ventilation space, or structural header. These materials can create readings that look like studs even when no suitable wood framing exists.
The target also matters. A light picture may need only a small nail and a hollow-wall anchor, while a television, mantel, or heavy shelf requires secure attachment to framing or masonry. Finding something solid is not enough; the material must be appropriate for the load and the fastener.
Tools to Gather Before Scanning
Use the least invasive tools first. A quality electronic stud finder is useful on drywall, but a magnetic finder, tape measure, flashlight, level, and pencil often provide equally important confirmation.
- Electronic stud finder: Choose a model with deep-scan or metal-detection modes when the wall finish is thick or layered.
- Magnetic stud finder: A strong magnet can locate drywall screws, which are commonly driven into studs. It detects fasteners, not the full width of the stud.
- Tape measure and level: These help project stud positions from known framing and keep the final installation aligned.
- Inspection light: Side lighting can reveal screw dimples, seams, trim nails, or slight changes in the finish.
- Small drill bit or finish nail: Use only after checking for utilities and only where a tiny confirmation hole is appropriate.
- Noncontact voltage tester: This may identify some energized wiring, but it is not a guarantee that the wall is safe to drill.
For a stone, brick, or concrete surface, a stud finder may be irrelevant. You may instead need a masonry bit, appropriate anchors, and confirmation that the surface is structurally suitable. Do not assume that a veneer is as strong as the substrate behind it.
Start With the Wall and Fireplace Layout
Inspect the wall before turning on a scanner. Look for electrical outlets, switches, cable plates, baseboard nails, door trim, ceiling trim, or exposed edges where framing can be inferred. Standard outlets and switches are often fastened to a stud on one side, though their position and orientation vary.
Measure horizontally from a verified reference point rather than guessing from the center of the fireplace. The firebox opening, mantel, and decorative surround may be centered on the room without being centered on the wall framing.
Check whether the wall projects outward from adjacent walls. A boxed-out fireplace often has its own short side walls, corners, and framing members. The center area may contain a header or specialized firebox construction instead of regularly spaced studs.
Also identify the finish. Drywall readings are generally easier to interpret than readings through tile, plaster, stone, or a thick mantel surround. If the surface is uneven, hold the scanner flat against the highest consistent area and expect less reliable results.
Use a Stud Finder Correctly
Read the instructions for the specific scanner, then calibrate it on the wall away from obvious trim, corners, metal objects, and the fireplace surround. Calibration over a stud or dense material can shift the baseline and produce misleading results.
- Place the scanner flat against the wall.
- Move it slowly in one horizontal direction.
- Mark the point where the signal begins and where it ends.
- Repeat the pass in the opposite direction.
- Mark the approximate center between the two edges.
- Scan above and below the intended mounting height to see whether the signal continues vertically.
A real wood stud commonly produces a consistent vertical band rather than one isolated beep. Scan at several heights because a header, blocking, nail plate, or pipe can create a short signal that does not represent a full-height stud.
If the scanner has separate stud, deep-scan, and metal modes, compare their results. A location that appears in stud mode but strongly triggers metal mode may contain a metal stud, protective nail plate, bracket, or other concealed component.
Do not slide the tool rapidly or tilt it over textured surfaces. Both actions can widen, narrow, or shift the apparent stud location. Mark lightly with removable painter’s tape if the finish is delicate.
Confirm the Reading With Independent Clues
One scanner reading should be treated as a lead, not proof. Confirmation is especially important above a fireplace because a false reading can result in damage to tile, a utility, or a fire-protection component.
Run a magnetic finder slowly across the suspected line. If it detects a series of drywall screws in a straight vertical pattern, the line probably follows a stud or another framing member. A single magnetic response may be only one isolated fastener.
Look for additional screw heads, joint-compound dimples, or nail patterns above and below the target. If the wall is painted, use a flashlight held at a shallow angle; side lighting can make small surface irregularities easier to see.
Project measurements from a confirmed stud at a nearby outlet or corner. For example, if a known stud is at one reference position, measure in likely 16-inch or 24-inch increments, then verify those positions with the scanner. This approach is more dependable than assuming the fireplace center marks a stud.
When a tiny test hole is acceptable, use a small bit just deep enough to pass through the finish. Stop immediately if you encounter unexpected resistance, metal, moisture, or a hollow space. A drill that suddenly meets hard metal is not an invitation to apply more pressure.
Recognize False Positives and Unusual Framing
Stud finders detect changes in density, moisture, and material composition. Their signal does not automatically identify a wood stud. Thick plaster, lath, tile adhesive, stone, corner bead, metal drywall framing, and wiring can all affect the result.
A continuous horizontal signal may indicate a header or blocking rather than a vertical stud. Above a fireplace, a header can be part of the opening or surround framing and may be useful for certain attachments, but its exact location and capacity should not be guessed.
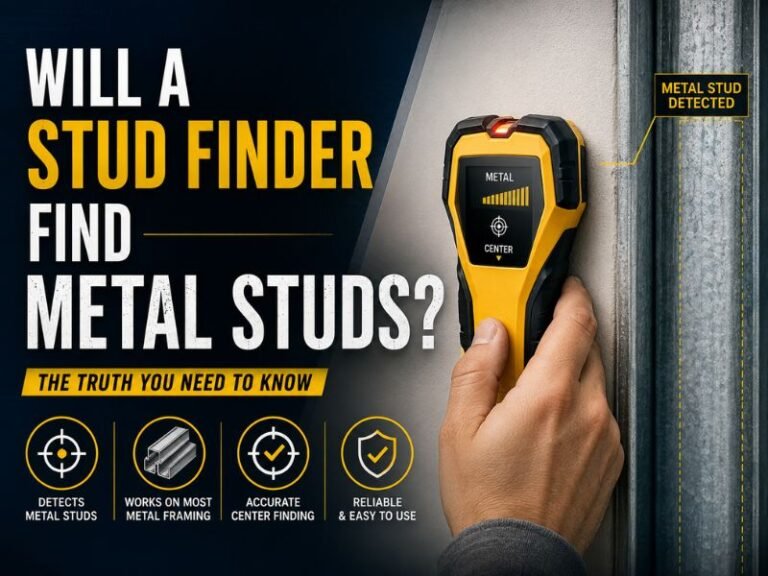
Metal studs are another possibility, especially in commercial buildings, apartments, manufactured construction, or remodeled walls. They may produce a broad metal response and feel different when probed. Metal-stud walls often require specialized toggles or reinforcement, and a heavy mount may need attachment to additional structural members.
Brick or concrete behind a thin finish can also produce a strong, uniform reading. In that case, wood-stud assumptions are unsafe. Determine whether the wall is structural masonry, a veneer, or a decorative layer before selecting a fastener.
Check for Wiring, Gas, and Heat-Related Hazards
Never rely on stud detection alone before drilling. Electrical cables may run vertically or horizontally through the wall, and protective metal plates may not cover every possible drilling location. A noncontact voltage tester can provide an additional warning, but it cannot detect every concealed cable or prove that an area is safe.
Do not drill where a wire, pipe, gas line, vent, or firebox component is reasonably suspected. Be particularly cautious near switches, outlets, thermostats, gas controls, fireplace controls, and the edges of the firebox. Turn off the relevant circuit before any permitted exploratory work, but remember that shutoff does not remove the risk of hitting a gas line or damaging a vent.
Gas fireplaces and wood-burning fireplaces have different construction details, yet both can include components that must remain undisturbed. The area above the firebox may also have temperature limitations that affect televisions, electronics, wood, adhesives, and mounting hardware.
Consult the fireplace, insert, or stove documentation for clearances and allowable materials. If the fireplace is active, recently operated, improperly vented, or unfamiliar to you, have a qualified fireplace or building professional inspect the proposed mounting area.
Choose the Right Attachment for the Wall
Once the framing is confirmed, select hardware based on the actual material and load. A wood stud can accept an appropriately sized lag screw or structural screw, but the screw must enter solid framing rather than merely the drywall or decorative facing.
For a heavy television mount, attach to two studs when the mount design allows it. Follow the mount manufacturer’s fastener, spacing, and load instructions, and account for the combined weight of the display, bracket, soundbar, and any accessories.
A mantel or shelf can impose both downward and outward forces. Those forces are different from the load of a flat picture, so ordinary drywall anchors may be unsuitable even when they feel tight during installation.
For masonry, use fasteners rated for the specific substrate and load. For tile or stone, drill carefully through the finish with the correct bit and avoid cracking the facing. The underlying wall must still support the attachment; a strong anchor in a weak veneer is not a secure installation.
If there is no suitable stud at the desired location, consider a different mount position, a properly designed backing plate, or professional installation. Do not substitute several small drywall anchors for structural support when the object is heavy or could injure someone if it falls.
A Safe Verification Checklist
Before making the final hole, review the complete installation path rather than focusing only on the marked stud center.
- Confirm the wall material and whether the surface is drywall, plaster, tile, stone, brick, or concrete.
- Mark both edges of the suspected framing member, not just a single scanner line.
- Verify the position with a second method, such as magnetic screw detection or measured framing clues.
- Check both sides of the wall when accessible for outlets, plumbing, gas equipment, or unusual fixtures.
- Review fireplace clearances and the mounting hardware’s load requirements.
- Use a short, appropriate fastener and control drilling depth.
- Stop if the bit meets metal, unusual resistance, moisture, or a void where solid framing was expected.
For a television or shelf, dry-fit the bracket and check that the holes land where intended before drilling all attachment points. A level can reveal whether the fireplace surround is visually centered but slightly out of square.
When to Stop and Call a Professional
Professional help is the prudent choice when the wall contains an active gas fireplace, a concealed chimney, unknown wiring, structural masonry, metal framing, or a complex stone surround. It is also appropriate when a mount must carry substantial weight and the framing cannot be confirmed confidently.
Stop work if you smell gas, see damaged wiring, find scorch marks, encounter a pipe or metal plate, or notice heat damage around the proposed location. Leave the area as needed and contact the relevant qualified professional rather than probing farther.
A fireplace technician can assess appliance clearances and venting concerns, while an electrician can evaluate concealed wiring. A qualified contractor or structural professional may be needed for unusual framing, heavy mantels, or modifications to a chimney chase.
FAQ About Finding Studs Above a Fireplace
Can a stud finder reliably locate studs above a fireplace?
It can help, but it is not conclusive by itself. Fireplace walls often contain tile, masonry, plaster, metal, headers, or other dense materials that confuse electronic sensors. Confirm a suspected stud with magnetic fastener detection, measured framing clues, and cautious verification before drilling.
How far apart are studs above a fireplace?
Many walls use 16-inch spacing, but no spacing should be assumed. Some walls use 24-inch spacing, while fireplace bump-outs may have irregular framing, doubled members, headers, or blocking. Measure from a verified stud or corner and confirm every proposed attachment point.
How can I find studs above a fireplace without drilling?
Scan for drywall screws with a magnet and use visible framing clues. Outlets, switches, trim fasteners, seams, corners, and repeated measurements can indicate stud locations. These methods are useful, but thick finishes and masonry can conceal or distort the evidence.
Why does my stud finder show a wide area above
A wide reading may indicate dense finish, a header, metal, masonry, or calibration trouble. Recalibrate on a clear section of wall and scan in both directions at several heights. If the signal does not form a consistent vertical band, do not treat it as a normal wood stud without further investigation.
Can I mount a TV to one stud above
Only if the mount and confirmed framing are designed for that arrangement. Many heavy mounts are intended to spread the load across two studs or a suitable structural backing. The heat above the fireplace, wall material, fastener length, and manufacturer’s installation requirements must also be checked.
Is it safe to drill above a gas fireplace?
It may be safe in some locations, but stud detection cannot establish that safety. Gas lines, vents, electrical wiring, and firebox components may be concealed. Follow the appliance documentation and obtain a qualified inspection when the construction or utility paths are unknown.
Make the Final Mounting Point a Verified One
The most dependable way to find studs above a fireplace is to combine scanner results with wall measurements, magnetic fastener patterns, visible clues, and cautious confirmation. Treat irregular readings, hard metal, masonry, and unknown fireplace construction as reasons to stop rather than obstacles to force through.
Confirm the wall material, utility risks, fireplace clearances, and hardware capacity before drilling. If any of those factors remain uncertain, the safest next step is an inspection by a qualified fireplace technician, electrician, or contractor.