How to Find Studs Behind Plywood: Easy Methods That Work
Knowing how to find studs behind plywood matters when you need to hang a shelf, cabinet, TV, grab bar, or other heavy item. Plywood can hide the usual clues that make stud hunting easy on drywall. The good news is that plywood is still a wood panel, so several simple methods can help you trace the framing behind it.
The key is to use more than one clue. A stud finder may detect the change in density behind the panel. A strong magnet can find screws or nails. Wall measurements can then help you predict the next stud. When the job matters, confirm the location before you make the final hole.
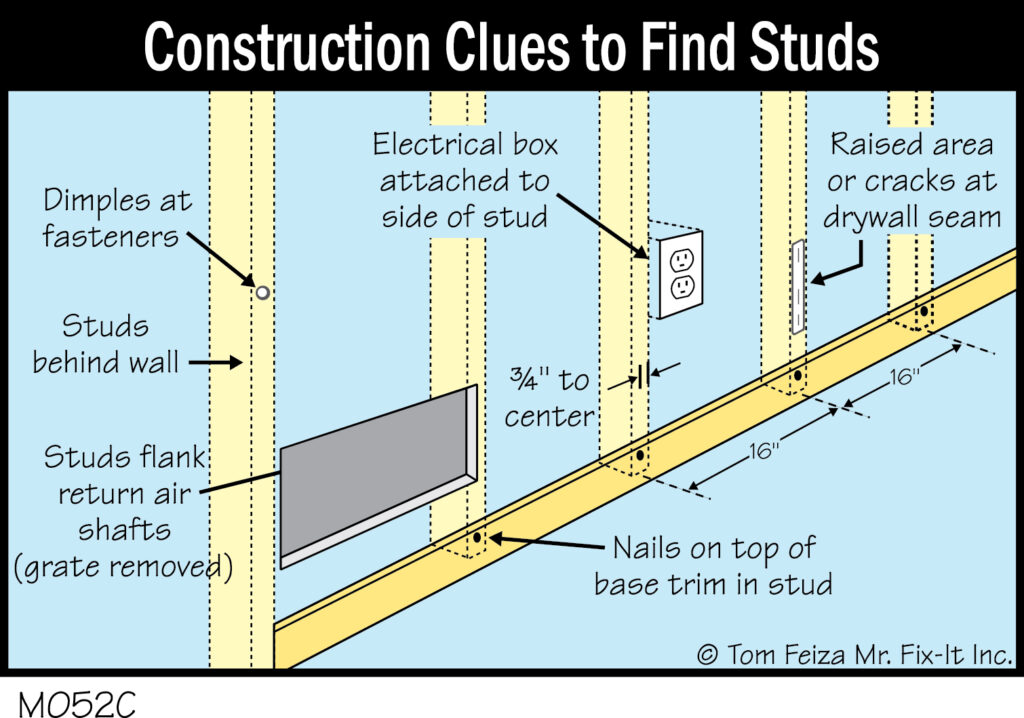
Why Finding Studs Behind Plywood Can Be Tricky
Plywood can make stud hunting harder because the panel covers the face of the wall. You cannot always see nail heads, drywall seams, or other framing clues. Thick plywood can also make some electronic stud finders less effective.
The wall may also have more than one layer. For example, plywood may sit over drywall, furring strips, or another panel. In that case, the fastener path can differ from the main wall framing. This is why learning how to find studs behind plywood starts with knowing what may be behind the panel.
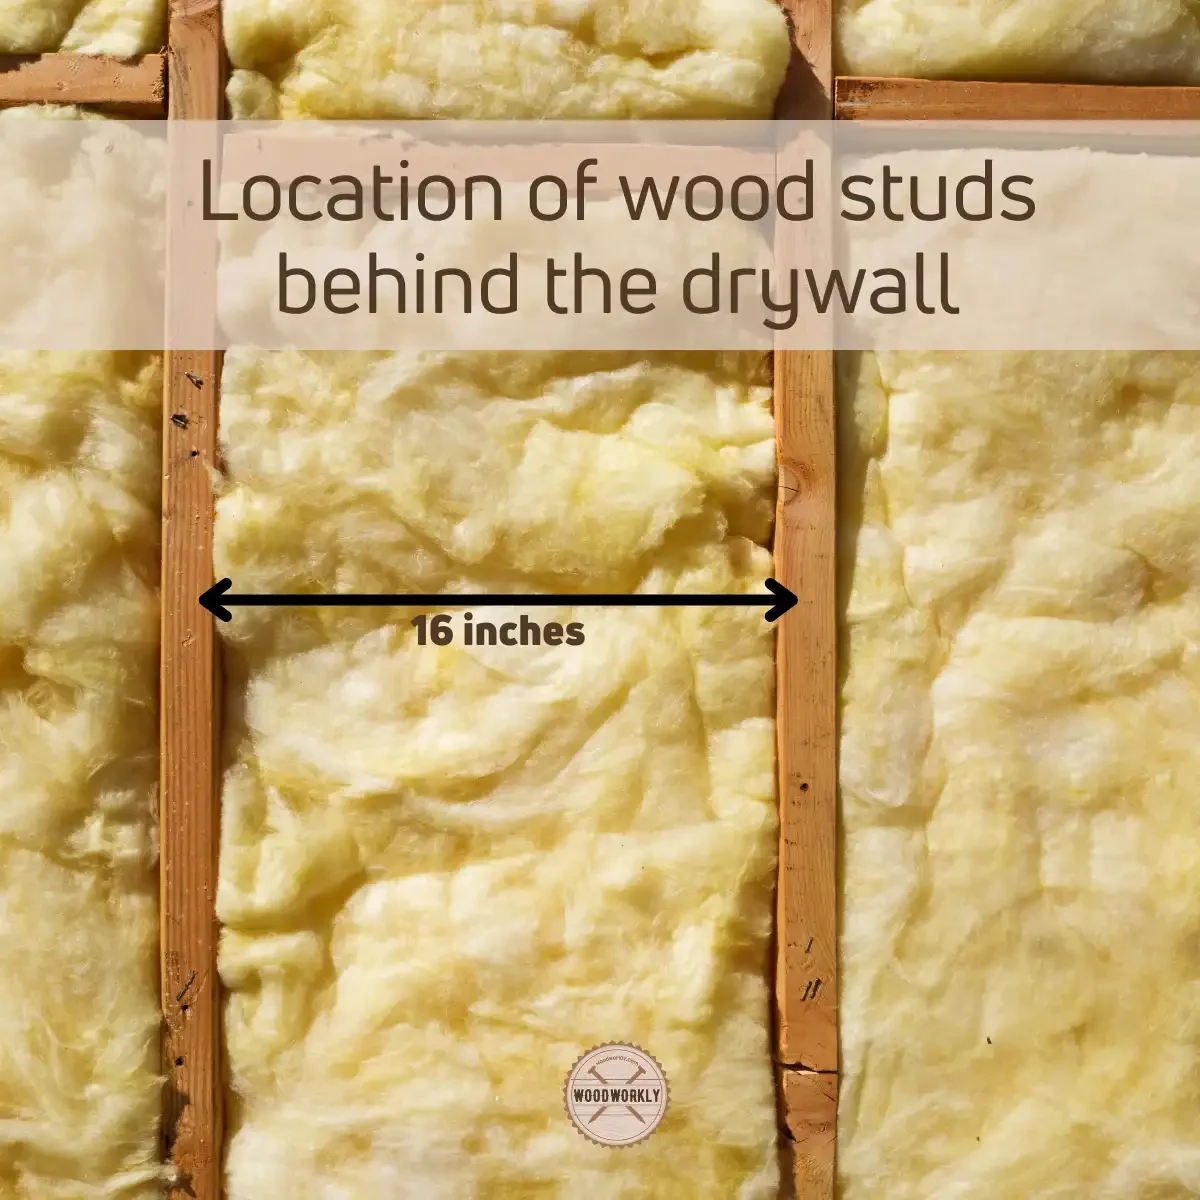
Most U.S. wood-framed walls use studs at regular spacing, often 16 inches on center. Some walls use 24-inch spacing, and older or unusual walls can vary. Treat spacing as a guide, not proof.

- ✦ Plywood thickness
Thicker plywood can reduce the useful range of some electronic stud finders.
- ✦ Multiple wall layers
Drywall, plywood, paneling, or furring strips can change what a tool detects.
- ✦ Irregular framing
Corners, doors, windows, plumbing walls, and older construction may not follow normal stud spacing.
What Is a Stud?
A stud is a vertical framing member inside a wall. In many U.S. homes, studs are made from wood such as dimensional lumber. Some newer walls use metal studs instead.
The stud provides a solid place to attach many wall-mounted items. Finding the actual framing is especially important when an item is heavy or when the fastener needs strong holding power.
How to Find Studs Behind Plywood With a Stud Finder
A stud finder is often the fastest first step. Choose a model that can work through the thickness of your plywood and any other wall layers. Read the tool instructions before use because sensing methods differ by model.
To learn how to find studs behind plywood with an electronic finder, start with a clean area of the panel. Move the tool slowly across the wall. Mark the point where the tool first signals a change, then keep moving until the signal ends. The stud usually lies between those edges rather than at one edge.
Do not trust one scan. Move the finder across the same area in both directions. Then check the suspected center from a second starting point. This helps reduce false readings caused by seams, dense patches, pipes, wires, or other objects.

- ✦ Calibrate first
Follow the manufacturer’s calibration steps before scanning the plywood.
- ✦ Move slowly
A slow, steady pass gives many electronic finders more time to detect a change.
- ✦ Mark both edges
Mark the start and end of the detected area, then use the middle as the likely stud center.
- ✦ Scan twice
Repeat the scan from another direction or nearby starting point before drilling.
Can a Stud Finder Detect Studs Through Plywood?
It can, but performance depends on the tool, plywood thickness, wall layers, and the type of sensor. A finder that works well on thin drywall may behave differently through thick plywood.
If the finder gives a wide or inconsistent signal, do not assume the entire area is a stud. Use another method to confirm the location.
Use a Magnet to Find Screws and Nails Behind Plywood
A strong magnet can be a simple way to find the fasteners that hold plywood to the wall framing. If a screw or nail passes through the plywood and into a wood stud, a magnet may detect the metal head near the panel surface.
This method does not find the wood directly. It finds the fastener. Once you locate several fasteners in a vertical line, that line can reveal the position of the stud behind the plywood.
This is one of the most useful methods for how to find studs behind plywood when an electronic finder gives poor results. It also works without making holes in the wall.

- ✦ Use a strong magnet
A small rare-earth magnet is often easier to use than a weak household magnet.
- ✦ Move in a grid
Sweep the magnet slowly across the plywood until you feel it pull toward a fastener.
- ✦ Look for a vertical line
Several fasteners lined up vertically are a strong clue that a stud runs behind them.
- ✦ Do not rely on one fastener
One metal object could be unrelated to the stud, so look for a pattern.
How to Mark the Stud Center
After you find several fasteners, mark their centers with removable painter’s tape. If the marks form a straight vertical line, the stud likely follows that line. Measure from this line to nearby framing clues before making a final decision.
Find Studs by Measuring From Corners, Doors, and Windows
Wall framing often follows a pattern. If you know where one stud is, you can measure along the wall to estimate where the next studs may sit. In many U.S. homes, common spacing is 16 inches on center, while some walls use 24 inches on center.
Corners, door openings, and window openings are useful reference points because framing is normally needed around them. Look for a known framing point, then measure outward. If the measurements match a regular pattern, you have a useful clue.
This approach is helpful when learning how to find studs behind plywood because the panel hides many visual clues. Still, measurements alone should not be treated as confirmation. Framing can change around openings, corners, cabinets, and other structural features.
- ✦ Start at a known corner
Measure from the corner and mark likely stud locations based on the wall’s apparent spacing.
- ✦ Check door openings
Framing around doors can provide a useful reference, but the framing near the opening may be wider than a normal stud.
- ✦ Check windows
Window framing can help establish a reference line for nearby studs.
- ✦ Confirm the pattern
Use a magnet, stud finder, or small test hole to verify the predicted location.
Why 16-Inch Spacing Is Not a Guarantee
The phrase 16 inches on center means the measurement runs from the center of one stud to the center of the next. It does not mean every wall has a stud exactly every 16 inches.
Some walls use 24-inch centers. Framing near corners and openings can also break the pattern. Older homes and remodeled walls may have even more variation.
Confirm the Stud Before You Drill
Finding a likely stud is only half the job. Before you drill a large hole, confirm that the spot is truly supported by the framing. This matters most when you plan to mount a heavy cabinet, shelf, TV bracket, or other load.
A small test hole can help confirm wood behind the plywood. Use a small drill bit and stop if you meet unexpected resistance. If you encounter metal, wiring, or plumbing, do not keep drilling.
Another option is to use an existing opening. A removed outlet cover, switch box, or other accessible point may reveal information about the wall construction. Turn off power before working near electrical devices, and do not remove covers unless you can do so safely.

- ✦ Use a small bit
A small pilot hole creates less damage and can help confirm whether solid wood lies behind the panel.
- ✦ Stop at unexpected resistance
Metal or unusual resistance may indicate a protective plate, pipe, conduit, or another obstruction.
- ✦ Check for utilities
Avoid drilling where electrical cables or plumbing may run, especially near outlets, switches, sinks, and fixtures.
- ✦ Match the fastener to the load
Finding a stud does not automatically mean any screw will safely support the item. Use suitable hardware and follow the item’s mounting instructions.
What If the Test Hole Misses the Stud?
A missed hole does not always mean your measurements were wrong. You may have found the edge of a stud, a furring strip, or a framing member that differs from the expected pattern.
Make a new plan from the confirmed clue rather than drilling many random holes. Use the fastener pattern, measurements, and another scan to narrow the location.
How to Find Studs Behind Plywood Without a Stud Finder
You do not need an electronic tool to learn how to find studs behind plywood. A magnet, tape measure, flashlight, and careful observation can often provide enough clues. The best no-tool approach is to combine several small clues rather than trust one guess.
Start by looking for rows of fasteners. A magnet can make this easier. Then measure from a corner, door, or window and compare the spacing with the fastener pattern. If both clues point to the same line, you have a stronger estimate.
For important mounts, confirm the result with a small pilot hole or another reliable method. The goal is not just to find a place that feels solid. The goal is to identify the actual framing member and avoid hidden utilities.

- ✦ Magnet method
Sweep a strong magnet across the plywood and mark repeated fastener locations.
- ✦ Measurement method
Measure from known framing points and look for a regular stud pattern.
- ✦ Visual clues
Look for panel seams, trim, outlets, corners, and other features that can reveal the wall layout.
- ✦ Confirmation method
Use a small pilot hole only after checking the area for likely pipes and electrical wiring.
A Simple Three-Clue Method
For a practical approach, first find a fastener with a magnet. Next, find another fastener above or below it and check whether they form a straight line. Finally, compare that line with the expected framing pattern from a nearby corner or opening.
When all three clues agree, you have much better evidence than you would from a single method. This is a useful habit for anyone learning how to find studs behind plywood.
Common Mistakes When Finding Studs Behind Plywood
The biggest mistake is drilling as soon as a tool gives one positive reading. A single reading can be misleading. Take a moment to scan again and compare the result with other clues.
Another common mistake is assuming every wall uses 16-inch stud spacing. That pattern is common, but it is not universal. Remodeling, framing around openings, and different construction methods can change the layout.
People also sometimes confuse a furring strip with the main wall stud. A plywood panel may be attached to thin strips that sit over the original wall. The strip may hold a light item, but it may not provide the same support as the structural framing behind it.
- ✦ Trusting one scan
Repeat the scan and confirm the suspected center before drilling.
- ✦ Assuming 16 inches
Use common spacing as a clue, not as proof.
- ✦ Ignoring wall layers
Consider drywall, plywood, paneling, furring strips, and other layers that may sit between you and the main framing.
- ✦ Drilling without checking utilities
Electrical wires and plumbing can run inside walls. Stop if the location is uncertain.
- ✦ Using the wrong hardware
The correct stud location still needs a fastener that suits the load, wall material, and mounting system.
When to Get Professional Help
Consider professional help when the wall has unusual construction, when you suspect hidden utilities, or when the mounting job carries a serious load. A professional can assess the wall and choose a suitable attachment method.
Extra care also makes sense in older homes or walls with several layers of unknown material. Avoid making repeated holes simply to solve a location problem.