Why Is My Air Impact Wrench Weak: Clear Answers and Key Facts
An air impact wrench is usually weak because it is not receiving enough usable air, although worn internal parts, a restricted hose or fitting, incorrect lubrication, and an unsuitable compressor can cause the same symptom. Check the air supply and tool settings before assuming the wrench needs replacement.
The difficult decision is whether to stop and troubleshoot or keep working with a tool that still turns fasteners. A quick adjustment may restore full torque, but continued use with restricted airflow or damaged components can waste time, overheat the motor, round fasteners, or leave critical hardware under-tightened.
Some causes are simple: a nearly closed regulator, a clogged coupler, a small hose, or a compressor that cannot maintain pressure while the wrench is running. Others require inspection, such as worn vanes, leaking seals, a damaged hammer mechanism, or oil contamination. This guide separates those possibilities, explains what the symptoms mean, and shows which checks are safe to perform before repair or replacement.
Start by Confirming What “Weak” Means
Impact wrenches can appear weak for different reasons. A tool that spins quickly but cannot loosen a bolt has a different problem from one that runs slowly, stalls, or produces little impact noise. Defining the symptom first prevents unnecessary disassembly.
If the wrench has normal speed but low breaking torque, focus on airflow, pressure under load, and the impact mechanism. If both speed and torque are poor, the supply system, trigger valve, motor, or lubrication is more likely involved. If it works briefly and then fades, suspect compressor recovery, heat, moisture, or a developing internal fault.
Also consider the fastener itself. Rust, thread damage, thread-locking compound, cross-threading, or excessive tightening can make a healthy impact wrench seem weak. A torque specification from a previous repair may also exceed the tool’s practical capacity, especially when using a long extension or swivel joint.
Check Air Pressure While the Wrench Is Running
The pressure shown by a compressor or wall regulator is not necessarily the pressure reaching the impact wrench. An impact tool consumes a large volume of air, so pressure can drop sharply when the trigger is pulled. This is called dynamic or working pressure.
Most pneumatic impact wrenches are rated at a specified pressure, commonly around 90 pounds per square inch, but the exact requirement depends on the model. Setting the regulator higher does not automatically create more torque if the hose, couplers, compressor, or tool inlet cannot deliver the required airflow.
Connect the wrench directly to a reliable air line, set the regulator according to the manufacturer’s specification, and observe the gauge while the tool runs. If pressure falls substantially, the restriction is probably upstream of the wrench or the compressor is too small to sustain demand.
- Test with the compressor tank adequately filled.
- Pull the trigger briefly while watching the regulator gauge.
- Compare the pressure at rest with the pressure under load.
- Do not exceed the tool’s stated maximum pressure to chase more torque.
A high static reading with a low working reading points toward a delivery problem, not necessarily a defective impact wrench.
Inspect the Hose, Couplers, and Air Fittings
A narrow hose or restrictive quick-connect fitting can starve an impact wrench even when the compressor is capable. The internal passage through some fittings is much smaller than the hose itself, creating a bottleneck at the tool inlet.
Long, lightweight hoses are particularly likely to cause pressure loss. A coiled hose, damaged hose, clogged filter, partially engaged coupler, or leaking connection can reduce the volume of air available during an impact cycle.
Listen for hissing around every connection while the system is pressurized. Apply an approved leak-detection solution to suspect joints if necessary; growing bubbles indicate escaping air. Replace damaged seals and make sure the coupler is fully seated rather than merely attached at an angle.
For a high-demand impact wrench, use a hose and fittings with an adequate internal diameter and airflow rating. Avoid stacking multiple adapters unless they are necessary. A short, unrestricted line often improves performance more than increasing the regulator setting.
Make Sure the Compressor Can Keep Up
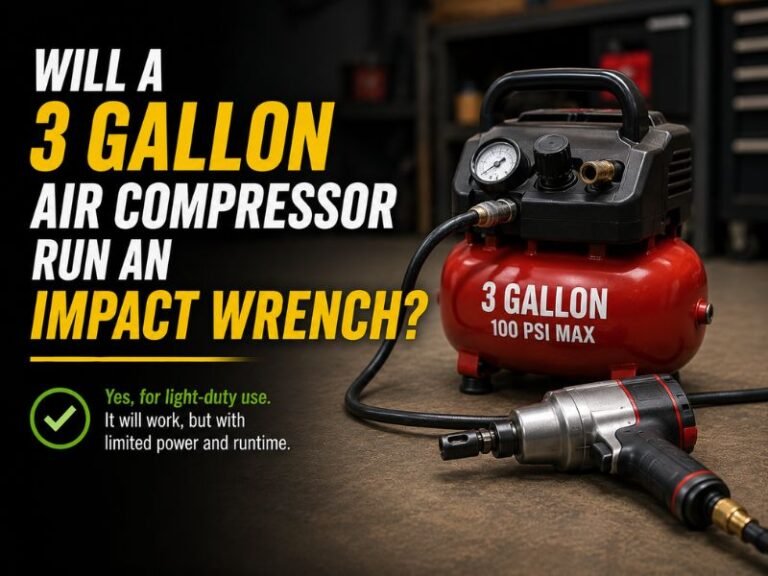
The tank size alone does not determine whether a compressor can power an impact wrench. The more important figure is the compressor’s delivered airflow, often listed as CFM at a specified pressure. An impact wrench may operate from a small tank for a few seconds, but repeated or prolonged use can exhaust that reserve quickly.
When the wrench is strong at first and weak after several seconds, watch the tank pressure and compressor duty cycle. If the compressor runs continuously while output fades, the tool may be using air faster than the compressor can produce it.
Allowing the tank to recover can confirm an air-capacity problem, but it is not a permanent solution for demanding work. Frequent operation beyond the compressor’s intended duty cycle can cause overheating and premature compressor wear.
Air consumption varies with tool size, working pressure, trigger time, and impact intensity. Compare the wrench’s air requirement with the compressor’s delivered-air rating rather than relying on horsepower claims or tank volume alone.
Check the Regulator and Tool Power Setting
Many impact wrenches have a rear or side power selector. It may limit forward output, and some tools have separate settings for tightening and loosening. A selector that is set to low power can make the tool seem defective when it is operating normally.
Move the selector through its usable positions and test the tool with the correct rotation direction. Do not force a selector that feels jammed. Dirt or internal damage may prevent it from reaching the intended setting.
The external regulator can also be misadjusted. A regulator installed before the hose may display a pressure that differs from the pressure at the tool, especially during operation. If the wrench has an integrated regulator, verify that it is not partly closed.
Use the lowest pressure that delivers the required result when possible. Excess pressure can increase wear, noise, and the risk of damaging fasteners without solving a restricted-air problem.
Lubricate the Pneumatic Motor Correctly
Insufficient oil can make the air motor slow, weak, and inconsistent. Pneumatic impact wrenches typically need air-tool oil at the inlet unless the manufacturer specifies another lubrication method. Oil helps the motor vanes, bearings, and other moving parts operate with less friction.
Before adding oil, disconnect the air supply and follow the tool’s instructions. A small amount of proper air-tool oil is generally used; flooding the inlet can create messy exhaust and does not compensate for worn components.
Moisture is another concern. Compressed air condenses water inside the tank and air line, and that water can wash away lubricant or corrode internal parts. Drain the compressor tank regularly, use suitable filtration, and avoid storing the wrench connected to a wet line.
Do not substitute automotive engine oil, penetrating oil, brake fluid, or other random liquids. Incorrect products can damage seals, contaminate the mechanism, or create an unsafe exhaust mist. If lubrication briefly improves performance and the weakness returns quickly, internal wear or contamination may be present.
Look for Internal Wear or a Damaged Impact Mechanism
If the air supply remains strong under load and the settings are correct, the wrench may have an internal problem. Worn motor vanes reduce rotational speed and torque. Damaged bearings, seals, valves, or a restricted exhaust can also limit output.
The hammer mechanism may be worn even when the motor sounds normal. Rounded hammer components, damaged pins, worn anvil surfaces, or a lack of proper grease can reduce the force transferred to the square drive. A tool may spin freely but produce weak or irregular impacts.
Common warning signs include metallic rattling, grinding, excessive vibration, oil leaking from unusual locations, a burning smell, or a trigger that does not open and close smoothly. A sudden loss of power after a dropped tool or severe overload deserves closer inspection.
Internal repair is not always economical, particularly for a heavily worn consumer-grade wrench. Use the manufacturer’s parts information and service instructions when available. If the tool is under warranty, avoid opening it before confirming the warranty process.
Use a Safe Diagnostic Sequence
A systematic test can identify most external causes without dismantling the tool. Perform these checks with the wrench unloaded and away from loose clothing, hands, and rotating parts.
- Read the tool’s specified operating pressure and air-consumption requirements.
- Confirm the forward/reverse switch and power selector are in the intended positions.
- Inspect the inlet screen, coupler, hose, and fittings for dirt, damage, or restrictions.
- Check for air leaks and verify that the coupler locks fully onto the tool.
- Test working pressure while the wrench is running, not only pressure at rest.
- Connect to a known-good air line or compressor briefly for comparison.
- Add the correct amount of air-tool oil if the manufacturer calls for it.
- Test the wrench on an appropriate fastener without exceeding safe operating limits.
Disconnect the air hose before cleaning the inlet, changing fittings, inspecting the square drive, or handling the socket. Never hold the socket by hand while operating the tool, and wear eye protection because sockets, debris, and damaged components can fail unexpectedly.
Separate Tool Weakness From Fastener Resistance
A fastener can require more torque than the wrench can provide, even when the wrench is healthy. Corrosion, thread locker, damaged threads, and mating-surface distortion all increase resistance. A long extension or universal joint can also reduce the impact energy that reaches the fastener.
Test the tool on a known-good fastener of suitable size and resistance. If it performs normally there, the original fastener or application is likely the issue. Avoid using an impact wrench to force a seized fastener indefinitely; heat, penetrating treatment, a breaker bar, or professional service may be more appropriate depending on the assembly.
Do not use an impact wrench as a substitute for a calibrated torque wrench when final tightening requires a specified torque. Impact tools vary with air pressure, lubrication, socket condition, trigger time, and joint friction. After using one for installation, verify critical fasteners with the required torque procedure.
When to Repair or Replace the Wrench
Repair is sensible when the tool has a known service history, high replacement cost, available parts, and clear signs of a replaceable problem. A clogged inlet, damaged coupler, worn hose, or dry motor is often worth addressing before considering replacement.
Replacement may be more practical when the motor and hammer mechanism are badly worn, parts are unavailable, the housing is cracked, or repair labor approaches the cost of a suitable new tool. A tool that repeatedly loses power after external causes have been eliminated should not be trusted for important fastening work.
Stop using the wrench immediately if it sparks, overheats, leaks heavily, produces severe grinding, has a cracked body, or throws pieces from the drive area. Pneumatic tools do not normally create electrical sparks during operation, so sparking can indicate contamination, damage, or a separate hazard.
Frequently Asked Questions About a Weak Air Impact Wrench
Why is my air impact wrench weak even
A full tank only proves stored pressure, not adequate airflow under load. A restrictive hose, small coupler, faulty regulator, leak, clogged inlet, or compressor outlet problem can still prevent the wrench from receiving enough air while it operates.
Can low air pressure make an impact wrench spin but
Yes, insufficient working pressure can allow rotation while sharply reducing impact force. Check the gauge during operation because pressure at rest may look normal even though the supply collapses when the trigger is pulled.
Does adding more oil make a weak impact wrench stronger?
Correct lubrication can restore performance lost to friction, but extra oil cannot repair worn parts or restricted airflow. Use only the lubricant and amount specified for the tool, and treat a short-lived improvement as a reason to investigate internal wear.
Can a small air hose cause a weak impact wrench?
Yes, a small or excessively long hose can create enough pressure loss to reduce torque. Couplers and adapters with narrow internal passages can be equally restrictive, so inspect the entire path from the compressor to the wrench.
How can I tell whether the compressor is too small?
If the wrench starts strong and fades while the compressor struggles to recover, the compressor may not deliver enough airflow. Compare its delivered CFM at the relevant pressure with the wrench’s requirements, and account for leaks and line restrictions.
Should I increase the regulator above the recommended pressure?
No, exceeding the specified pressure can increase wear and create a safety risk without overcoming a supply restriction. Restore adequate airflow, use the correct fittings, and follow the tool’s operating limits instead.
Is a weak impact wrench safe to keep using?
It may be unsafe or unreliable if the cause is internal damage, overheating, severe vibration, or a cracked housing. Stop using it when those signs appear, and do not rely on a weak tool to achieve final torque on safety-critical fasteners.
Restore Airflow Before Replacing the Tool
A weak air impact wrench most often reflects inadequate working airflow, a restriction, an incorrect setting, poor lubrication, or compressor limitations rather than an immediate need for replacement. Check the hose, fittings, regulator, pressure under load, and air capacity in that order.
If those checks pass and the tool still lacks torque, internal motor or hammer wear becomes more likely. Stop when damage or overheating appears, repair the wrench with suitable parts or replace it, and use a calibrated torque method for final tightening where the application requires it.