How to Find Roof Studs: Instructions, Tips, and Useful Advice
Roof studs are usually called rafters or trusses, and the most reliable way to locate them is to measure from a known structural point or inspect the framing from the attic. A stud finder may help through a finished ceiling, but it can mistake drywall fasteners, wiring, pipes, or furring strips for structural framing.
The small detail that changes the final decision is the roof’s framing direction. A ceiling joist, rafter, or truss chord may not line up with the point where you want to mount hardware, and the visible ceiling surface can conceal gaps, sistered members, or a nonstructural layer. Guessing can leave a fastener holding only drywall, damage a utility, or create a leak if the search moves onto the roof surface.
This guide explains how to find roof studs from the attic, ceiling, and roof exterior; how to distinguish rafters from trusses; and which tools and measurements are dependable. You will also learn how to verify a target before drilling, when a shallow attachment is appropriate, and when a roofing or framing professional should handle the work.
What “roof studs” usually means
“Roof stud” is not the usual construction term in the United States. Most people using the phrase mean the structural members supporting the roof or the ceiling below it: rafters, trusses, or sometimes ceiling joists.
Individual rafters run from the roof ridge toward the exterior wall and are commonly installed in parallel pairs. A prefabricated roof truss is a triangular assembly with top chords, a bottom chord, and internal web members. Ceiling joists generally run across the building and may connect opposing walls, although their layout depends on the roof design.
This distinction matters because a fastener for a light ceiling fixture, attic platform, or storage support may need a ceiling joist or truss bottom chord rather than the sloped rafter above the roof. A satellite mount, vent, solar attachment, or other roof-mounted item requires a suitable rafter or truss location and proper waterproofing—not merely a place where a nail happens to enter wood.
The most reliable method: inspect the attic
If the attic is accessible, inspect it before relying on measurements or electronic tools. The framing is normally visible, and you can see its direction, spacing, size, insulation coverage, electrical wiring, plumbing, ductwork, and previous repairs.
- Enter the attic with a bright flashlight, stable footing, and appropriate protective equipment.
- Identify the sloped rafters or the top chords of the trusses and note which direction they run.
- Find the exact area above the proposed attachment point, using ceiling penetrations, light fixtures, vents, or other fixed references.
- Measure from a visible framing member to the target location, then transfer that measurement to the room below or the roof surface.
- Check both the framing and the proposed fastener depth before drilling.
Do not walk on the drywall ceiling between framing members. Use installed walk boards or place weight only on the structural members when the attic is safe to enter. Watch for exposed nails, low headroom, loose insulation, hot conditions, and electrical conductors.
Attic access also reveals an important limitation: the member you can see may not be directly beneath the surface you plan to fasten into. Roof sheathing, drywall, furring strips, and dropped ceiling framing can create offsets. Trace the layers and measure their thickness rather than assuming a straight line.
Finding rafters from inside the room
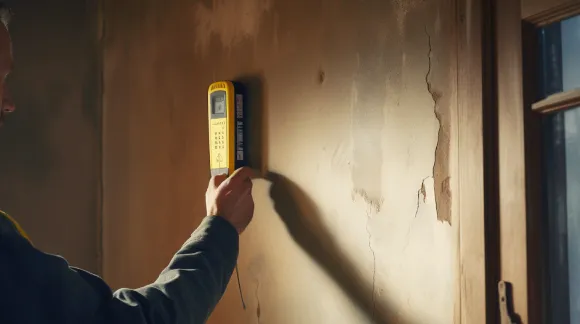
When there is no attic access, begin with a ceiling or wall inspection. A stud finder with a deep-scan or AC-detection mode can provide a starting point, but it should not be treated as proof of a rafter. Scan slowly in both directions and mark each apparent edge of the detected member.
Many electronic finders react to changes in density rather than identifying wood. Drywall screws, metal channels, adhesive, pipes, wiring, and changes in insulation can create false readings. A real framing member should produce a repeatable pattern: the tool detects both sides of a consistent-width area, and nearby framing members appear at a plausible spacing.
A strong magnet can locate drywall screws or nails that attach the ceiling finish to framing. Move the magnet in a grid and mark several fasteners. A line of fasteners often indicates a joist, rafter, or furring strip, but it does not establish which one is above the drywall.
Magnetic results should therefore be confirmed with measurements or a small, carefully chosen inspection hole.
Use known framing points and spacing
Start at a location where framing is more predictable. A ceiling light box, attic hatch, roof vent, partition wall, or beam may be fastened to or positioned near a framing member. Measure from that point with a tape measure and extend the likely spacing across the ceiling.
Typical residential framing may use repeating spacing such as 16 or 24 inches on center, but roof construction varies. “On center” means the measurement from the center of one member to the center of the next, not the clear gap between their edges. Do not force a 16-inch pattern onto a roof that was built with a different layout.
At a sloped ceiling, measurements must follow the actual surface or be converted carefully from a horizontal plan measurement. A straight measurement across the room can put the mark several inches away from the rafter line, especially on a steep slope.
Finding a roof rafter from the exterior
Locating framing from the roof surface is more difficult because shingles, underlayment, and roof sheathing hide the wood. In most cases, the best approach is to establish the framing layout from the attic or interior and transfer the position to the exterior using fixed references such as gable ends, eaves, ridges, or roof penetrations.
Rafters commonly run from the ridge to the eave. If the gable end is accessible, measure along the eave or fascia from a known end and mark the expected rafter centerlines. If the roof has a hip design, multiple slopes and irregular framing can make this method less reliable.
A roof-mounted item must be positioned on sound sheathing over an appropriate structural member, with a fastening system designed for the load and roof covering. Avoid probing repeatedly through shingles. Each unnecessary hole can compromise the water-shedding layer, and a misplaced fastener may puncture wiring or fail to reach structural wood.
Do not assume a visible roof vent, shingle seam, or fastener line marks a rafter. Roofing nails may be placed according to shingle installation requirements and can miss the center of framing. Some roof decks use engineered panels, metal components, or irregular repairs that make surface clues misleading.
How to verify the location before drilling
Verification is more important than the first detection. Mark the suspected centerline, then confirm it with at least one independent method. For example, combine a magnetic fastener line with measurements from an attic reference, or compare a stud-finder reading with a carefully controlled test hole in a low-risk location.
If a small test hole is appropriate, use a bit only slightly larger than the fastener and drill no deeper than necessary. Stop if you encounter metal, unusual resistance, empty space, or a cable-like obstruction. A test hole can confirm wood behind drywall, but it does not prove that the member is large enough, sound enough, or correctly positioned for a heavy load.
Use a depth stop or wrap tape around the bit. The required fastener must pass through the surface material and enter enough solid wood, while avoiding penetration into the opposite side of a rafter, roof deck, pipe, or wire. The correct depth depends on the attachment, load, framing size, and manufacturer or engineering requirements.
- Confirm the member continues beyond the proposed fastener point rather than ending at a repair or blocking piece.
- Check for water staining, rot, insect damage, splits, or previous oversized holes.
- Locate electrical cables, plumbing, ducts, and metal plates before drilling.
- Make sure the fastener will not penetrate a roof membrane or exterior flashing where it could cause a leak.
- For heavy or overhead loads, verify the load path—not just the presence of wood.
Choosing the right tool
A few simple tools are usually more useful than a single sophisticated device. A tape measure helps transfer a layout, a strong magnet can trace drywall fasteners, and a flashlight or inspection camera can reveal framing through an attic hatch or small access opening.
An electronic finder is useful for screening a broad area, especially on a flat finished ceiling. Use fresh batteries, calibrate it according to its instructions, and scan in several directions. Treat its result as a marked possibility until another clue supports it.
An inspection camera can help when there is a suitable existing opening, such as a light-fixture opening or attic access. Never enlarge an opening near suspected wiring or plumbing without understanding what lies behind it. A borescope also shows only a narrow area, so it cannot replace a structural assessment.
For roof work, appropriate fall protection and access equipment matter more than the locating tool. A ladder, wet shingles, steep pitch, wind, and fragile roofing materials create serious hazards. If safe access is not already available, hire a qualified roofing professional rather than climbing solely to confirm a measurement.
Rafters, trusses, and hidden blocking
Rafter framing offers a relatively direct target: the sloped member usually runs continuously from the ridge area to the exterior wall. However, rafters may be doubled around openings, interrupted by dormers, or reinforced with sistered members.
Trusses require more care. The top chords follow the roof slopes, but the bottom chord is usually near the ceiling plane. A truss web may be visible in the attic without being suitable for the fastener or load you have in mind.
Do not cut, notch, drill, or alter a truss member without direction from a qualified structural professional.
Some roofs contain blocking, outlookers, purlins, or added framing that can look like a rafter from below. These pieces may support a specific detail but may not carry the load you want to apply. A roof-mounted attachment should be placed according to its installation requirements, not simply wherever a piece of wood is found.
Older homes may have irregular spacing, dimensional lumber that differs from modern nominal sizes, or multiple layers of ceiling and roofing material. Remodels can also add furring strips or suspended framing. These conditions are why an attic inspection and conservative verification are preferable to a repeated trial-and-error approach.
Safety and situations requiring professional help
Turn off power to nearby circuits before opening a ceiling or drilling where wiring may be present, but do not assume a switched-off circuit makes every cable safe. Plumbing, gas lines, HVAC ducts, and hidden low-voltage systems can also occupy roof and ceiling cavities.
Stop and seek professional help if you find water damage, sagging, cracked framing, extensive mold, a damaged truss, or signs that the roof is shifting. A structural engineer, qualified contractor, or experienced roofer can determine whether the framing can support the proposed load and whether the attachment will remain weather-tight.
Professional advice is especially important for solar equipment, satellite dishes, snow-retention systems, rooftop decks, suspended loads, large antennas, and any attachment exposed to significant wind or snow forces. The correct solution may require reinforcement, engineered fasteners, flashing, or a different mounting location.
Never use the roof surface as a work platform during rain, frost, high wind, or poor visibility. If the task involves cutting roofing, removing shingles, or sealing penetrations, a roofer should handle the work or provide specific installation guidance for the roof system.
FAQ: Finding roof studs
What is the easiest way to find roof studs?
Inspecting the attic is usually the easiest and most accurate method. You can see rafters or trusses directly, identify their spacing, and measure from the exact area where the fastener will be installed. If the attic is inaccessible, combine a stud finder or magnet with measurements and independent verification.
Can a stud finder locate a roof rafter through drywall?
Yes, but a stud finder provides an indication rather than certainty. It may detect drywall fasteners, furring strips, pipes, or wiring instead of the rafter. Scan slowly, mark both edges, repeat the reading, and confirm the result before drilling.
Are roof rafters spaced 16 inches apart?
Many are, but roof framing does not follow one universal spacing standard. Rafters and trusses may be installed at 16, 19.2, 24 inches on center, or at irregular spacing in older or remodeled buildings. Measure the actual structure instead of assuming a pattern.
Can a magnet find roof studs?
A magnet can find the metal screws or nails that often attach drywall to framing. Trace several fasteners to identify a likely line, then verify that the line corresponds to structural framing rather than a furring strip or another attachment. A magnet cannot reveal the member’s size or condition.
How do you find roof studs from the roof surface?
Transfer the framing layout from the attic or interior using fixed roof references. Measure from a gable end, eave, ridge, or known penetration, and avoid repeated probing through shingles. Exterior work also requires checking the sheathing, fastener length, flashing, and roof condition.
Can I drill into any visible roof truss member?
No, a visible truss member is not automatically a suitable attachment point. The member may not be designed for the added load, and drilling or cutting can weaken the engineered assembly. Follow the attachment instructions or obtain advice from a qualified structural professional.
What should I do if I cannot confirm the framing
Do not drill repeatedly or rely on a single tool reading. Use an existing access point, arrange a professional inspection, or choose a mounting method that does not require uncertain structural penetration. A small locating problem is safer and cheaper to solve before the roof or ceiling is damaged.
Make one verified measurement before drilling
The dependable approach is to identify whether the structure is a rafter, truss, or ceiling joist, locate it from the attic when possible, and confirm the position with measurements plus a second detection method. Stud finders and magnets are useful aids, but neither replaces verification of the framing, utilities, load capacity, and fastener depth.
For a light, low-risk attachment, proceed only after confirming solid wood and a safe drilling path. For roof penetrations, heavy loads, trusses, damaged framing, or steep and unsafe roofs, the useful next step is a qualified roofer or structural professional who can locate the framing and protect the roof system.