How to Reset Zircon Stud Finder: Calibration & Troubleshooting
If you want to know how to reset Zircon stud finder models, the usual “reset” is simply to recalibrate the tool: release the Power button, move the scanner a few inches away from the suspected stud, place it flat against the wall, press and hold Power, and wait about 1–2 seconds for calibration to finish before moving it. Most Zircon stud finders do not use a separate factory-reset button for normal scanning problems.
This is important because a Zircon StudSensor or MultiScanner automatically calibrates itself to the wall surface when you power it on. If you turn it on while it is over a stud, move it during calibration, hold it away from the wall, or have a weak battery, it may beep, flash, fail to detect studs, or produce inconsistent readings.
In many cases, the tool is not broken. Recalibrating it correctly or installing a fresh battery solves the problem.
Different Zircon models have slightly different indicators, scanning modes, batteries, and center- or edge-finding features, so the exact manual for your model should always take priority. However, the basic reset and calibration process is similar across many StudSensor and MultiScanner models.
In this guide, I’ll explain how to reset a Zircon stud finder, recalibrate it correctly, troubleshoot continuous beeping and flashing, deal with inaccurate readings, check the battery, use DeepScan properly, and determine when the tool may actually need repair or replacement.
How to Reset Zircon Stud Finder Correctly

For most Zircon stud finders, you do not reset the device through a menu or hidden reset button. Instead, you restart the scanning process and allow the sensor to calibrate to a different section of the wall.
The basic procedure is straightforward.
- Release the Power button completely and stop scanning.
- Move the stud finder several inches to the left or right of the location where the problem occurred.
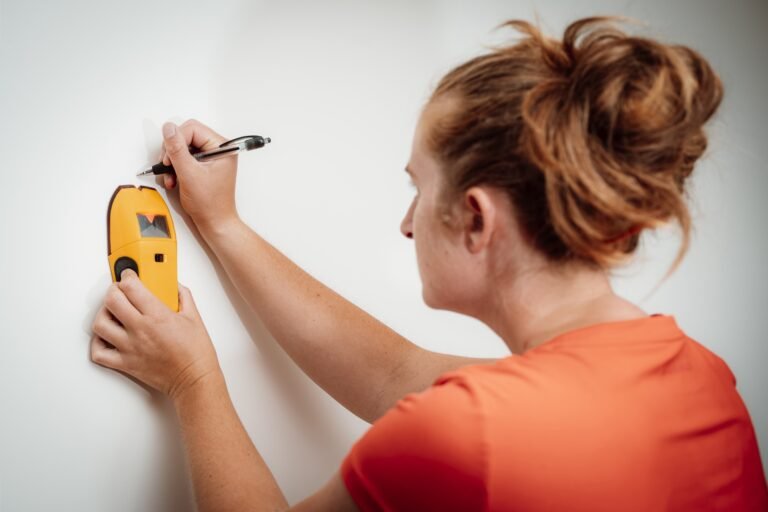
- Place the tool flat against the wall.
- Press and hold the Power button while keeping the scanner completely still.
- Wait approximately 1–2 seconds for the calibration process to finish.
- Continue holding the button and slowly slide the scanner across the wall.
- If it immediately gives another calibration warning, move farther away and repeat the process.
On models with a Ready or TruCal-type indicator, wait until the tool indicates that calibration has completed before you begin moving it.
The exact lights and sounds vary by model. Some stud finders illuminate a Ready light, some provide an audible tone, and more advanced scanners may show information on an LCD display.
The important part is the same: place the scanner on the wall first, then turn it on, keep it still while it calibrates, and only begin scanning after calibration finishes.
Do Not Turn It On in the Air
One of the easiest ways to get inaccurate results is to press the Power button before the tool is touching the wall.
A Zircon stud finder calibrates itself according to the surface beneath the sensor. If you turn it on while holding it in the air and then place it against drywall, it calibrated to the wrong starting condition.
Always put the scanning surface flat against the wall before pressing Power.
Do Not Move It During Calibration
Calibration normally takes only a moment, but the scanner should remain stationary during that period.
If you slide or tilt it immediately after pressing Power, it may have difficulty establishing a reliable baseline.
Once calibration is complete, move it slowly across the surface.
Key Takeaways:
- Resetting most Zircon stud finders means recalibrating the scanner, not performing a factory reset.
- Place the tool against the wall before pressing Power and keep it still for about 1–2 seconds.
- If calibration fails, release Power, move several inches sideways, and start again.
Why a Zircon Stud Finder Needs Calibration
Electronic stud finders do not simply “see” a piece of wood through the wall.
Many StudSensor-type tools detect changes in wall density or related electrical properties as the scanner moves from an open wall cavity toward a stud.
Before the tool can recognize that change, it needs to understand what the wall surface looks like at the starting point.
That is what calibration does.
Drywall thickness, paint, wallpaper, wood backing, moisture, and other materials can affect the sensor response. Calibration establishes a baseline against which the scanner compares the surrounding area.
If you calibrate in a normal hollow section of wall and then move toward a stud, the increase in density can be detected.
But if you begin directly over the stud, the tool may treat that high-density area as normal. Many Zircon models are designed to recognize this situation and warn you instead of providing a misleading scan.
That is why moving several inches and recalibrating is such an effective solution.
What Happens If You Calibrate Over a Stud?
If you accidentally start directly over a stud, many Zircon models will recognize the problem.
Depending on the model, you may notice repeated beeping, flashing indicators, a calibration warning, or instructions to scan back toward the area where you started.
With simpler StudSensor models, the appropriate response is generally to release the Power button, move several inches sideways, and recalibrate.
More advanced models may automatically compensate or provide a directional indication telling you that you started over a stud.
Either way, do not continue scanning as though the warning does not matter.
Starting in a different location gives the scanner a better reference point.
How Far Should You Move?
Moving approximately 2–3 inches or more to either side is usually a good starting point.
If the tool still gives the same warning, move farther.
Remember that a typical dimensional wood stud has a face about 1½ inches wide, but the scanner’s sensing area and wall construction can make the detected zone appear wider.
If you unknowingly started near the center of a stud, moving only half an inch may leave you over the same framing member.
How to Know When Your Zircon Stud Finder Has Reset
A successful recalibration should result in normal Ready behavior rather than continuous warning signals.
The exact indication depends on your model.
You might see a green Ready light, a TruCal indicator, an LCD confirmation, or a short tone.
Once calibration finishes, slowly move the scanner sideways without releasing the button.
If the tool begins responding logically as you approach and pass a stud, the recalibration was successful.
A good test is to scan the same area from both directions.
For an edge-finding model, find one edge, mark it, then scan from the opposite side to find the other edge. The midpoint between the two marks is approximately the stud center.
Center-finding Zircon models may identify the center more directly.
If the scanner gives completely different locations on repeated passes, continue troubleshooting before drilling.
Why Is My Zircon Stud Finder Beeping and Flashing?
Continuous or repeated beeping and flashing usually means the tool is trying to tell you something rather than randomly malfunctioning.
Two particularly common causes are incorrect calibration and a weak battery.
You Started Over a Stud
If the scanner begins flashing or beeping during calibration, you may be standing directly over a stud or another dense object.
Release the button, move sideways, and recalibrate.
The Battery Is Weak
Low battery voltage can create surprisingly strange behavior in electronic stud finders.
The scanner may flash, beep unexpectedly, fail to detect anything, shut off, or produce inconsistent readings.
Even a battery that still works in another low-power device may not necessarily supply the stud finder properly.
If your Zircon scanner has become unreliable after previously working normally, installing a fresh alkaline battery is one of the first troubleshooting steps I recommend.
Many StudSensor models use a 9-volt alkaline battery, although some Zircon scanners use other battery types. Check the battery compartment or model instructions before purchasing a replacement.
The Tool Was Moved Too Soon
If you start sliding immediately after pressing Power, the scanner may not calibrate correctly.
Restart it and keep the scanner completely stationary until calibration finishes.
The Tool Is Not Flat Against the Wall
The sensor surface needs consistent contact with the wall.
Tilting the tool, rocking it, or scanning with only part of its back touching the surface can lead to unstable readings.
Keep your hand position steady and move the entire tool sideways while maintaining contact.
Resetting a Zircon Stud Finder With a New Battery
If normal recalibration does not solve the problem, check the battery next.
A battery replacement is particularly worthwhile when the tool:
- Flashes as soon as you turn it on
- Behaves erratically even after proper calibration
- Turns off unexpectedly
- No longer reacts to studs it previously detected
Those are a few situations where a weak battery may be contributing to the problem.
Do not assume an old battery is fine simply because a voltage tester or another device still responds to it.
Electronic scanners can be sensitive to battery condition.
How to Replace the Battery Safely
Use the designated battery compartment.
Many classic Zircon StudSensor models use a battery cover on the back of the tool. On some older designs, the cover may also function as a belt clip.
Do not remove unrelated case screws simply because you are trying to access the battery.
Zircon specifically warns against unscrewing the body of many StudSensor models because doing so can release internal components and cause the tool to operate incorrectly.
Install the correct fresh alkaline battery, match the positive and negative terminals, close the compartment completely, and recalibrate the scanner before testing it again.
Important Tip: If you do not expect to use the tool for a long time, removing the battery before storage can help prevent problems associated with aging or leaking batteries.
Troubleshooting After Resetting a Zircon Stud Finder
If calibration and a fresh battery do not fix the problem, the symptoms can help narrow down the cause.
| Problem | Likely Cause | What to Try |
| Continuous flashing during calibration | Started over stud or dense object | Move sideways and recalibrate |
| Tool will not turn on | Weak/dead battery or battery contact issue | Install correct fresh battery |
| Stud finder detects nothing | Improper calibration, weak battery, thick wall | Recalibrate and check wall/mode |
| Stud appears extremely wide | DeepScan used unnecessarily or dense material | Try normal Stud Scan mode |
| Different reading every pass | Moving too quickly, uneven contact, wall material | Slow down and rescan both directions |
| Tool detects objects everywhere | Dense wall, moisture, metal, wiring, unusual construction | Try another area or appropriate scan mode |
| Scanner works on one wall but not another | Different wall construction | Confirm wall material and tool limitations |
Not every unusual reading indicates a defective stud finder.
Wall construction can make a huge difference.
Drywall over conventional wood framing is relatively straightforward. Plaster, lath, plywood backing, foil insulation, metallic wall coverings, concrete, tile, and heavily textured surfaces can make scanning more difficult.
Should You Use DeepScan After Resetting?
Some Zircon models include a DeepScan mode for detecting framing through thicker wall materials.
DeepScan can be useful, but I would not automatically turn it on whenever the scanner has trouble.
On an ordinary drywall wall, the normal Stud Scan mode is generally preferable.
DeepScan increases sensitivity and may make the detected stud area appear wider than it does in standard mode. On some models, certain calibration-error behavior may also differ in DeepScan mode.
Start with regular Stud Scan whenever the wall thickness is normal.
Use DeepScan when the wall material is thick enough that standard scanning cannot locate the framing reliably.
When DeepScan May Help
DeepScan can be useful when you have thicker wall coverings or an additional layer of material between the scanner and framing.
However, it cannot overcome every wall-construction problem.
For example, traditional lath-and-plaster walls can be difficult for ordinary density-based stud detection because the material behind the surface is irregular.
On walls with unusual materials, a scanner with Metal Scan capability may sometimes provide a better way to locate the nails or screws securing the material to the framing.
How to Recalibrate Between Different Walls
You should allow your Zircon stud finder to recalibrate whenever you start a new scan.
Do not assume calibration from one section of wall remains valid when you move to another wall or a significantly different surface.
A wall may have different:
- Drywall thickness
- Paint layers
- Wallpaper
- Plywood backing
- Moisture conditions
- Framing configuration
The scanner establishes its baseline each time it is powered on.
That automatic calibration is part of normal operation, not something you need to save permanently.
This is also why the phrase “reset Zircon stud finder” can be slightly misleading. There usually is no stored calibration that needs to be erased. The device calibrates again when you correctly begin a new scan.
Key Takeaways:
- Try normal Stud Scan before using DeepScan on a standard wall.
- Recalibrate whenever you restart a scan or move to a substantially different surface.
- Persistent errors may come from wall construction rather than a faulty scanner.
Why Does My Zircon Stud Finder Keep Finding Studs Everywhere?
If the scanner seems to indicate a stud across almost the entire wall, several things may be happening.
One possibility is that you are scanning over a wall with plywood or another dense backing material.
A second possibility is that DeepScan mode is increasing sensitivity on a wall where it is unnecessary.
The wall might also contain closely spaced framing, blocking, metal, plumbing, wiring, or another material the scanner interprets as a density change.
Moisture can affect some electronic scanning methods as well.
Start over in normal Stud Scan mode if appropriate, recalibrate in a different location, and scan slowly.
Then check whether the indicated studs repeat at logical intervals such as approximately 16 or 24 inches on center.
Consistent framing patterns are much more convincing than isolated electronic signals.
Why Does My Zircon Stud Finder Detect Nothing?
The opposite problem is also common.
If your scanner completes calibration but never shows a stud, start by testing the battery and your scanning technique.
Keep the scanner flat and move slowly.
If the wall is unusually thick, try the appropriate deeper scan mode if your model provides one.
Also consider the wall material.
Basic electronic stud finders are not equally effective on every surface. Lath and plaster, plywood shear walls, tile assemblies, highly textured walls, and certain metallic materials can complicate detection.
If you know where one stud should be—for example, because a visible fastener line identifies it—scan across that area as a test.
If the scanner cannot identify a known stud after proper calibration and a fresh battery, the wall construction may exceed the tool’s practical capabilities.
Why Does the Stud Location Change Every Time I Scan?
A stud should not move, so noticeably different readings indicate a scanning or calibration problem.
First, slow down.
Stud finders work better when moved deliberately across the wall rather than quickly sweeping back and forth.
Second, maintain the same orientation and pressure against the surface.
Third, start each calibration away from the suspected stud.
Finally, scan from both directions.
Suppose the scanner indicates one edge from the left. Mark it. Move past the stud, recalibrate if the model requires it, and scan from the right to identify the opposite edge.
If the two edges are reasonable and repeatable, the midpoint provides a much better estimate of stud center than a single one-direction scan.
How to Test a Zircon Stud Finder After Resetting It
Do not immediately trust the first reading after troubleshooting.
Test the scanner on a simple interior wall where conventional framing is likely.
Place it flat against the wall and calibrate properly.
Move slowly until it identifies a stud.
Mark the location with painter’s tape rather than drilling.
Scan again from the opposite direction.
Then look for another stud at approximately 16 or 24 inches away.
If the tool repeatedly shows logical, evenly spaced framing positions, it is probably working normally.
You can also compare its result with other clues, such as a visible screw, baseboard nail, wall seam, or electrical box location.
No single clue is perfect, but several clues that agree provide much greater confidence.
What If the Power Button Seems Stuck?
A calibration problem and a mechanical Power-button problem are different issues.
If the button physically does not move or release normally, recalibration will not correct it.
First remove the battery and inspect the exterior of the button for dirt or damage.
Do not spray liquid cleaner into the scanner.
Do not open the housing unless you have a specific reason and appropriate manufacturer guidance for your model.
If the case has been dropped, cracked, or disassembled and the Power button no longer aligns correctly, internal repair may be necessary.
For an inexpensive older scanner, replacement may make more sense than trying to repair damaged internal electronics.
What If You Accidentally Unscrewed the Zircon Stud Finder?
This deserves special attention because some users assume the rear screw needs to be removed to change the battery.
On many Zircon StudSensor models, it does not.
Removing the case screw can allow internal components to shift and may cause the scanner to behave incorrectly.
If you already opened the housing, do not continue randomly rearranging parts.
Make sure internal components and battery-contact pieces are properly seated before closing the case.
Because internal designs vary, the safest approach is to follow the instructions for your exact Zircon model rather than using a generic reassembly procedure.
Once reassembled, install the correct fresh battery and test the scanner before trusting it for drilling locations.
Can You Factory Reset a Zircon Stud Finder?
Most common Zircon StudSensor models do not need a consumer-accessible factory reset for normal operation.
They are not like smartphones or programmable electronic devices that store many user settings.
The tool establishes a new calibration whenever you correctly begin a scan.
Therefore, if someone tells you to “reset” the tool, they usually mean one of three things:
Restart the scan and recalibrate.
Replace a weak battery.
Correct the scanning technique or mode.
Some advanced MultiScanner or SuperScan models have additional features and operating modes, so you should consult the instructions for that particular model if the normal calibration procedure does not apply.
How to Get More Accurate Results After Resetting
Correct calibration is only the beginning.
Move the stud finder slowly and keep it flat against the surface throughout the scan.
Use painter’s tape to mark results rather than drawing directly on finished paint.
When using an edge-detection model, identify both sides of the stud before choosing a drilling location.
If your scanner identifies the center automatically, I still recommend scanning from both directions when the mounting job is important.
Studs in conventional framing are often spaced 16 or 24 inches on center. Once you find one, check whether neighboring readings follow a reasonable pattern.
Those construction clues can expose false positives.
Avoid Assuming Every Reading Is Wood
Electronic scanners may respond to more than wood framing.
Depending on the tool and mode, wall conditions may include metal studs, pipes, electrical components, blocking, or other dense objects.
A scanner reading should therefore be treated as information that needs interpretation, especially before drilling a long screw.
Safety Before Drilling Into a Detected Stud
A stud finder helps locate framing, but it does not guarantee that an area is safe to drill.
Electrical wiring and plumbing can pass through studs.
Protective steel plates are sometimes installed over locations where wires or pipes pass close to the stud face.
If your drill or screw unexpectedly contacts metal, stop.
Do not assume the metal is simply part of the stud and drill through it.
It could be a protective plate installed specifically to keep fasteners away from wiring or plumbing.
Also remember that live-wire detection features have limitations. Wiring may not be detected if it is too deep, shielded, not energized, inside conduit, or behind certain wall materials.
Important Tip: Never interpret the absence of a live-wire warning as proof that no electrical cable is present.
When Resetting Will Not Solve the Problem
Recalibration fixes many stud-finder problems, but it cannot correct every situation.
The scanner may have a hardware issue if it still behaves incorrectly after:
- Correct calibration
- A fresh correct battery
- Testing on a normal drywall wall
- Trying the correct scanning mode
- Cleaning the sensor surface
Physical damage from dropping the tool can also affect its electronics or sensing surface.
Water exposure, battery leakage, damaged contacts, or an improperly reassembled case can cause persistent problems.
At that point, compare the cost of repair with the cost of replacing the scanner.
For an older inexpensive StudSensor, replacement is often the practical choice.
Common Mistakes When Resetting a Zircon Stud Finder
The most common mistake is repeatedly turning the scanner on in exactly the same location.
If that location is directly over a stud, every calibration attempt may fail for the same reason.
Move several inches before restarting.
Another mistake is holding the tool like a remote control rather than keeping the entire sensing surface flat against the wall.
Using DeepScan on every wall can also create unnecessarily wide readings.
And do not overlook the battery. A seemingly complicated electronic problem can sometimes be nothing more than insufficient battery power.
Finally, never remove case screws simply to change the battery unless the instructions for your specific model explicitly tell you to do so.
Key Takeaways:
- Repeated calibration errors usually require changing the starting location, not repeatedly restarting in the same spot.
- Keep the scanner flat, move slowly, and use the correct scan mode.
- If recalibration and a fresh battery do not help on a normal wall, consider wall limitations or hardware failure.
FAQs About How to Reset Zircon Stud Finder
How do you reset a Zircon stud finder?
Release the Power button, move the scanner several inches to another location, place it flat against the wall, press and hold Power, and wait roughly 1–2 seconds for automatic calibration. Then begin scanning while continuing to hold the button if your model requires it.
Does a Zircon stud finder have a reset button?
Most common Zircon StudSensor models do not have a separate factory-reset button. Starting a new scan automatically recalibrates the tool.
How do I recalibrate my Zircon stud finder?
Place the tool flat against the wall before turning it on. Hold it still, press and hold the Power button, wait for the calibration or Ready indication, and then slowly begin scanning.
Why does my Zircon stud finder keep beeping?
Repeated beeping can indicate that you calibrated over a stud, experienced a calibration error, or have a weak battery. Move the scanner to a different location and recalibrate. If the problem continues, try a fresh battery.
Why does my Zircon stud finder keep flashing?
Flashing can indicate a calibration problem or low battery, depending on the model. Install the correct fresh battery and restart calibration away from the suspected stud.
How long does a Zircon stud finder take to calibrate?
Many Zircon StudSensor and MultiScanner models complete automatic calibration in approximately 1–2 seconds.
Should I move the stud finder while it is calibrating?
No. Keep the tool still and flat against the wall until calibration finishes. Begin scanning afterward.
Can I calibrate a Zircon stud finder in the air?
No. For normal stud scanning, place the sensor against the wall first. Calibrating it in the air gives the tool the wrong reference condition.
What happens if I calibrate directly over a stud?
Many Zircon models will warn you with flashing, beeping, or another indicator. Release Power, move a few inches sideways, and recalibrate.
Why does my Zircon stud finder detect the whole wall as a stud?
The scanner may be in an overly sensitive mode, scanning unusually dense material, or experiencing a calibration problem. Restart in another location using normal Stud Scan mode when appropriate.
Why does my Zircon stud finder not detect anything?
Check the battery, make sure the scanner is flat against the wall, recalibrate properly, and move slowly. Thick or unusual wall materials may require a different scan mode or detection method.
Will changing the battery reset my Zircon stud finder?
A new battery can solve erratic behavior caused by low voltage, but normal calibration still happens when you start scanning. Battery replacement is best considered troubleshooting rather than a separate factory-reset procedure.
What battery does a Zircon stud finder use?
Many Zircon StudSensor models use a 9-volt alkaline battery, but not every model does. Some newer or specialized scanners use other battery configurations. Check your specific model before replacing the battery.
Should I remove the screw on the back to change the battery?
Generally, no. Many Zircon StudSensor models have a separate battery cover, and removing the housing screw can loosen internal parts. Follow the battery instructions for your exact model.
Why does my Zircon stud finder work on one wall but not another?
The second wall may use different materials or thicknesses. Plywood, plaster, lath, tile, moisture, metallic materials, or thicker assemblies can affect electronic stud detection.
Should I use DeepScan all the time?
No. Use normal Stud Scan for ordinary wall thickness when possible. DeepScan is intended for situations where the stud is deeper behind the surface and can produce wider indications on normal walls.
How do I know my Zircon stud finder is accurate after resetting it?
Scan the suspected stud from both directions and compare the results. Then check whether nearby studs appear at logical framing intervals, commonly around 16 or 24 inches on center.
Can a weak battery cause false stud readings?
Yes. Weak battery power can cause flashing, erratic operation, failure to detect studs, and other unusual behavior. A fresh correct alkaline battery is a sensible first troubleshooting step.
What should I do if recalibration does not fix my Zircon stud finder?
Install a fresh battery, verify the correct operating mode, test it on a simple drywall wall, and check the model instructions. Persistent problems after those steps may indicate unsuitable wall construction or a damaged tool.
Conclusion
Learning how to reset Zircon stud finder models is simpler once you understand that most do not require a traditional factory reset. In normal use, resetting essentially means restarting the scan and allowing the tool to calibrate correctly to the wall surface.
Place the stud finder flat against the wall, press and hold the Power button, keep the scanner still for approximately 1–2 seconds, and begin moving only after calibration finishes. If the unit flashes or beeps because you started over a stud, release Power, move several inches sideways, and recalibrate.
If proper calibration does not solve the issue, I recommend checking the battery next. A fresh alkaline battery can correct many problems that look like scanner failure, including erratic lights, repeated error signals, and inconsistent detection.
After that, consider the wall material and scan mode. Thick walls, plywood backing, plaster, lath, tile, and other unusual construction can make electronic stud detection more difficult. DeepScan can help on some thicker surfaces, but it should not automatically replace normal Stud Scan.
For the most reliable results, scan slowly from both directions and confirm that detected studs follow a logical framing pattern before drilling.
The practical bottom line is that you usually do not need a hidden button or complicated sequence to reset a Zircon stud finder. Recalibrate it on a clear section of wall, use a strong fresh battery, keep the sensor flat, and scan slowly. If it still cannot produce repeatable results on a normal wall, then it is time to investigate the specific model, wall construction, or possible tool damage.