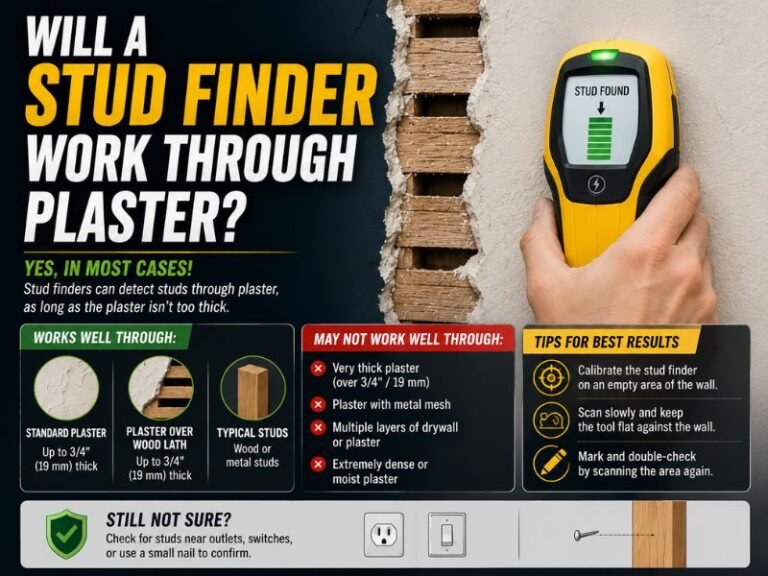
Do I Drill Where the Stud Finder Beeps: Detailed Guide and Facts
Usually, no. A stud finder typically beeps when it detects the edge or changing density of a stud, so the center is often a short distance beyond the first beep rather than directly beneath it. Confirm the stud’s full width before drilling.
The familiar assumption is that a beep marks a precise target. In reality, an electronic stud finder is reacting to a change in the wall, and that change may come from the stud’s edge, a screw, wiring, plumbing, drywall variation, or an incorrect calibration. A single sound is useful evidence, but it is not proof that the exact spot is safe or structurally suitable.
This guide explains what different beeps mean, how to locate the stud center, why readings can be misleading, and when drilling should stop. You will learn how to scan in both directions, verify the result with other clues, choose a safer drilling point, and recognize situations where a stud finder cannot reliably rule out electrical wires or pipes.
What a Stud Finder Beep Usually Means
Most electronic stud finders sense a change in material density behind the wall. When the tool moves from an area of relatively low density into the edge of a wood or metal stud, it may beep, light up, or display a signal.
That first beep commonly identifies the stud edge, not its center. Depending on the model, the tool may beep at the beginning of the detected area, beep continuously across the stud, or signal when it reaches the opposite edge.
Some devices are designed to locate the center automatically. A center-finding model may show a center icon, illuminate a central indicator, or produce a different tone when the middle of the stud is aligned with the tool’s guide mark. Even then, the result should be checked rather than assumed.
Wall conditions affect the reading. Thick drywall, plaster, textured surfaces, tile, closely spaced framing, metal studs, insulation, and high moisture can all change how the sensor responds. A beep is therefore best treated as a location clue, not a drilling command.
How to Find the Center Before Drilling
The safest general method is to identify both sides of the detected area. Start with the tool away from the suspected stud and follow the manufacturer’s instructions for calibration. Keep the finder flat against the wall and move it slowly in a straight horizontal line.
- Mark the point where the finder first signals a stud.
- Continue moving in the same direction until the signal disappears or changes.
- Mark that second boundary.
- Measure between the two marks and place the drilling point approximately halfway between them.
- Repeat the scan from the opposite direction to confirm the same center.
For a typical wood stud, the detected width may be close to the actual framing width, but it does not have to be exact. The tool’s sensing field can make the apparent area wider or narrower than the lumber behind the drywall.
Scanning from both directions is especially important because it reduces the chance that one false reading determines the drilling location. If the marks do not agree, recalibrate and test the area again instead of averaging uncertain results.
A pencil mark is preferable to a deep scratch or nail test. If the wall finish is delicate, use removable painter’s tape for temporary reference marks and remove it after the location is confirmed.
Why the First Beep Is Not Always the Stud Edge
A stud finder does not “see” a clean outline in the way an X-ray would. It interprets changes in the electrical or physical properties of the wall, and several conditions can create a signal that resembles framing.
Calibration errors
Many electronic finders need to be calibrated against the wall surface. Starting over a stud, a seam, a thick patch, or an unusually dense area can cause the device to establish the wrong baseline. The result may be a delayed beep, a weak signal, or a false reading.
Read the instructions for the specific tool and recalibrate in a clear area. Keep your free hand away from the wall if the device uses an electronic field that can be affected by body position or nearby objects.
Drywall seams and patches
Joint compound, repaired holes, corner bead, backing strips, and drywall seams may change the wall’s density. A finder can react to these areas even though no full-length stud is directly behind the beep.
If a signal appears unusually broad, does not repeat at nearby heights, or stops abruptly, treat it with caution. A true stud normally produces a consistent vertical path when scanned at several points up and down the wall.
Fasteners and metal objects
Drywall screws and nails are often attached to studs, so a metal-detection mode may help confirm framing. However, a single metal signal can also come from a pipe, protective plate, conduit, old fastener, or other embedded object.
A fastener can confirm that something metallic is present, but it does not establish the entire stud width or prove that drilling at that exact point is safe. It is one piece of evidence to compare with the broader scan.
Electrical wiring and plumbing
Wires and pipes can produce false positives, especially when the tool includes a metal or AC-detection mode. They may run vertically or horizontally through walls and can be near a stud without being part of the framing.
Some wiring is protected by metal nail plates, but not every hazard is detected consistently. A stud finder should never be treated as a guarantee that a wall is free of live electrical cables or water lines.
A Reliable Verification Process
Before drilling, combine the finder’s reading with the wall’s layout and the intended load. Interior walls commonly have studs arranged at regular centers, but framing around doors, windows, corners, plumbing walls, and openings may not follow the expected pattern.
Scan at several heights. If the same vertical area responds consistently, the result is more convincing than a single beep at one level. Move slowly and keep steady pressure; sweeping too quickly can cause the sensor to miss a boundary.
Check for visible clues such as existing trim nails, electrical outlets, switches, and wall-mounted hardware. Electrical boxes are usually attached to framing or supported by a nearby structure, but the box location does not automatically reveal every safe drilling point around it.
When the project permits it, make a very small pilot hole with a short bit. A pilot hole can confirm whether the material behind the drywall behaves like wood, metal, hollow space, or masonry. It cannot by itself prove that no wire or pipe is present, so use caution and stop if the resistance is unusual.
For a heavy object, do not rely only on the center of a suspected stud. Confirm the mounting hardware, screw length, load rating, and attachment method. A stud may support a load, but the wall covering, bracket, and fastener must also be suitable for the object being installed.
Where to Drill Once the Stud Is Confirmed
For a normal wood-stud installation, drill near the confirmed centerline rather than at the first beep. Centering the fastener gives it better engagement in the framing and reduces the chance of breaking out near the stud’s edge.
Do not assume the centerline is perfectly vertical from one part of the wall to another. Framing can be irregular, and older homes may have unusual spacing or plaster over wood lath. Verify the location at the same height where the hardware will be installed.
The required hole depth depends on the fastener and the item’s weight. Avoid driving a long screw farther into the wall than necessary, especially in areas where utilities may pass through framing.
Do not force a drill through sudden resistance. Wood generally offers steady resistance, while metal, masonry, a protective plate, or an embedded object may feel sharply different. Stop, withdraw the bit, and reassess rather than increasing pressure.
If the item is light, a hollow-wall anchor may be more appropriate than drilling into an uncertain stud. If the item is heavy or safety-critical, use a confirmed structural attachment point or obtain professional help instead of selecting a location based on one ambiguous signal.
Important Safety Limits
The main risk is not merely missing the stud. Drilling into a live wire can cause shock, fire, or equipment damage; striking a water or gas line can cause flooding or a dangerous leak. A finder’s “AC detection” feature can help, but detection technology has limitations and should not replace safe judgment.
Be especially cautious near outlets, switches, plumbing fixtures, radiators, utility rooms, kitchens, bathrooms, and areas directly above or below visible pipes. Also take care around walls that may contain communications cables, heating components, or concealed electrical routes.
- Turn off power to the relevant circuit when practical, but do not assume that de-energizing one breaker makes every cable in the wall safe.
- Never drill through a location that produces a strong or unusual metal or AC warning without investigating further.
- Use the shortest suitable fastener and avoid excessive drilling depth.
- Wear eye protection, particularly when drilling overhead or through plaster, tile, or masonry.
- Stop if you encounter unexpected metal, moisture, burning odor, sparking, or a sudden change in resistance.
Professional help is appropriate when the wall contains uncertain utilities, the installation carries significant weight, or the building has unusual construction. An electrician or plumber can investigate hazards that a consumer stud finder cannot reliably identify.
Common Mistakes When Following a Beep
Drilling at the first signal
This is the most common mistake. If the first tone marks the near edge, the fastener may land too close to the side of the stud or miss it entirely.
Moving the tool too quickly
Fast scanning can blur the boundaries and make a narrow signal appear to be the center. Slow, even passes produce more useful results.
Testing only one direction
A one-way scan does not show whether the tool has detected the beginning or end of a target. Mark both boundaries and confirm them from the opposite direction.
Ignoring the wall surface
Wet paint, heavy texture, thick plaster, tile, wallpaper, and uneven contact can affect readings. Keep the finder flat if the instructions allow it, and test it on a known clear area first.
Assuming every wall has wood studs
Some homes use metal framing, masonry, concrete, or mixed construction. A wood screw may not hold properly in metal framing, while masonry requires the correct bit and anchor system.
FAQ: Drilling at a Stud Finder Beep
Do I drill where the stud finder beeps?
Usually, you should not drill at the first beep. Mark the first and last points of the detected area, confirm the result in both directions, and drill near the estimated center only after checking for possible wires and pipes.
Does a continuous beep mean I found the center?
Not necessarily. A continuous tone may mean the finder is over the detected stud, but the exact meaning depends on the model. Use the tool’s center indicator or locate both edges manually.
How far past the beep is the stud?
The distance varies by tool, wall thickness, and calibration. The first signal may occur at the stud’s edge, but the sensing field can extend beyond the actual lumber. Measuring the complete detected zone is more reliable than applying a fixed offset.
Can a stud finder beep for a wire or pipe?
Yes, a wire, pipe, metal plate, fastener, or dense patch can trigger a reading. A beep alone cannot identify the object, so inspect the pattern, use available detection modes, and avoid drilling when the result is ambiguous.
Should I drill in the middle of the marked stud?
Yes, the middle of a consistently detected stud is generally the preferred drilling area. Confirm the center at the installation height, select an appropriate fastener, and keep the hole no deeper than necessary.
Why does my stud finder beep everywhere?
It may be incorrectly calibrated or reacting to a dense wall surface. Recalibrate in a clear area, clean the sensor and wall contact area, slow down, and check whether the wall contains plaster, lath, tile, foil-backed material, or closely spaced framing.
What should I do if the finder gives conflicting readings?
Do not drill until the location is independently verified. Scan at multiple heights, approach from both directions, compare with visible construction clues, and seek professional assistance if wiring or plumbing may be involved.
Conclusion: Confirm the Center Before You Drill
A stud finder beep usually identifies a change at or near the stud’s edge, not a guaranteed drilling point. Scan slowly from both directions, mark the detected boundaries, confirm the center, and treat every warning about wiring or plumbing seriously.
The major limitation is that no consumer stud finder can guarantee a wall is hazard-free. If the reading is inconsistent or the location is near utilities, stop and investigate before making a hole; otherwise, use a suitable fastener at the confirmed stud center.