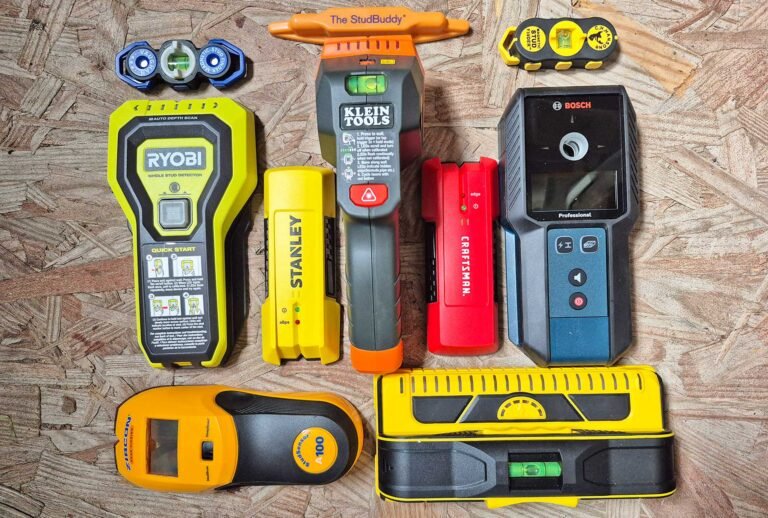
Why Is My Stud Finder Giving False Readings? Causes and Fixes
If you are wondering why is my stud finder giving false readings, the most common causes are incorrect calibration, uneven wall density, moisture, low battery power, improper scanning technique, metal or wiring behind the wall, and using the wrong scan mode. In many cases, the stud finder itself is working correctly—it is simply detecting a density change or concealed object that is not actually a wood stud.
Electronic stud finders do not see through walls like an X-ray. Most conventional models compare changes in material density as you move the sensor across the surface. A thicker patch of joint compound, a pipe, a drywall screw, plaster, plywood, insulation, or another material can therefore look like a stud to the sensor.
Wall construction also matters enormously. A basic stud finder normally performs best on relatively uniform drywall installed directly over wood or metal framing. Lath and plaster, tile, multiple drywall layers, textured surfaces, foil-backed insulation, wet wallpaper, and other complicated assemblies can make readings far less predictable.
Before assuming your tool is defective, there are several simple checks that can dramatically improve accuracy. In this guide, I’ll explain why stud finders give false positives and false negatives, how calibration and wall materials affect readings, how to scan correctly, how to verify a suspected stud, and what to do when your stud finder seems to detect studs everywhere—or nowhere.
Why Is My Stud Finder Giving False Readings?

A stud finder can give a false reading whenever it detects something that resembles the signal it expects from a stud.
For a conventional electronic stud finder, that usually means the tool senses a change in density beneath the wall surface. The detector does not necessarily know whether that change is caused by a wood stud, metal stud, pipe, extra layer of drywall compound, fastener, blocking, or some other concealed object.
This explains why a stud finder can confidently beep or illuminate even though you later discover there is no conventional stud at that exact location.
The most common causes fall into several categories:
| Cause | What You May Notice | Best First Step |
| Incorrect calibration | Studs appear too wide or in strange places | Recalibrate in another location |
| Low battery | Erratic beeping or inconsistent results | Install a fresh battery |
| Wall irregularities | Random or unusually wide readings | Scan vertically and horizontally |
| Moisture | Large areas trigger the detector | Let surface dry and investigate moisture |
| Lath and plaster | Many inconsistent readings | Use alternative detection methods |
| Metal, pipes, or wires | Isolated or unusual signals | Rescan and avoid drilling until identified |
| Wrong scan mode | Studs seem much wider than expected | Use normal mode for ordinary drywall |
| Foil or metallic material | Inconsistent or blocked readings | Use another locating method |
| Poor scanning technique | Results change every pass | Slow down and keep the tool flat |
The first step is therefore not to drill where the first beep occurs. Repeat the scan and look for a consistent pattern.
A False Positive Is Not Necessarily a Broken Stud Finder
A false positive occurs when the detector indicates a stud or object where the target you expected is not actually present.
Suppose there is a plumbing pipe close to the back of the drywall. The pipe changes the material characteristics behind the surface, and a density-based detector responds.
Technically, the tool detected something real. It simply cannot always identify precisely what that object is.
This is why I recommend thinking of a basic stud finder as a wall-density detector, not a perfect wood-stud identification system.
False Negatives Can Happen Too
A false negative is the opposite problem: a stud is present, but the finder fails to indicate it.
This can happen when the stud is too deep, the wall is unusually thick, the tool is calibrated incorrectly, the surface contains interfering materials, or the detector is being used outside its intended depth range.
A negative scan should therefore not be treated as absolute proof that an area contains no framing, electrical wiring, plumbing, or other concealed objects.
Key Takeaways:
- Most electronic stud finders detect material changes rather than directly identifying wood.
- Pipes, fasteners, wall irregularities, and other objects can create apparent stud readings.
- Always confirm a location with repeated scans before drilling.
Incorrect Calibration Is One of the Most Common Causes
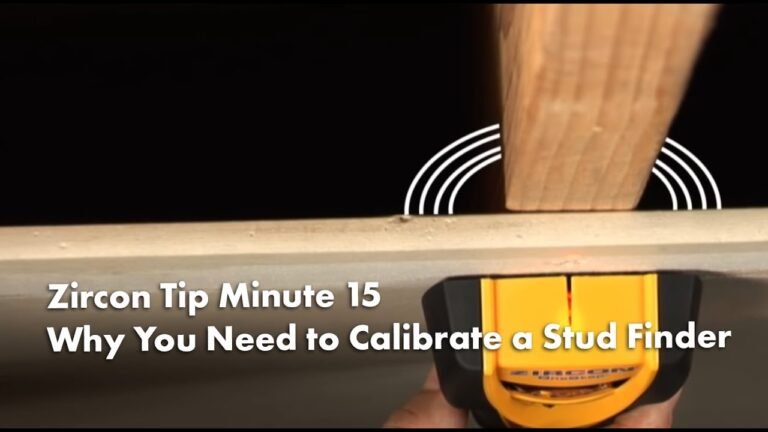
Many conventional electronic stud finders need to establish the density of the wall before they can recognize a change.
This process is called calibration.
If calibration is performed incorrectly, every reading that follows can become unreliable.
What Happens If You Calibrate Over a Stud?
Suppose you place the stud finder directly over a stud and then activate a model that expects to calibrate over an empty wall cavity.
The detector may treat the increased density of the stud as its baseline.
When you move away from the stud, the density decreases rather than increases. Depending on the model, this may cause a calibration error, strange readings, or failure to locate the stud properly.
Some modern finders automatically compensate for this problem, while others require you to start again in a different location.
How to Calibrate a Stud Finder Correctly
Follow the operating procedure for your exact model.
For many conventional models, the basic process is to place the tool flat against the wall, activate it without moving, allow calibration to finish, and then begin scanning slowly.
Do not assume every stud finder works this way. Some multi-sensor models do not require the same manual calibration procedure.
If your detector suddenly seems inaccurate, recalibrating according to its manual is one of the first things I would try.
Move to Another Starting Point
If you receive an error immediately after starting, move several inches away and try again.
Starting beside an outlet, trim, window, door, or known wall fixture can sometimes put the sensor over unusual framing or concealed material.
An ordinary open section of wall usually provides a better baseline.
Low Battery Power Can Cause Erratic Readings
A weak battery is easy to overlook.
A stud finder may still turn on even though its battery does not provide ideal operating voltage. Depending on the model, you might notice repeated error signals, inconsistent detection, dim indicators, or readings that change from one pass to another.
If the device previously worked well and suddenly becomes unreliable, replacing the battery is an inexpensive troubleshooting step.
Use the battery type recommended by the manufacturer and make sure it is installed correctly.
I would replace the battery before concluding that the sensor has failed internally.
You May Be Scanning Too Fast
Stud finders need time to measure the wall as they move across it.
Sweeping the device rapidly from one side of the room to the other can make edge detection inconsistent.
Keep the tool flat against the wall and move it slowly and steadily.
Do not tilt one side away from the drywall while scanning. Maintaining consistent contact improves the sensor’s ability to compare one area with another.
Scan From Both Directions
If a stud appears to be in one location when you move left to right but somewhere else when you move right to left, do not immediately mark either result as final.
Repeat both passes.
With an edge-detection model, mark the edge from each direction. The actual center should generally fall between those edge marks.
A center-finding model may do this calculation automatically, but repeated passes are still useful for verification.
Scan Vertically After Finding a Suspected Stud
A wall stud normally continues vertically for a substantial distance.
If your detector gives a strong signal at one point, move several inches higher or lower and scan across the same area.
If the reading continues in roughly the same vertical line, you have stronger evidence that it is framing.
If the signal occurs only at one isolated height, you may be detecting blocking, a pipe, electrical wiring, a fastener, or another concealed object.
This vertical confirmation technique is one of the most useful ways to separate real framing from random false readings.
Wall Texture and Uneven Drywall Can Confuse the Sensor
Electronic stud finders perform best when the wall surface and materials behind it are reasonably uniform.
Heavy texture changes the distance and contact between the detector and the wall.
Uneven drywall mud can also create density variations.
Even apparently smooth walls may have thicker joint compound over seams, repaired holes, taped joints, or multiple paint layers.
A conventional detector can interpret those variations as changes beneath the wall.
What to Do on a Textured Wall
Choose the flattest horizontal path you can find and maintain consistent contact.
Do not rock the detector across raised texture.
If the texture is severe, you may get better results by checking the suspected stud line at several different heights and looking for a consistent vertical pattern.
If your detector cannot maintain proper contact, a magnetic method may be more reliable because it searches for steel drywall fasteners instead of measuring wall density.
Lath and Plaster Walls Are Especially Difficult
If you live in an older home and your stud finder seems almost useless everywhere, the wall construction may be the reason.
Traditional lath-and-plaster construction is much less uniform than modern drywall.
Wood lath strips run horizontally across the studs, and plaster pushes through gaps between them to form irregular keys on the back of the wall.
A density-based stud finder therefore encounters constant changes as it moves.
It may respond to:
- Wood lath
- Thick plaster
- Plaster keys
- Fasteners
- Repairs
- Different layers of material
As a result, it can indicate false studs repeatedly.
Metal Lath Makes the Problem Harder
Some plaster systems contain metal mesh or expanded metal lath.
That large amount of metal can interfere with electronic sensing and make ordinary stud finding extremely difficult.
In such walls, I would not continue making random holes based on inconsistent electronic readings.
A detector designed for metal, inspection from another side of the wall, construction clues, or another locating method may work better.
A Magnet Can Sometimes Help
On wood-lath construction, small nails or fasteners attach the lath to framing.
A strong magnet can sometimes locate these fasteners.
If several fasteners align vertically, that pattern may reveal the underlying stud.
It is slower than using a stud finder on drywall, but it can be much more dependable on difficult plaster walls.
Key Takeaways:
- Uneven wall materials can look like studs to density-based detectors.
- Lath and plaster are inherently harder to scan than uniform drywall.
- On difficult walls, look for a consistent vertical pattern rather than trusting one isolated signal.
Moisture Can Cause False Stud Finder Readings
Moisture changes the electrical characteristics of building materials and can interfere with some electronic stud finders.
This is particularly relevant when scanning:
- Recently painted walls
- Newly wallpapered walls
- Damp basement walls
- Areas near plumbing leaks
- Bathrooms
- Walls affected by condensation
If paint, wallpaper paste, or another water-based material is still wet, wait until the wall is thoroughly dry before relying on the detector.
New wallpaper can take much longer to dry throughout the wall assembly than the surface appearance suggests.
Do Not Ignore Unexpected Moisture
If an established wall suddenly starts producing broad, unusual readings and you have another reason to suspect moisture, investigate the underlying cause.
A plumbing leak should obviously be addressed rather than treated solely as a stud-finder inconvenience.
Foil-Backed Insulation and Metallic Wallpaper Can Interfere
Conductive materials can cause major problems for electronic stud detection.
Foil-backed insulation behind drywall is one example. Metallic wallpaper or wall coverings can create similar issues.
Instead of seeing a simple density transition from drywall to stud, the detector may encounter a relatively continuous conductive layer.
Results can include broad readings, inconsistent detection, or failure to detect framing at all.
If you know the wall contains metallic material, switching to a more advanced scanning technology—or locating fasteners magnetically—may be more effective.
Pipes and Electrical Wiring Can Look Like Studs
A density-based stud finder can respond to objects other than framing.
A pipe located close to the drywall, for example, may trigger the sensor.
Electrical cables, junction boxes, protective metal plates, screws, and other concealed components can also influence certain detectors.
This becomes a safety issue because you should never assume every positive reading is safe to drill into.
Look at the Shape of the Reading
A stud typically creates a fairly consistent vertical signal.
A pipe may travel vertically but then branch or turn.
Electrical wiring may cross a stud horizontally or follow a different route.
If a signal appears only in a small area and disappears above and below it, investigate before treating it as framing.
Pay Attention to Live-Wire Warnings
If your stud finder also displays a live-AC warning, stop before drilling.
An AC warning does not pinpoint the exact wire location, and absence of a warning does not prove that no wire exists.
Electrical wiring can pass through holes drilled in studs, meaning you can correctly locate a stud and still encounter a cable at that height.
Drywall Screws and Nails Can Affect Readings
Stud finders and magnets may react to the metal fasteners used to attach drywall.
This is not always a disadvantage.
In fact, drywall screws provide one of the best secondary methods for confirming a stud.
If you find several screws running in a straight vertical line, they were probably driven into the same framing member.
The mistake is assuming that one metal hit automatically indicates the center of a stud.
Find several aligned fasteners before relying on the pattern.
Deep-Scan Mode Can Make Studs Appear Too Wide
Many electronic stud finders provide a deep mode intended for thicker wall assemblies.
It may seem logical to leave Deep Scan turned on all the time because “deeper must be better.”
That can actually make normal drywall scanning less precise on some models.
Higher-sensitivity modes can make detected objects appear wider or can pick up material farther behind the surface that standard mode would ignore.
Use the mode appropriate for your wall thickness.
For ordinary single-layer drywall, standard stud mode is usually the best starting point.
Switch to deep scanning when the manufacturer recommends it for thicker surfaces.
Doors and Windows Can Produce Confusing Readings
The framing around openings is often much more complicated than the framing in the middle of an ordinary wall.
Around a window or door you may encounter:
- King studs
- Jack studs
- Headers
- Cripple studs
- Additional blocking
Several framing members may sit directly beside each other.
Your stud finder may therefore indicate an unusually wide solid region rather than a normal narrow stud.
This is not necessarily a false reading.
The detector may be accurately showing that a large portion of the wall contains solid framing.
If you are scanning near trim and the readings seem unusually broad, move farther into the open wall and establish the normal framing pattern first.
The Wall May Contain Plywood or OSB Behind the Drywall
Not every drywall surface has empty cavities immediately behind it.
Some walls include continuous plywood or OSB sheathing behind the drywall for structural bracing, mounting support, acoustic construction, or other purposes.
A basic density-based finder can have difficulty distinguishing an individual stud when the entire wall already contains relatively dense wood material.
The same issue can occur with multiple layers of drywall.
If you know your wall has an unusual construction assembly, check whether your stud finder is rated for that material and thickness.
Metal Studs Can Behave Differently From Wood Studs
Commercial buildings, apartments, basements, and some modern houses use metal framing rather than wood.
A stud finder that can detect both wood and metal studs may still show a different pattern than you expect.
Metal studs are also narrower in some respects and have hollow profiles rather than being solid pieces of lumber.
If you repeatedly find signals at predictable intervals but they do not behave exactly like wood studs, consider the possibility that the wall is framed with metal.
Fastener selection also changes when mounting to metal studs, so knowing the framing type matters before installing a heavy object.
Your Hand Position May Be Affecting the Sensor
Electronic stud finders can be sensitive to how they are held.
Follow the manufacturer’s grip instructions.
On some models, touching areas outside the designated handle can affect the detector’s electrical field and make readings less reliable.
Do not place your other hand directly beside the sensing area while scanning unless the instructions specifically tell you to do so.
Also remove anything obviously interfering with smooth movement along the wall.
Correct technique varies by model, which is why reading the instructions is more useful than assuming every electronic stud finder operates identically.
How to Fix a Stud Finder That Gives False Readings
If your stud finder seems inaccurate, I recommend troubleshooting systematically rather than replacing it immediately.
First, install a fresh battery.
Next, confirm that you are using the correct scanning mode and calibration procedure for the model.
Choose a flat, dry section of wall away from doors, windows, outlets, and trim. Scan slowly from both directions.
Once you get a potential stud location, scan several inches above and below it.
Then verify the suspected location using another method, such as a strong magnet to locate drywall screws.
If results remain inconsistent, consider whether the wall itself contains plaster, metal lath, foil insulation, plywood, tile, moisture, or another material that makes ordinary electronic detection unreliable.
A Reliable Verification Process
A stud location becomes much more convincing when several clues agree.
For example, suppose your electronic finder shows a vertical stud line. A strong magnet then finds two or three drywall screws on that same line. The next stud appears roughly 16 inches away, and repeated scanning shows the same pattern.
That is substantially more reliable than a single beep.
Do Not Depend on Stud Spacing Alone
Wood studs in many U.S. walls are commonly framed at 16 inches on center, and some construction uses 24 inches on center.
However, spacing is only a clue.
Walls can contain additional studs around corners and openings, nonstandard framing, blocking, repairs, and remodeling.
Never measure 16 inches from one suspected stud and automatically drill without confirming the next one.
Key Takeaways:
- Start troubleshooting with a fresh battery, correct mode, correct calibration, and slow scanning.
- Confirm suspected framing vertically and with a second detection method whenever possible.
- Standard stud spacing is useful evidence, but it is not proof.
Why Does My Stud Finder Detect Studs Everywhere?
If nearly the entire wall triggers your detector, several explanations are possible.
You might be using a deep or high-sensitivity mode on ordinary drywall.
The wall might contain plywood or OSB directly behind the drywall.
You could be dealing with foil-backed insulation, metal lath, moisture, or another material that interferes with sensing.
You might also have calibrated the detector over an unusual area.
Move to another wall and test the device.
If it behaves normally elsewhere, the original wall construction is probably responsible.
If it behaves erratically on several ordinary drywall walls even after installing a fresh battery and following the correct calibration procedure, the detector itself may be faulty.
Why Does My Stud Finder Show Different Locations Every Time?
Small variations are normal, especially with simple edge-detection models.
Large changes are not.
If one pass indicates a stud at 20 inches from a corner and the next places it at 28 inches, check your technique.
Make sure you are:
Keeping the detector flat against the surface, scanning slowly, starting from a suitable calibration point, using the correct mode, and maintaining consistent hand placement.
Then perform the same scan at another height.
A real vertical stud should produce broadly repeatable results.
Why Does My Stud Finder Keep Beeping?
Continuous or frequent beeping can indicate different things depending on the model.
It may mean the tool is detecting a large dense area, experiencing a calibration error, sensing AC electricity, or encountering a wall material it cannot interpret reliably.
Do not guess from the sound alone.
Look at the display or indicator symbols and check the manufacturer’s instructions for your specific model.
If the device beeps continuously from the moment you turn it on, recalibrate it in another area and replace the battery if necessary.
Why Does My Stud Finder Work on One Wall but Not Another?
This usually points to wall construction rather than a defective detector.
One wall may consist of simple ½-inch drywall over wood studs.
Another may contain:
- Double drywall
- Plaster
- Plywood sheathing
- Tile
- Metal studs
- Foil insulation
- Moisture
- Concrete or masonry
- Additional backing
Electronic detectors have specific depth and material limitations.
A tool that works perfectly in a bedroom may struggle on a tiled bathroom wall or an older plaster partition.
How to Find a Stud When the Electronic Finder Is Unreliable
If repeated electronic scans are inconclusive, switch methods instead of continuing to guess.
A strong rare-earth magnet is my preferred backup for conventional drywall.
Move it slowly across the wall until it is attracted to a drywall screw or nail. Then search directly above and below that point.
Several vertically aligned fasteners strongly suggest a framing member.
You can combine this with measurements from known framing locations, observations around baseboards, and scans at multiple heights.
For particularly complicated walls, such as metal-lath plaster or walls containing extensive utilities, a more advanced wall scanner may be worth using.
If the mounting project involves a heavy TV, cabinet, handrail, or other high-consequence load, certainty is more important than avoiding a small exploratory repair.
When Should You Replace the Stud Finder?
Do not replace it simply because it struggles on one difficult wall.
Test the finder on an ordinary drywall wall where stud locations are reasonably predictable.
Install a fresh battery and use the correct procedure.
If it repeatedly fails to produce consistent results on straightforward drywall, shows error signals constantly, has damaged sensing pads, or behaves differently than it did previously, replacement may be reasonable.
Before buying another basic model, consider why the existing tool failed.
If your home primarily has thick plaster or unusual multilayer walls, purchasing another entry-level density detector may not solve the problem. A multi-sensor or multi-material scanner—or a magnetic locating method—may be more appropriate.
Safety Before Drilling After Finding a Stud
Even a perfectly identified stud is not automatically a safe drilling location.
Electrical cable and plumbing frequently pass through holes drilled across framing members.
Protective metal plates may be installed where wiring or pipes pass close to the stud face.
If your drill bit or screw encounters an unexpected piece of metal, stop rather than drilling through it.
That plate may be protecting a concealed utility.
Also pay attention to any electrical-warning feature on your scanner. Treat a repeatable live-wire alert seriously.
A stud finder is a locating aid, not a guarantee that the area behind your planned hole contains nothing except wood.
FAQs about why is my stud finder giving false readings
Why does my stud finder say there is a stud when there isn’t?
The detector may be responding to another density change, such as a pipe, drywall compound, blocking, fastener, plywood, plaster, or another concealed material.
Repeat the scan vertically and confirm the location with another method.
Why is my stud finder inaccurate?
Common causes include poor calibration, a weak battery, scanning too quickly, incorrect scan mode, wall texture, moisture, plaster, foil insulation, or unusual wall construction.
Start by replacing the battery and following the manufacturer’s calibration procedure.
Can a stud finder give false positives?
Yes.
Electronic stud finders can interpret other dense materials or wall irregularities as studs. A positive reading should be confirmed before drilling.
Can a stud finder miss a stud?
Yes.
Excessive wall thickness, interfering materials, improper calibration, limited detection depth, or poor technique can cause false negatives.
Why does my stud finder find studs everywhere?
The wall may contain continuous plywood, metal lath, foil-backed insulation, moisture, or another material that produces broad readings. The wrong scan mode or calibration can also cause this behavior.
Why does my stud finder show different results each time?
Inconsistent technique, weak batteries, irregular wall materials, and poor calibration are common causes.
Scan slowly from both directions and compare results at several heights.
Can a low battery make a stud finder inaccurate?
Yes. A weak battery can contribute to erratic operation or repeated errors on some stud finders.
Installing a fresh battery is one of the easiest troubleshooting steps.
Does wall texture affect a stud finder?
It can.
Heavy texture may prevent consistent sensor contact, while variations in surface and wall density can create misleading signals.
Try scanning along the flattest available area.
Does plaster confuse stud finders?
Yes.
Lath-and-plaster construction contains many density changes that can create false positives or make studs difficult to distinguish.
A magnet or metal-detection approach can sometimes work better.
Can moisture cause false stud finder readings?
Yes. Moisture can affect the way some electronic stud finders sense the wall.
Allow recently painted or wallpapered surfaces to dry thoroughly and investigate unexpected moisture.
Can electrical wires cause a false stud reading?
Depending on the detector and cable location, electrical wiring can influence a scan.
If your finder displays a live-AC warning, stop before drilling and investigate the area further.
Can pipes fool a stud finder?
Yes. A pipe close to the surface can create a density change that resembles framing to certain electronic detectors.
Check whether the signal continues vertically like a stud and use other information before drilling.
Why does my stud finder not work near windows and doors?
Framing around openings can contain several adjacent studs and large headers, producing broad areas of increased density.
Move away from the opening to establish the normal framing pattern first.
Should I use Deep Scan mode all the time?
No.
Deep mode is designed for thicker wall assemblies on compatible stud finders. On ordinary drywall, extra sensitivity can make readings less precise or make studs appear wider.
Use the mode recommended for the wall you are scanning.
How can I tell if a stud finder reading is real?
Repeat the scan from both directions, check the same location at several heights, and verify with another method such as locating drywall screws with a strong magnet.
A consistent vertical pattern is much more convincing than one isolated beep.
Are studs always 16 inches apart?
No.
Sixteen inches on center is common in U.S. wood framing, but 24-inch spacing and other configurations also exist. Additional framing occurs around doors, windows, corners, and structural features.
Use spacing only as supporting evidence.
Is a magnetic stud finder more accurate than an electronic one?
It works differently rather than being universally more accurate.
A magnet finds steel screws or nails that typically attach wallboard to framing. It is simple and reliable on many drywall walls but may require more time to map the complete stud location.
What should I do if my stud finder cannot get a reliable reading?
Stop relying on repeated uncertain scans. Try a strong magnet, investigate the wall construction, scan from another height or the opposite side, or use a more capable wall scanner.
For heavy or safety-critical mounting, establish the framing location before drilling.
Conclusion
If you are asking why is my stud finder giving false readings, the problem is often not a defective tool. Electronic stud finders respond to changes behind the wall, and many things besides a stud can create those changes.
Incorrect calibration is one of the first things to check. A weak battery, scanning too quickly, poor contact with a textured surface, or using Deep Scan unnecessarily can also make a normally reliable finder behave unpredictably.
The wall itself may be the bigger challenge. Lath and plaster, metal lath, moisture, foil-backed insulation, metallic wall coverings, plywood behind drywall, multiple drywall layers, pipes, wires, and unusual framing can all produce confusing readings.
My preferred approach is to never trust one beep by itself. Scan from both directions, check the suspected stud at several heights, and look for a consistent vertical line. On drywall, use a strong magnet to locate several screws or nails along that same line. When multiple clues agree, you can be much more confident that you have found real framing.
If the detector works consistently on ordinary drywall but not on one particular wall, the wall construction is probably responsible. If it remains erratic everywhere after correct calibration and a fresh battery, the stud finder may need replacement.
Most importantly, remember that finding a stud does not prove the drilling path is free of hazards. Wiring and plumbing can pass through framing, and protective metal plates should never be drilled through simply because they are in the way. Confirm the stud, respect electrical or metal warnings, and investigate unusual resistance before driving a long fastener into a wall.