How to Find Center of Stud: 7 Easy Methods for Accurate Wall Mounting
Learning how to find center of stud is a basic skill that makes wall mounting much safer. Whether you are hanging a TV, shelf, cabinet, grab bar, or heavy mirror, a solid stud gives the screw a strong anchor. The key is not just finding the stud. You also need to know where its center lies.
In most U.S. wood-framed walls, studs are commonly spaced 16 inches on center. Some walls use 24-inch spacing, and older homes may have other layouts. That means spacing can help you predict a stud, but it should not replace checking the wall before you drill.
Why You Need the Center of a Stud
A wood stud is wider than the screw or nail you use to mount an item. If you hit near the edge, the fastener may not have as much wood around it. A center mark gives you the best target for a secure connection.
This matters most for heavy loads. A light picture may need little support, while a large shelf or TV mount can place much more force on the fasteners. Finding the center of the stud also helps prevent missed holes and unnecessary damage to drywall.
When learning how to find center of stud, think of the stud as a rectangle behind the drywall. Your goal is to locate its two side edges. The midpoint between those edges is the center.
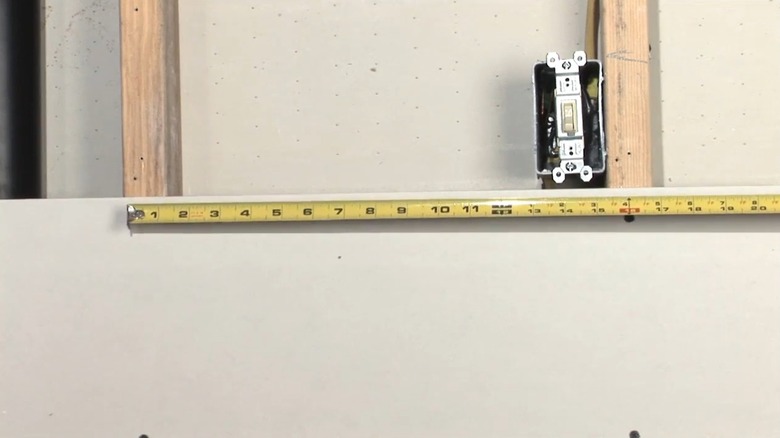
- ✦ Better holding power
A fastener placed near the middle of a wood stud has solid wood around it.
- ✦ Fewer mistakes
A clear center mark reduces the chance of drilling beside the stud.
- ✦ Safer mounting
A confirmed stud location is more dependable than guessing from wall spacing alone.
How Wide Is a Typical Wood Stud?
A common U.S. wall stud is made from a nominal 2-by-4 board. Its actual size is usually about 1.5 inches wide and 3.5 inches deep. New lumber and older framing can vary, so do not assume every wall uses exactly the same size.
The center is halfway across the actual stud width. For a 1.5-inch-wide stud, the center is 0.75 inch from either edge.
How to Find Center of Stud With a Stud Finder
A stud finder is often the fastest tool for this job. Most electronic stud finders detect changes in wall density or material behind the drywall. Many models can indicate the edges or center of a stud.
Start by reading the tool instructions. Some models need calibration while resting on the wall. Move the finder slowly across the surface and mark the point where it first detects the stud.
For better accuracy, do not stop at the first signal. Mark the left edge and right edge of the same stud, then measure between the two marks. Divide that distance by two. Mark that midpoint.
This edge-to-edge check is one of the most useful tips when learning how to find center of stud. It helps catch false readings and gives you a physical center mark instead of relying on one electronic signal.

- ✦ Calibrate first
Follow the stud finder’s instructions so the tool starts with the correct reference.
- ✦ Move slowly
Slow passes help the sensor detect changes more clearly.
- ✦ Mark both edges
Use a pencil to mark where the stud begins and ends along the scan.
- ✦ Measure the midpoint
Measure between the edge marks and divide the distance by two.
How to Avoid False Stud Finder Readings
Electrical wires, pipes, corner framing, changes in drywall thickness, and other materials can affect some stud finders. A single beep or light should not always be treated as proof of a stud.
Scan the area more than once. Check the same location from both directions when possible. If the reading changes in a way that does not match a normal stud width, investigate before drilling.
- ✦ Scan in both directions
A second pass can reveal whether the detected edges stay in the same place.
- ✦ Check the stud width
A normal wood stud should produce a sensible edge-to-edge measurement.
- ✦ Watch for warning signs
Unexpected readings near outlets, switches, plumbing fixtures, or other utility areas deserve extra care.
How to Find Center of Stud Without a Stud Finder
You do not need an electronic tool for every wall. A magnet, tape measure, pencil, and careful observation can often help locate a wood stud. These methods work because drywall is normally attached to the framing with screws or nails.
A strong magnet can help you find those metal fasteners. Move the magnet slowly across the wall until it sticks or pulls toward a fastener. Find several fasteners in a vertical line. That line usually points to the center area of the stud.
Another option is a tiny test hole. Choose a spot where a small mark will be easy to repair, then use a very small drill bit or finishing nail. If you hit wood at the expected depth, you may have found the stud. If the bit passes through the drywall with little resistance, stop and reassess.
When using manual methods, confirm the location more than once. One fastener or one test hole is not enough to prove the full stud position.

- ✦ Use a magnet
Find drywall screws or nails and trace several fasteners that line up vertically.
- ✦ Look for patterns
Outlets, switches, trim, and visible framing can provide clues about stud locations.
- ✦ Make a tiny test hole
A small hole can confirm wood behind drywall when other methods are unclear.
Using a Magnet to Find the Center
A magnet can be a simple and low-cost way to locate drywall fasteners. Once you find several screws or nails in a vertical line, place a pencil mark through the line of fasteners.
This method works best on drywall attached to wood framing with ferrous screws or nails. It may not work well with every fastener, wall covering, or construction method.
Using a Small Test Hole
A small test hole can confirm what lies behind the drywall. Use care, especially in areas where plumbing or electrical wiring may be present. Never drill deeply just to search for a stud.
For a finished wall, choose a test location that will be hidden by the final item or can be patched easily. Stop if you meet unexpected resistance or suspect a utility line.
How to Find Center of Stud Using the 16-Inch Rule
Many U.S. wood-framed walls use studs placed 16 inches on center. This means the center of one stud is 16 inches from the center of the next stud. Some walls use 24-inch spacing, so the rule is a guide rather than a guarantee.
If you know the center of one stud, you can measure 16 inches to find a likely center of the next one. Measure again in the same direction to locate another possible stud.
This is especially useful when a stud finder confirms one location but you need to find several more. Still, verify the predicted locations before driving fasteners into the wall.
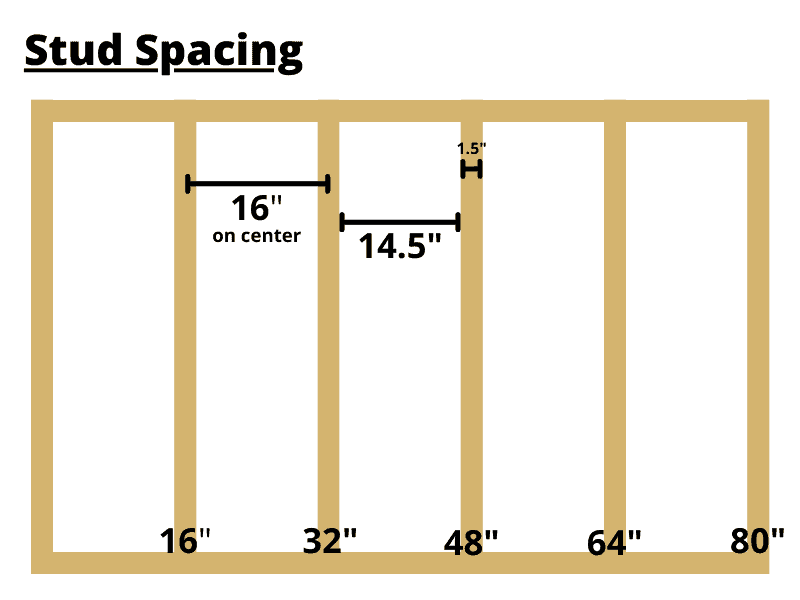
- ✦ 16-inch spacing
A common framing layout places stud centers 16 inches apart.
- ✦ 24-inch spacing
Some walls use studs on 24-inch centers, especially in certain construction layouts.
- ✦ Use measurements as clues
Spacing can predict a location, but physical confirmation is safer before drilling.
What Does On Center Mean?
On center means the distance from the center of one framing member to the center of the next. So 16 inches on center does not mean there is 16 inches of empty space between two studs.
For a typical 1.5-inch-wide stud, the open space between studs in a 16-inch-on-center wall is about 14.5 inches. The exact gap can vary with framing size and construction.
How to Calculate the Exact Stud Center
Once you find both edges of a stud, the math is simple. Measure the distance from the left edge to the right edge. Divide that measurement by two, then measure that half-distance from either edge.
For example, suppose your edge marks are 1.5 inches apart. Half of 1.5 inches is 0.75 inch. Mark a point 0.75 inch from either edge, and you have the stud center.
If your measurements differ from 1.5 inches, use the actual distance you measured. This approach is better than assuming the stud has a standard width.

- ✦ Step 1
Mark the first edge of the stud.
- ✦ Step 2
Mark the second edge of the same stud.
- ✦ Step 3
Measure the distance between the two edge marks.
- ✦ Step 4
Divide the measurement by two and mark that midpoint.
Simple Center Formula
The basic formula is: stud center = first edge + half of the measured stud width. You can use this method for wood studs even when the width is not the standard size.
For example, if the first edge is at 20 inches on your tape and the measured stud width is 1.5 inches, the center is at 20.75 inches.
How to Find Center of Stud in Difficult Walls
Some walls are harder to scan than plain painted drywall. Thick plaster, tile, paneling, textured finishes, insulation, and multiple layers can make electronic readings less clear.
In these cases, use more than one clue. Check for fastener patterns, measure from a known stud, inspect accessible areas, and compare several readings before deciding where the center lies.
Corners and wall intersections also need special attention. Framing at a corner can be wider or arranged differently, so the usual 16-inch pattern may not tell you exactly where the wood sits.
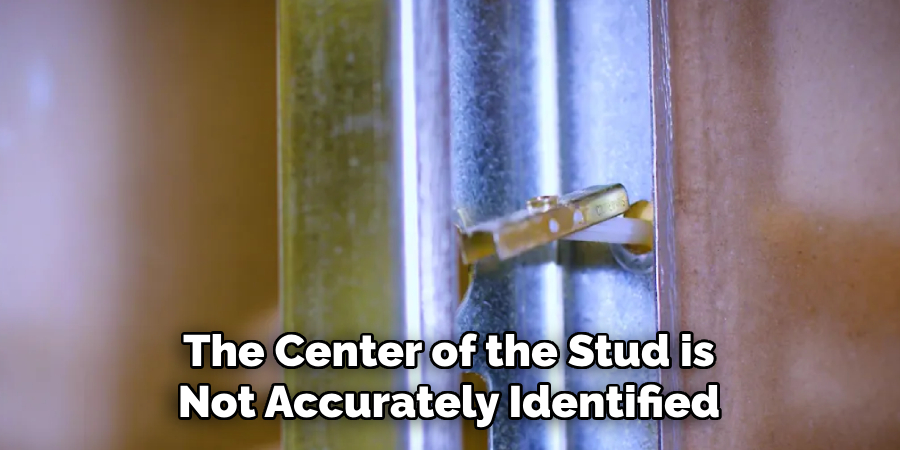
- ✦ Plaster walls
Thicker wall material can make some electronic stud finders less reliable.
- ✦ Tile walls
Tile and backer material can block or change the response of some sensors.
- ✦ Paneling
Extra wall layers can change the depth and density that a stud finder detects.
- ✦ Corners
Corner framing can differ from normal wall framing, so verify the wood before drilling.
How to Find Center of Stud Behind Tile or Thick Material
When a stud is behind tile or another thick surface, do not rely on a single electronic reading. Look for known framing points and use construction clues where available.
If the mounting job is heavy or the wall contains plumbing or electrical systems, consider exposing a small area or using a professional inspection method rather than drilling based on a guess.
How to Confirm the Stud Center Before Drilling
Finding a likely stud is only part of the job. Before you drill, confirm the center with a second method when the project matters. This is especially important for heavy items or holes that will be hard to hide.
One useful check is to scan from the opposite direction. Another is to locate several drywall fasteners. You can also compare the measured stud width with the center mark.
Pay attention to the area around electrical outlets, switches, plumbing fixtures, and other utility locations. A stud may be present, but utilities can also run through or near framing. Do not assume that finding wood means the drilling area is automatically safe.
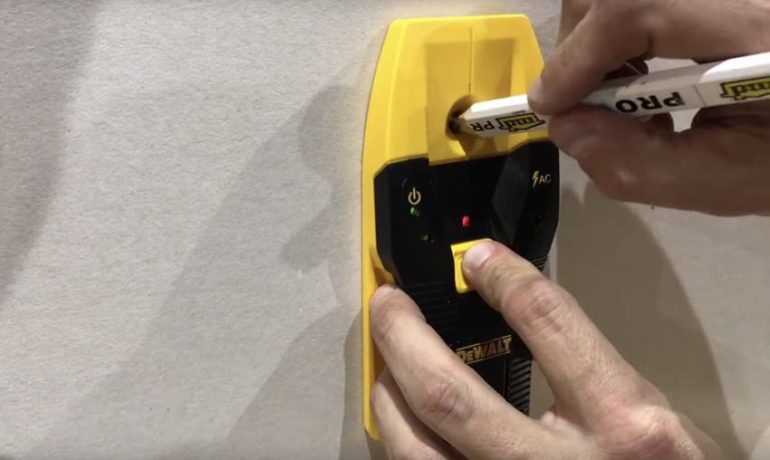
- ✦ Recheck the mark
Scan the same area again and confirm that the center stays in the same location.
- ✦ Use a second method
Pair a stud finder with a magnet, measurement, or visible framing clue when practical.
- ✦ Check the mounting hardware
Make sure the fastener length and type suit the wall material and the item being mounted.
- ✦ Think about utilities
Look for electrical and plumbing warning signs before drilling into any wall.
What to Do If You Find Wood but the Center Seems Wrong
Stop and measure again if your drill meets wood at an unexpected location. You may have found the edge of the stud, a piece of blocking, a corner assembly, or another framing member.
Do not enlarge the hole just to explore. Use another detection method or choose a confirmed location.
Common Mistakes When Finding a Stud Center
The most common mistake is treating the first stud finder signal as the exact center. Many tools detect an edge or a change in density, so the first signal may not represent the middle of the stud.
Another mistake is assuming every wall follows a 16-inch pattern. That spacing is common, but walls can use different layouts. Remodeling, doors, windows, corners, and plumbing can also change the normal pattern.
A third mistake is drilling as soon as a likely location appears. Take a moment to confirm the position, especially when the item is heavy or the hole will be visible.
- ✦ Mistake: trusting one reading
Confirm the result instead of assuming one beep or light proves the exact center.
- ✦ Mistake: relying only on 16 inches
Use common spacing as a guide, then verify the actual framing.
- ✦ Mistake: skipping edge marks
Finding both edges makes it much easier to identify the true midpoint.
- ✦ Mistake: drilling too deep
Use only the depth needed for the mounting task and follow safe drilling practices.
A Better Workflow for DIY Projects
A reliable workflow is simple: locate, mark, measure, confirm, then drill. This takes only a little more time than guessing and can save a damaged wall and a misplaced mount.
For important mounting jobs, make your center mark easy to see but small. A sharp pencil works well because the mark can be erased or covered later.