How to Remove Clutch Nut Without Impact Wrench: A Step-by-Step Guide
If you need to know how to remove clutch nut without impact wrench, you are not stuck just because you lack an air or battery impact tool. A strong hand tool setup can remove many clutch nuts. The key is to stop the clutch from turning while you apply steady force to the nut.
The exact method depends on the motorcycle, ATV, scooter, or other machine. Clutch nuts can use different thread sizes, thread directions, locking methods, and torque values. Before turning anything, check the service manual for your exact model.
A common mistake is to use brute force before securing the clutch. That can damage the clutch basket, primary drive parts, or the nut itself. A controlled setup is usually safer and gives you much better leverage.
What You Need Before Removing the Clutch Nut
The right tools make clutch nut removal much easier. You do not need an impact wrench, but you do need a way to hold the clutch and a way to create enough turning force. A poor tool fit can damage the nut and make the job harder.
Start by cleaning dirt and oil from the area. Then confirm the socket size and inspect the nut for a locking washer, retaining plate, cotter pin, or other locking device. Remove or release the locking feature before trying to loosen the nut.
For anyone learning how to remove clutch nut without impact wrench, tool choice matters more than raw strength. A six-point socket and a breaker bar give a better grip than a loose-fitting wrench.
- ✦ Six-point socket
Use the exact size whenever possible. A six-point socket grips the nut flats well and reduces the chance of rounding the nut.
- ✦ Breaker bar
A long breaker bar gives more leverage than a short ratchet. Use slow, controlled pressure rather than sudden jerks.
- ✦ Clutch holding tool
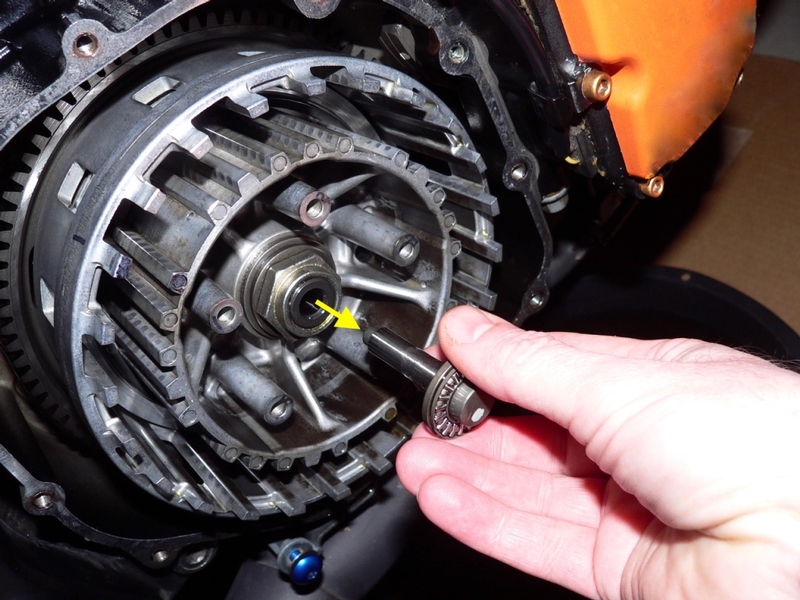
A clutch holder keeps the basket or hub from turning while you loosen the nut. Use a tool made for the clutch design.
- ✦ Torque wrench
You will need a torque wrench when you install the nut again. Use the service-manual torque value for your exact machine.
- ✦ Penetrating oil
A suitable penetrating oil may help with corrosion around exposed threads. Keep fluids away from clutch friction surfaces.
Check the Thread Direction First
Most nuts loosen counterclockwise when viewed from the nut side, but do not assume that every clutch uses a standard right-hand thread. Some assemblies use special thread designs. Confirm the direction in the service manual before applying force.
- ✦ Do not guess
If the nut will not move with reasonable force, stop and confirm the thread direction and locking method instead of increasing force.
How to Remove Clutch Nut Without Impact Wrench
The basic process is simple: expose the nut, remove its lock, hold the clutch, fit the socket, and use a breaker bar. Take your time at each step. The goal is to transfer force into the nut without letting the clutch assembly move.
If you are learning how to remove clutch nut without impact wrench, begin with the machine stable and supported. Follow the service manual for covers, oil draining, and any model-specific clutch removal steps.
Once the socket is fully seated, keep the breaker bar in line with the nut. Apply smooth pressure. If the nut breaks free, remove it by hand and keep track of washers, spacers, and other parts in their original order.

- ✦ 1. Stabilize the machine
Park or support the machine securely. Prevent movement before placing force on the clutch assembly.
- ✦ 2. Expose the clutch nut
Remove the required cover and parts according to the service manual. Keep small parts organized.
- ✦ 3. Release the nut lock
Straighten a locking washer tab or remove another retaining device if the design uses one.
- ✦ 4. Install the clutch holder
Fit the holder so the clutch assembly cannot rotate. Make sure the tool has a solid grip.
- ✦ 5. Seat the socket
Push the correct six-point socket fully onto the nut. Keep it square with the nut.
- ✦ 6. Apply breaker-bar pressure
Pull the breaker bar smoothly in the loosening direction. Use a firm stance and keep your hands clear of pinch points.
- ✦ 7. Remove the nut
Once the nut moves, continue slowly. Set the nut and all related washers or spacers aside in order.
Why a Breaker Bar Works
A breaker bar gives you more leverage because its handle is longer than a typical ratchet. The longer handle lets you create more turning force with the same hand effort. This is why a breaker bar is often the first choice when learning how to remove clutch nut without impact wrench.
- ✦ Use steady force
Slow pressure is easier to control than a sudden jump. It also helps keep the socket seated.
- ✦ Keep the tool aligned
A square socket and straight tool path reduce the chance of slipping or damaging the nut.
What to Do When the Clutch Nut Is Stuck
A stuck clutch nut needs a careful approach. Rust, old thread-locking compound, high installation torque, and years of heat cycles can make a nut very tight. Do not keep adding force without checking why it will not move.
When deciding how to remove clutch nut without impact wrench, first make sure the clutch holder is secure and the socket fits correctly. A secure setup often solves problems that look like a lack of tool power.
If thread-locking compound may be present, controlled heat can sometimes soften it. Use only the temperature and method allowed by the service information, and keep heat away from seals, wiring, bearings, fuel, oil, and other parts that could be damaged.

- ✦ Recheck the socket
A worn or incorrect socket can slip. Replace it with the correct size and type.
- ✦ Inspect the lock
A locking tab or retaining device may still be holding the nut.
- ✦ Use penetrating oil carefully
For exposed corroded threads, a suitable penetrating product may help. Prevent it from reaching clutch friction material.
- ✦ Consider controlled heat
Heat may help release some thread-locking compounds, but follow the manufacturer’s guidance and protect nearby components.
- ✦ Use more leverage only when safe
A longer breaker bar can increase force, but excessive force can damage parts or cause the tool to slip.
When Not to Force the Nut
Stop if the socket starts to climb off the nut, the clutch holder bends, or the nut begins to round. Also stop if the assembly starts moving in an unexpected way. These signs mean the setup needs to be corrected before more force is applied.
- ✦ Rounded nut
Do not keep using a standard socket on a badly damaged nut. A proper extraction method may be needed.
- ✦ Damaged clutch holder
Replace or reposition a holder that does not provide a solid grip.
Alternative Ways to Hold the Clutch
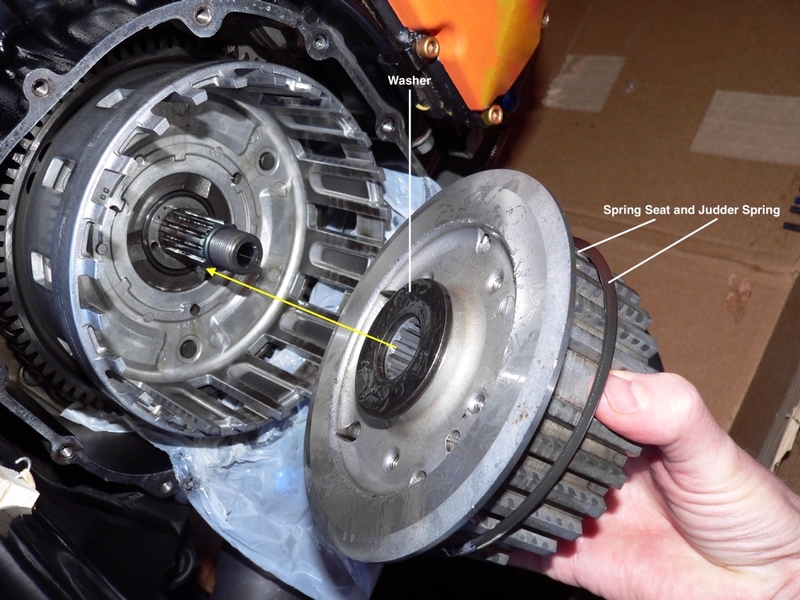
The clutch must stay still while the nut turns. This is one of the most important parts of learning how to remove clutch nut without impact wrench. The correct holder depends on whether the clutch basket, hub, or another part must be held.
A purpose-made clutch holding tool is usually the cleanest choice. Some designs allow a holder to grip the basket teeth, while others use a tool that fits the clutch hub. Follow the tool maker’s instructions and your vehicle’s service procedure.
Avoid methods that can bend the basket or damage gear teeth. Do not place random objects between gears just to stop rotation unless the service manual specifically allows that method.
- ✦ Universal clutch holder
An adjustable holder can work with many clutch basket designs when it fits securely.
- ✦ Model-specific holder
A tool made for your machine often provides a more secure fit and can reduce the chance of damage.
- ✦ Manufacturer-approved method
Some machines have a special procedure for locking the clutch. Follow that method instead of improvising.
Why Improvised Locking Methods Can Fail
The clutch basket and primary drive parts are designed to transmit engine power, but that does not mean every part can safely resist a large removal load at an odd angle. A makeshift holder can put force on thin or brittle areas. If you need extreme force, use a proper holder or get professional help.
- ✦ Protect the basket
Do not clamp or pry against areas that can bend or crack.
- ✦ Protect the gears
Do not jam hard objects between gear teeth unless the service procedure specifically calls for it.
Safety Tips for Manual Clutch Nut Removal
Manual clutch nut removal can require high force, so safety matters. Wear eye protection and keep your body out of the likely path of the breaker bar if the tool slips. Make sure the machine cannot fall or roll while you work.
Do not use a cheater pipe unless the tool maker allows it and the setup can safely handle the added load. Extra leverage can exceed the rating of a socket, breaker bar, extension, or clutch holder.
If the nut remains stuck after you have checked the thread direction, locking method, socket fit, and holder, stop and consult the service manual or a qualified technician. Knowing when to stop is part of good mechanical work.

- ✦ Wear eye protection
Protect your eyes from tool slips, broken parts, and debris.
- ✦ Use stable support
Keep the motorcycle, ATV, scooter, or other machine firmly supported.
- ✦ Inspect your tools
Do not use cracked sockets, damaged breaker bars, bent holders, or badly worn extensions.
- ✦ Keep hands clear
Place your hands where a sudden tool movement will not trap them against the machine.
- ✦ Follow the manual
Use the specified removal procedure, thread direction, replacement parts, and final torque value.
Do Not Guess the Final Torque
Removing the nut is only half the job. During reassembly, the clutch nut must be tightened to the correct specification for the exact model. Too little torque can allow movement, while too much torque can damage threads or parts.
- ✦ Use the service manual
Find the exact torque specification for your model and engine.
- ✦ Use a torque wrench
Set the wrench to the specified value and use the correct tightening procedure.
Common Mistakes to Avoid
Many clutch nut problems come from simple setup errors. Before using more force, check the socket, holder, locking device, and thread direction. This approach can prevent expensive damage.
Another common mistake is using a hammer on a ratchet. A ratchet is made for turning, not for repeated impact loads. If you need shock or impact, use a tool designed for that job.
When learning how to remove clutch nut without impact wrench, focus on control. A good setup with the correct tools is more useful than trying to overpower the nut.

- ✦ Using the wrong socket
The wrong size can round the nut and make later removal much harder.
- ✦ Skipping the locking device
A bent lock tab or retaining feature can make the nut appear seized.
- ✦ Holding the clutch poorly
If the clutch turns with the nut, the removal force cannot work efficiently.
- ✦ Pulling at an unsafe angle
An angled pull can make the socket slip and may cause injury.
- ✦ Overheating nearby parts
Too much heat can damage seals, wiring, bearings, paint, oil, or clutch components.
- ✦ Ignoring model-specific instructions
Clutch designs vary, so a method that works on one machine may not be safe on another.
A Simple Troubleshooting Order
If the nut will not move, work through the problem in order. Confirm the thread direction first. Then check the lock, socket, clutch holder, tool alignment, and possible thread-locking compound before increasing force.
- ✦ First
Confirm the nut is meant to loosen in the direction you are turning.
- ✦ Second
Confirm every locking feature has been released.
- ✦ Third
Check that the clutch holder and socket are secure.
- ✦ Fourth
Use controlled leverage or an approved heat method if the service procedure allows it.