How to Remove Flywheel Nut Without Impact Wrench: A Step-by-Step Guide
If you need to know how to remove flywheel nut without impact wrench, you do not need a shop full of power tools. A good socket, a solid breaker bar, and a safe way to hold the flywheel can often do the job. This is useful for many small engines, lawn equipment, motorcycles, ATVs, and other machines.
The key is not brute force. The flywheel can spin, the crankshaft can turn, and some nuts may have unusual thread directions. Before you start, check the service manual for your exact engine. It can tell you the nut size, thread direction, torque value, and approved way to hold the flywheel.
What You Need Before Removing the Flywheel Nut
Good preparation makes flywheel nut removal much easier. Use a socket that fits the nut fully. A six-point socket is often a good choice because it grips the flat sides of the nut and helps reduce damage.
You also need a way to keep the flywheel from turning. The best method depends on the machine. A purpose-made flywheel holder is a strong choice, but some engines allow another approved holding method. Never rely on your hand or a loose strap to stop a flywheel from spinning.

- ✦ Correct socket
Use the exact size needed for the flywheel nut. A loose socket can round the nut.
- ✦ Breaker bar
A breaker bar gives you more leverage than a short ratchet.
- ✦ Flywheel holder
Use a tool made for the flywheel when possible. It gives you a firm and controlled hold.
- ✦ Penetrating oil
A small amount may help if corrosion has made the nut hard to turn.
- ✦ Safety gear
Wear eye protection and keep your hands clear of pinch points.
Check the Thread Direction First
Most flywheel nuts use a normal right-hand thread, but you should never assume that every engine does. Some designs may use a left-hand thread. If you turn a nut the wrong way with a long breaker bar, you can damage the fastener or another engine part.
Find the exact procedure for your engine before applying force. The service manual is the best source for this detail.
- ✦ Normal thread
A standard right-hand thread loosens when you turn the nut counterclockwise as viewed from the nut.
- ✦ Special thread
Some machines can use a different thread setup. Follow the manufacturer’s instructions.
How to Remove Flywheel Nut Without Impact Wrench Step by Step
The basic process is simple. Disconnect the engine from its power source, expose the flywheel, confirm the thread direction, hold the flywheel safely, and apply steady force to the nut. Work slowly so you do not damage the crankshaft, flywheel, or nut.
When learning how to remove flywheel nut without impact wrench, steady leverage usually works better than sudden movement. A breaker bar lets you build force in a controlled way. If the nut does not move, stop and find out why instead of adding unsafe force.
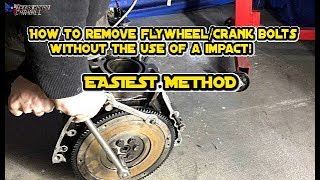
- ✦ 1. Disconnect power
Remove the spark plug wire on a small gasoline engine and follow the machine’s shutdown procedure. For electric or battery equipment, disconnect the proper power source.
- ✦ 2. Expose the flywheel
Remove the cover or other parts that block access. Keep removed hardware together so it can be replaced correctly.
- ✦ 3. Clean the nut
Brush away dirt and rust around the nut and shaft. This helps the socket seat fully.
- ✦ 4. Confirm the socket
Push the correct six-point socket fully onto the nut. Make sure it sits straight.
- ✦ 5. Hold the flywheel
Use the manufacturer’s recommended holder or another safe method designed for that machine.
- ✦ 6. Fit the breaker bar
Place the breaker bar on the socket and keep it aligned with the nut.
- ✦ 7. Apply steady force
Push smoothly in the loosening direction. Keep your body balanced and avoid sudden jerks.
- ✦ 8. Remove the nut by hand
Once the nut breaks loose, remove the breaker bar and spin the nut off by hand or with a ratchet.
Use a Breaker Bar for More Leverage
A breaker bar is often the simplest answer when an impact wrench is not available. Its longer handle gives you more leverage, so you can produce more turning force with less effort.
Keep the socket square on the nut as you work. If the bar starts to move at an odd angle, reset it. This reduces the chance of slipping or damaging the nut.
- ✦ Use controlled force
Increase pressure gradually rather than jumping on the bar.
- ✦ Keep the socket straight
A straight socket connection helps prevent slipping and rounded corners.
Try a Longer Handle Only When It Is Safe
More leverage can help, but adding a random pipe to a tool can exceed its safe load. A long breaker bar designed for high torque is a better choice than an improvised extension.
If the nut still will not move, stop and inspect the setup. The problem may be corrosion, a damaged thread, a wrong thread direction, or a flywheel that is not being held correctly.
- ✦ Preferred approach
Use a breaker bar rated for the work rather than an improvised tool extension.
- ✦ Know when to stop
Stop if the socket starts to slip, the nut begins to round, or the flywheel holder moves.
How to Hold the Flywheel Safely
Holding the flywheel is one of the most important parts of this job. If the flywheel turns while you pull on the breaker bar, the crankshaft can rotate with it. A poor holding method can also damage the flywheel fins or create a pinch point.
A purpose-built flywheel holder is usually the safest choice when one is available for your machine. Some manufacturers give a specific procedure for holding the flywheel or crankshaft. Follow that procedure rather than copying a method from another engine.

- ✦ Use a proper holder
A flywheel holding tool is designed to resist rotation without relying on fragile flywheel parts.
- ✦ Follow the manual
The manufacturer’s procedure should take priority over general repair tips.
- ✦ Avoid fragile fins
Do not clamp or pry against thin cooling fins unless the manufacturer specifically allows that method.
- ✦ Watch your hands
Keep fingers away from the space between the breaker bar, flywheel, frame, and other fixed parts.
Why Holding the Flywheel Matters
The nut is tightened against the flywheel and crankshaft. When you turn the nut, the flywheel may simply turn with it unless you hold the rotating assembly. That is why even a strong breaker bar may seem useless when the flywheel is free to spin.
A stable setup also gives you better control. You can apply force to the nut without fighting the movement of the whole engine.
- ✦ Better control
A stable flywheel lets you use slow, steady pressure.
- ✦ Less damage
The correct holding method protects the flywheel, crankshaft, and surrounding parts.
What to Do When the Flywheel Nut Is Stuck
A stuck flywheel nut can need more care than more force. Rust, dirt, old thread-locking compound, and years of high engine heat can make the nut hard to remove. First check that you have the right socket, the right direction, and a solid flywheel hold.
If corrosion is present, apply a suitable penetrating oil around the nut and let it work according to the product directions. Clean the area before trying again. Do not soak parts that could be harmed by the product.
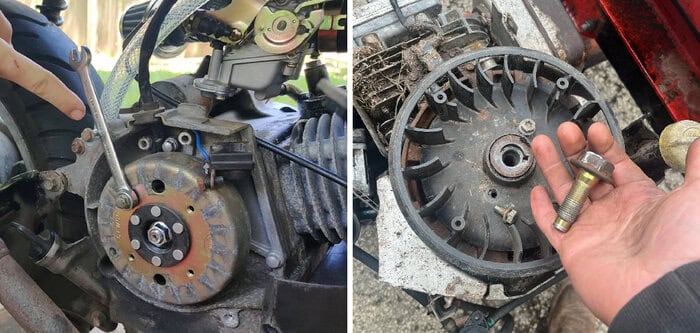
- ✦ Clean the threads
Remove loose rust and dirt from the exposed area around the nut.
- ✦ Use penetrating oil
Apply it sparingly and give it time to work when corrosion is suspected.
- ✦ Check for thread locker
Some manufacturers use thread-locking products. Follow the service procedure before using heat.
- ✦ Inspect the nut
If the corners are already damaged, stop before the socket makes the problem worse.
Can Heat Help?
Heat can sometimes help release a stubborn fastener, but it is not a first choice for every flywheel. The flywheel, magnets, seals, wiring, fuel, and nearby parts may be sensitive to heat. Some components can also be damaged by an open flame.
Only use heat when the service information allows it and you understand what is near the fastener. If you are unsure, use a mechanical method or have a qualified technician handle the stuck nut.
- ✦ Use caution
Keep heat away from fuel, wiring, seals, paint, and other heat-sensitive parts.
- ✦ Avoid open flames near fuel
Fuel vapors can ignite. Do not use a torch around a fuel system or other flammable material.
How to Remove a Flywheel Nut Without Damaging It
A damaged nut can turn a simple repair into a much harder job. The most common mistake is using a socket that is slightly too large or poorly seated. Another is pulling at an angle until the socket slips.
When learning how to remove flywheel nut without impact wrench, focus on a clean, direct connection. A quality six-point socket and a breaker bar give you a much better setup than a worn socket and a short ratchet.
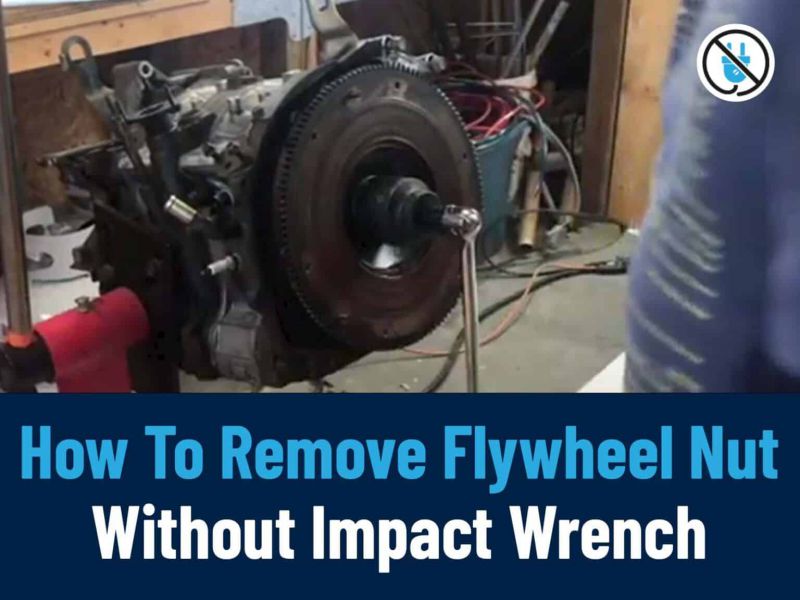
- ✦ Use a six-point socket
It grips the flat sides of many hex nuts more securely than a twelve-point socket.
- ✦ Seat the socket fully
Make sure the socket reaches the nut completely before applying force.
- ✦ Keep the tool aligned
Hold the breaker bar in line with the socket and nut.
- ✦ Replace damaged tools
A worn socket can slip even when the size is correct.
What If the Nut Starts to Round?
Stop as soon as the corners begin to deform. Repeated attempts with the same socket can make the nut harder to remove. A professional may use a dedicated extraction socket or another method suited to the damaged fastener.
Do not cut or grind near the crankshaft or flywheel unless you have a repair procedure that supports it. Damage to the shaft or flywheel can cost much more than replacing the nut.
- ✦ Stop early
Do not keep pulling when the socket is no longer gripping the nut.
- ✦ Use the right extractor
A purpose-made extraction socket may be safer than repeated attempts with a standard socket.
How to Remove the Flywheel After the Nut Comes Off
Removing the nut does not always mean the flywheel will come off easily. Many flywheels sit tightly on a tapered crankshaft. Do not pry hard against the flywheel or strike the crankshaft directly.
If the flywheel is held by a taper, the correct puller is usually the safest way to separate it. Use the puller made for the flywheel when possible, and follow the manufacturer’s instructions for installation and removal.

- ✦ Use the correct puller
A flywheel puller applies force in the right place and helps protect the crankshaft and flywheel.
- ✦ Protect the crankshaft
Do not hammer directly on the crankshaft threads.
- ✦ Do not pry against fragile parts
Prying can bend the flywheel or damage the engine case.
- ✦ Keep track of key parts
Note the position of washers, keys, spacers, and other parts before removal.
Do Not Confuse the Nut With the Flywheel
The flywheel nut holds the flywheel on the crankshaft, but removing the nut does not remove the flywheel itself. A flywheel can remain firmly seated because of its tapered fit.
If you need to remove the flywheel, check whether your engine needs a specific puller. The wrong removal method can damage a flywheel, crankshaft, bearing, or engine case.
- ✦ Nut removal
A socket and breaker bar are used to remove the retaining nut.
- ✦ Flywheel removal
A suitable puller may be needed after the nut is removed.
Common Mistakes to Avoid
Most failed attempts at flywheel nut removal come from a poor setup rather than a lack of strength. The nut may be the wrong size, the flywheel may not be held correctly, or the mechanic may be turning it in the wrong direction.
Avoid shortcuts that can damage the engine. If you are unsure about the thread direction, torque specification, or holding method, stop and check the service information for the exact model.
- ✦ Using the wrong socket
Even a small size mismatch can damage the nut.
- ✦ Holding the flywheel by the fins
Thin fins can bend or break when used as a force point.
- ✦ Using a regular ratchet for extreme force
A breaker bar is better suited to controlled high-leverage work.
- ✦ Guessing the thread direction
Confirm the direction before pulling hard.
- ✦ Striking the crankshaft
Direct impacts can damage threads or internal engine parts.
- ✦ Using unsafe heat
Open flames can create a serious fire risk around fuel and vapors.
- ✦ Ignoring the service manual
The exact engine may have special removal steps that general advice does not cover.
When Should You Stop and Get Help?
Stop if the nut is badly rounded, the flywheel holder will not stay secure, the crankshaft threads look damaged, or the required torque seems beyond your tools. These signs can point to a problem that needs a different repair method.
Professional help can also make sense when the machine is valuable or when the flywheel has a complicated ignition or timing system. A damaged crankshaft or flywheel can cost far more to repair than a difficult nut.
- ✦ Damaged fastener
Get help when normal sockets can no longer grip the nut.
- ✦ Unsafe setup
Stop if the engine or flywheel cannot be held securely.
- ✦ Unknown procedure
Check the service manual or consult a qualified mechanic when the design is unfamiliar.
How to Tighten the Flywheel Nut After Removal
Getting the nut off is only half of the repair. When you reinstall it, use the manufacturer’s torque specification. Do not guess the final torque because the flywheel nut may be important to crankshaft and flywheel alignment.
Clean and inspect the mating surfaces before reassembly. Replace damaged hardware when the service procedure calls for it. If the manual specifies thread locker, washer replacement, or a special tightening sequence, follow those instructions.
- ✦ Check the threads
Make sure the nut and crankshaft threads are clean and undamaged.
- ✦ Check the flywheel
Inspect the flywheel, key, taper, and mating surfaces for damage.
- ✦ Use a torque wrench
Tighten the nut to the exact specification given for your engine.
- ✦ Follow the manual
Use the specified washer, thread treatment, and tightening procedure.
Why Correct Torque Matters
Too little torque can allow the connection to loosen or move. Too much torque can stretch the fastener, damage threads, or create other mechanical problems.
A torque wrench is the right tool for final tightening. A breaker bar is useful for loosening, but it should not replace the specified torque procedure during assembly.
- ✦ Use the exact value
Torque values vary by engine and fastener, so use the value for your specific model.
- ✦ Do not guess
If you cannot find the correct specification, obtain the service information before reassembly.
A Simple Tool Setup for Flywheel Nut Removal
For many home repairs, you can remove a flywheel nut without owning an impact wrench. The core setup is a correctly sized six-point socket, a breaker bar, and a safe flywheel holding tool. A torque wrench is also useful when you put the nut back on.
This approach is especially practical for a garage or home workshop where an impact wrench may not be available. It gives you control and lets you feel whether the fastener is starting to move or something in the setup is slipping.
- ✦ Socket
Choose a high-quality socket that fits the flywheel nut exactly.
- ✦ Breaker bar
Use a sturdy breaker bar for controlled leverage.
- ✦ Flywheel holder
Use a suitable holder to prevent the flywheel from turning.
- ✦ Torque wrench
Use it for final tightening during reassembly.
- ✦ Service information
Keep the correct repair manual or manufacturer’s specifications nearby.
Why You May Not Need an Impact Wrench
An impact wrench makes fastener removal quick, but it is not the only way to remove a flywheel nut. A breaker bar uses simple leverage and can provide enough force for many applications.
The important part is the setup. If the flywheel is held correctly and the socket fits well, hand tools can provide a controlled way to break the nut loose.
- ✦ Lower tool cost
Basic hand tools can be enough for many occasional repairs.
- ✦ More control
A breaker bar lets you apply force slowly and stop when something does not look right.