How to Fix Impact Wrench: Problems, Causes, and Helpful Solutions
Most impact wrench problems can be fixed by identifying whether the tool has a power-supply issue, an air or battery problem, a jammed mechanism, or internal wear. Start with safe cleaning, connection checks, lubrication where appropriate, and simple replacement parts before opening the housing.
There is no single repair for every impact wrench because a cordless model, pneumatic model, and corded electric model fail in different ways. A wrench that spins but will not remove a lug nut may need a charged battery or adequate air pressure, while one that runs slowly, leaks, overheats, or makes grinding noises may have a mechanical or electrical fault. This article explains the relevant causes, conditions, limitations, and safety details so a quick adjustment is not mistaken for a repair that requires professional service.
What should you check if the wrench worked yesterday but now only clicks, turns weakly, or stops under load? The answer depends on the symptom and the tool’s power source. You will learn how to diagnose no-start conditions, low torque, air leaks, battery faults, stuck sockets, unusual noise, and overheating; which fixes are reasonable at home; and when replacing a part or contacting a qualified repair shop is the safer decision.
Start With a Safe Inspection
Disconnect the tool before inspecting it. Remove the battery from a cordless wrench, unplug a corded model, and shut off or disconnect the air supply from a pneumatic wrench. Never test a suspected electrical fault while the tool is open or wet.
Look for cracked housing, a bent drive anvil, damaged wiring, loose terminals, oil contamination, and signs of impact damage. Check the square drive and retaining ring as well as the socket. A damaged socket can slip or bind and may make a healthy wrench appear defective.
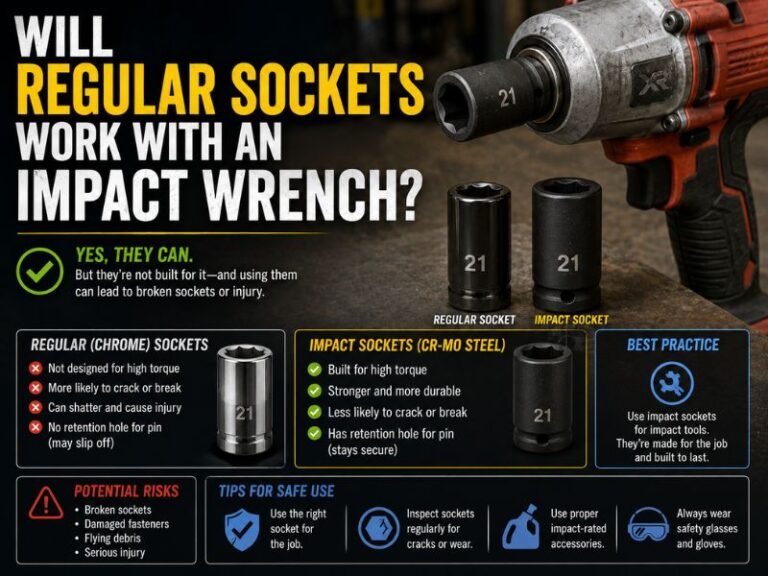
Use the correct impact-rated socket rather than a chrome hand-tool socket. Keep fingers away from the trigger and rotating parts, and wear eye protection when working with compressed air or removing a stuck attachment. If the tool has exposed electrical damage, a burning smell, melted insulation, or a swollen battery, stop troubleshooting and arrange professional service.
Identify the Symptom Before Choosing a Fix
Many unsuccessful repairs begin with replacing a part before confirming the fault. First note exactly what happens when the trigger is pressed: no response, a click, normal rotation with low force, intermittent operation, air leakage, excessive vibration, or a complete stall.
- No operation: Check the battery, charger, power cord, trigger, air supply, and internal switch.
- Runs but has little torque: Inspect the power source, speed setting, socket fit, lubrication, and impact mechanism.
- Stops under load: Look for voltage drop, inadequate air volume, thermal protection, a weak battery, or internal wear.
- Leaks air or oil: Inspect fittings, hoses, seals, and the lubrication system.
- Grinds, rattles, or vibrates: Stop using it until the socket, drive, bearings, and internal impact components are checked.
The tool’s manual is important for model-specific oil, disassembly instructions, torque settings, and replacement parts. Similar-looking impact wrenches may use different lubrication points and may not tolerate the same cleaners or replacement components.
How to Fix a Cordless Impact Wrench
Check the battery and charger
A cordless impact wrench that will not start often has a battery problem rather than a failed motor. Remove and reinstall the battery firmly, inspect the contacts for dirt or corrosion, and try a known-good compatible battery if one is available.
Confirm that the charger recognizes the battery and completes its charging cycle. A charger light that flashes an error, a battery that becomes unusually hot, or a pack that will not accept a charge can indicate a failed cell or protection circuit. Do not open or rebuild a lithium-ion battery pack unless you are trained and equipped to handle its fire and shock risks.
Clean light contact contamination with a dry cloth. Do not scrape terminals aggressively or apply water, grease, or an unapproved solvent. If the tool works with another battery but not the original, replace the battery with the correct voltage and model-compatible pack.
Inspect the control and direction switch
Check whether the forward/reverse selector is centered in a lock position. Some tools will not run when the selector is between settings. Move it fully into forward or reverse, then press the trigger gently.
If the trigger feels loose, sticks, or works only when pressed at an angle, the trigger switch or electronic control may be worn. Do not bypass the switch or connect wires directly to make the motor run. That can defeat overload protection and create an electric shock, fire, or runaway-tool hazard.
Address weak cordless performance
When the wrench spins but cannot loosen a fastener, use a fully charged battery and check whether the tool has a selectable power mode. A low-power setting, cold battery, or battery nearing the end of its service life can greatly reduce performance.
Allow an overheated tool or battery to cool naturally. Repeatedly pulling the trigger after thermal protection activates can damage the motor or electronics. If the wrench remains weak with a healthy battery and correct setting, worn brushes, a damaged motor, a faulty controller, or a worn impact assembly may require parts replacement by a qualified technician.
How to Fix a Pneumatic Impact Wrench
Verify pressure and air volume
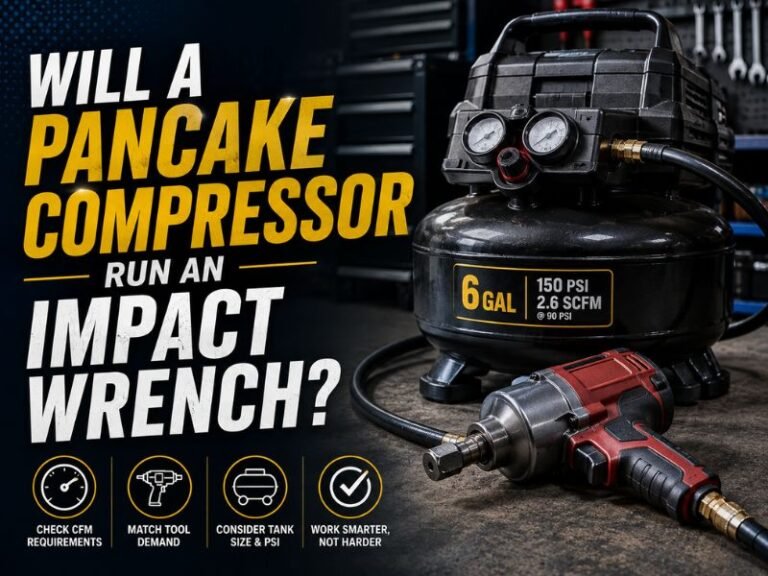
A pneumatic impact wrench needs more than a high pressure reading at the compressor. The hose, couplers, regulator, filter, and compressor must deliver enough air volume under load. A narrow hose, restrictive fitting, clogged filter, or long undersized line can cause the wrench to spin freely but lose force when it contacts a fastener.
Check the pressure at the tool while the trigger is pressed, following the tool manufacturer’s specification. Do not simply raise the regulator beyond the rated limit. Excessive pressure can damage seals, increase wear, and create a safety risk without solving an air-volume restriction.
Inspect the hose for kinks, splits, and soft sections. Listen for leaks around the coupler, inlet, trigger, and housing. Replace damaged hoses or worn fittings rather than wrapping a temporary repair around a high-pressure connection.
Lubricate the air motor correctly
Many pneumatic impact wrenches need a small amount of manufacturer-approved pneumatic oil through the air inlet. Disconnect the air line, add the specified amount, reconnect the tool, and run it briefly as directed by the manual. Too little oil increases friction; too much can contaminate the exhaust and interfere with operation.
Do not substitute motor oil, penetrating oil, or general-purpose grease unless the manufacturer specifically permits it. Some impact mechanisms use separate grease or oil from the air motor, and adding lubricant to the wrong location can cause damage or reduce hammer action.
Find the source of low impact force
If air supply and lubrication are correct but the wrench lacks torque, worn vanes, damaged seals, a clogged inlet screen, or a worn impact mechanism may be responsible. A tool that leaks continuously from the exhaust or turns slowly may need an air-motor rebuild, while a tool that spins normally but delivers weak blows may have internal hammer or anvil wear.
Internal pneumatic repairs require clean work conditions and model-specific parts. Dirt inside the motor can cause further damage, so disassemble the tool only if the manual provides clear instructions and you can identify every seal, vane, washer, and lubrication point.
How to Fix a Corded Electric Impact Wrench
First inspect the outlet, extension cord, plug, and strain relief. Test the outlet with another suitable device, and avoid a long or undersized extension cord because voltage drop can make the motor weak and hot.
Examine the cord for cuts, crushed sections, exposed conductors, or heat discoloration. A damaged cord should be replaced properly, not repaired with tape. If the wrench works intermittently when the cord is moved, unplug it immediately; that symptom often indicates a broken conductor near the plug or handle.
A corded wrench that hums without turning may have a seized mechanism, failed switch, damaged motor, or electrical fault. Do not keep holding the trigger while it hums, since the motor can overheat quickly. Internal switch, brush, capacitor, or armature repairs should follow the service manual and be performed only by someone qualified to work safely on mains-powered equipment.
Fix a Stuck Socket or Drive Anvil
A socket can become stuck because of rust, a damaged retaining ring, side loading, or a fastener that has twisted inside it. Disconnect the tool and support it securely before attempting removal. Do not strike the battery, motor housing, or trigger area with a hammer.
Apply a suitable penetrating product to the socket-to-anvil area and allow time for it to work. Use controlled hand force with pliers or a socket-removal tool while holding the anvil securely. If the socket is cracked or badly distorted, replace it rather than trying to reuse it.
Inspect the square drive anvil after removal. Rounded corners, a missing retaining ring, excessive play, or a bent drive can prevent proper socket engagement. A worn anvil may need replacement; continued use can throw the socket or damage the fastener.
Deal With Noise, Heat, and Vibration
Some noise is normal during impact operation, but a new grinding, screeching, clicking, or rattling sound is not. Stop the tool and check the socket, retaining ring, drive, and fastener alignment before assuming the motor is defective.
Excessive heat may result from overload, poor ventilation, low voltage, restricted air, insufficient lubrication, or failing bearings. Let the tool cool, clean its vents or air inlet, and correct the supply problem. Never cover ventilation openings or cool a hot tool with water.
Strong vibration can indicate a bent anvil, damaged socket, loose internal component, worn bearing, or impact mechanism failure. If vibration continues without an obvious external cause, professional inspection is safer than continued use. Internal parts can fail suddenly and send fragments or the socket outward.
When Repair Is Not the Best Option
Basic maintenance and external part replacement are often practical. Battery replacement, air-hose replacement, socket replacement, cleaning, and approved lubrication may restore normal operation without opening the tool.
Replacement is usually more sensible when the housing is cracked, the motor and controller are both damaged, the battery pack is unsafe, or repair parts and labor approach the cost of a comparable new tool. A tool that has suffered water intrusion may have hidden corrosion even if it temporarily starts again.
Send the wrench to an authorized or qualified repair service when it has an electrical burning odor, exposed mains wiring, a swollen battery, severe internal noise, repeated thermal shutdown, or a failure that remains after basic checks. Keep the model and serial information available so the correct parts and service procedure can be identified.
Essential Checks Before Using It Again
- Confirm that the housing, cord, battery, hose, coupler, and drive are undamaged.
- Use only a compatible battery, charger, air supply, lubricant, and impact-rated socket.
- Test the wrench briefly without a fastener, listening for abnormal noise or vibration.
- Run a pneumatic tool at the specified pressure and check for leaks.
- Keep hands, clothing, and hair away from the rotating drive.
- Use eye protection and follow the fastener manufacturer’s tightening procedure.
- Stop immediately if the tool smells burnt, overheats, sparks, or behaves unpredictably.
FAQ About Fixing an Impact Wrench
Why does my impact wrench turn on but not remove
Low battery charge, insufficient air volume, the wrong power setting, or a worn impact mechanism are common causes. Confirm that the socket fits correctly, the battery is charged, or the air pressure remains adequate while the trigger is pressed. If the wrench spins normally but produces little impact force after those checks, internal wear is likely.
How do I fix an impact wrench that will not
Check the power source and control lock before opening the tool. Install a charged compatible battery, test the charger and contacts, inspect a cord and outlet, or verify the pneumatic connection. If the trigger, switch, controller, or wiring is damaged, do not bypass it; arrange a qualified repair.
Can I use WD-40 to lubricate a pneumatic impact wrench?
Use the pneumatic oil specified for the tool instead of a general-purpose spray. The correct oil protects the air motor and seals, while an unsuitable product may provide poor lubrication or damage components. Follow the manual for the amount and location of lubricant.
Why does my pneumatic impact wrench leak air?
Leaks commonly come from the coupler, hose, inlet fitting, trigger valve, or worn internal seals. Disconnect the air supply, inspect each external connection, and replace damaged fittings or hoses. A continuous leak from the housing or exhaust usually needs a seal or air-motor repair.
Why does my cordless impact wrench stop after a few
Thermal protection, a weak battery, overload, or a controller fault can cause repeated shutdown. Let the tool and battery cool, try a known-good compatible battery, and reduce the load during testing. Continued shutdown with a healthy battery indicates a service issue rather than a condition to override.
Is it safe to repair an impact wrench myself?
External maintenance and approved replacement parts are generally safer than electrical or internal mechanism repairs. Unplug or disconnect the tool before inspection, and never open a swollen battery or bypass a safety switch. Professional help is appropriate for mains wiring, burnt electronics, severe mechanical damage, and unexplained overheating.
Use the Symptom to Choose the Next Step
To fix an impact wrench, begin with the simplest likely cause: battery or outlet, air delivery, socket fit, switch position, lubrication, and visible damage. A weak tool may need better power delivery, while grinding, overheating, electrical odor, or internal vibration points to a repair that should not be delayed.
The major limitation is that internal faults cannot be diagnosed reliably from sound or appearance alone, and lithium batteries and mains-powered components carry serious risks. Perform the external checks, test the tool briefly and safely, then replace a clearly failed accessory or take the wrench to a qualified repair service when the fault involves internal parts.