How to Lubricate Impact Wrench: A Practical Step-by-Step Guide
Lubricate an impact wrench according to its power source and lubrication points: add pneumatic tool oil through the air inlet for an air-powered model, and use the manufacturer-specified grease or oil for the anvil and impact mechanism. Do not put oil into a cordless or corded electric motor unless the manual specifically directs you to do so. This guide explains the right lubricant, preparation, application points, frequency, and warning signs so you can service the tool without damaging seals, clutches, or electrical components.
A dry tool does not always announce the problem immediately; a little extra noise or slower operation may simply reflect normal wear, a restricted air supply, or a low battery. The familiar assumption that “more lubricant means more protection” can be just as harmful as neglect, because excess grease may interfere with the impact mechanism while oil in the wrong location can contaminate an electric motor.
Pay attention to the difference between harmless residue and a real service issue. After reading, you will know how to lubricate an impact wrench safely, how to separate air-tool lubrication from gearcase maintenance, which symptoms call for cleaning or repair, and when a sealed electric tool should be left unopened.
Identify the Impact Wrench Before Adding Lubricant
The first step is identifying whether the wrench is pneumatic, cordless electric, or corded electric. These designs do not share the same lubrication routine, and treating them as interchangeable is the most common cause of incorrect maintenance.
A pneumatic impact wrench uses compressed air to drive its motor and impact mechanism. It normally needs a small amount of air-tool oil delivered through the air inlet, along with periodic lubrication of the impact mechanism if the manufacturer provides a grease fitting, removable housing, or service procedure.
A cordless or corded electric wrench usually has an electric motor, gears, bearings, and an impact assembly. The motor may be designed to run without user-applied oil, while the gears and hammer mechanism may contain factory grease. Opening the housing or adding general-purpose lubricant can damage insulation, attract abrasive dust, or void the warranty.
Read the owner’s manual before selecting a product. Look specifically for instructions covering the air inlet, anvil, impact mechanism, grease type, service intervals, and whether the gearcase is sealed.
What Lubricant Does an Impact Wrench Need?
For a pneumatic tool, use clean oil labeled for pneumatic tools or air tools. This oil is formulated to move through the air motor, coat internal vanes and bearings, and tolerate the operating conditions inside the tool. General motor oil, penetrating oil, brake fluid, and household spray lubricants are poor substitutes.
The air motor and the impact mechanism may use different lubricants. Air-tool oil belongs in the air inlet unless the manual says otherwise. The hammer and anvil assembly generally needs a heavier impact-tool grease, not a thin oil, because grease stays in place under repeated high-force impacts.
Electric models require more caution. Some manufacturers specify a particular grease for the front gearcase or impact assembly, but many consumer tools are not intended for routine user lubrication. If no service point is identified, do not drill, pry, or inject oil into the housing.
Never mix unknown greases inside the impact mechanism. Different thickener systems and additives may not be compatible, and an incompatible mixture can separate, harden, or lose its ability to protect the hammer and anvil.
How to Lubricate a Pneumatic Impact Wrench
Lubricating an air-powered wrench is usually a short process, but the order matters. Disconnect the air supply before handling the tool, and wipe dirt from the coupling and inlet so contamination does not enter with the oil.
- Shut off and disconnect the air. Remove the hose from the wrench and release pressure. Do not service a tool while it can start unexpectedly.
- Clean the air inlet. Wipe the inlet and surrounding area with a clean, lint-free cloth. Avoid pushing grit into the opening.
- Add the specified amount of air-tool oil. Hold the wrench with the inlet facing upward and place the manual’s recommended number of drops into the inlet. If no quantity is listed, a few drops are generally used for routine hand lubrication; avoid flooding the tool.
- Reconnect the hose briefly. Point the drive end away from people and loose objects, then run the wrench for a few seconds. This distributes oil through the air motor.
- Wipe away expelled oil. A small amount may leave the exhaust or collect around the drive end. Clean the tool before attaching a socket.
Oil may come out of the exhaust after application, and that alone is not a defect. Excessive oil spray, smoke, a strong oily discharge, or oil soaking the work area suggests over-lubrication, poor air preparation, or an internal problem.
Lubricating Through an Air-Line Oiler
A pneumatic wrench used frequently may be connected to a properly adjusted in-line oiler. The oiler must be installed and set according to the tool and air-system instructions; too much oil can damage seals, contaminate connected equipment, and create a messy exhaust.
An air-line oiler does not eliminate all maintenance. Drain moisture from the compressor system, keep filters clean, and inspect the hose and fittings. Water, rust, and compressor debris can wear the motor even when the oil supply is correct.
If the wrench is connected to a dry air line, occasional manual oiling may still be necessary. Follow the manufacturer’s interval rather than adding oil every time the tool feels slightly slow.
How to Lubricate the Anvil and Impact Mechanism
The square drive and internal impact mechanism perform different jobs. The socket-facing anvil transfers torque, while the hammer assembly repeatedly strikes or engages it. Both can require lubrication, but the correct access point depends on the wrench design.
Some tools have a removable front cover, grease port, or clearly documented service opening. Others require complete disassembly. Only use the access method described by the manufacturer, because the hammer, anvil, springs, washers, and retaining components may need to be installed in a precise order.
When the manual permits user servicing, use this general procedure:
- Disconnect the air hose or remove the battery. Unplug corded tools.
- Clean the exterior around the front housing and drive end.
- Remove the cover, plug, or retaining component using the correct tool.
- Inspect the old lubricant for metal particles, discoloration, hardening, or a burnt smell.
- Remove contaminated grease with a clean, suitable cloth. Do not leave lint inside the mechanism.
- Apply the specified impact-rated grease to the hammer and anvil contact areas in the stated quantity.
- Reinstall every component in its original orientation and tighten fasteners as directed.
- Test the wrench at low load first, listening for abnormal rattling, grinding, or uneven impact.
Do not pack the entire cavity solid with grease unless the manual specifically calls for that amount. A heavy excess can create drag, increase heat, and prevent the impact parts from moving freely. The goal is a protective film and appropriate coverage, not a completely filled housing.
Lubricating the Square Drive
A light coating of suitable grease on the square drive can help prevent socket rust and reduce wear between the drive and socket. Apply only a thin film, and keep lubricant away from the socket-retaining ball or pin if the manufacturer warns that grease may cause retention problems.
Clean the drive before applying fresh lubricant. If the socket is difficult to remove, the retaining ring, detent pin, or drive itself may be worn or damaged; adding more grease will not correct a mechanical defect.
How Often Should an Impact Wrench Be Lubricated?
Lubrication frequency depends on the tool type, operating time, air quality, load, and manufacturer’s schedule. A pneumatic wrench used throughout a workday generally needs more attention than one used briefly each month.
For air tools, check the air-oil requirement before each work session and apply the specified amount at the recommended interval. A tool used in dusty conditions, with a long hose, or on a wet compressor system may require more frequent inspection, but increasing oil alone will not solve contamination or moisture problems.
The impact mechanism typically needs service less often than the air motor. Follow the stated maintenance interval, and inspect it sooner if the tool develops unusual impact noise, reduced torque, visible leakage, or rough operation.
Electric impact wrenches should be maintained according to their manuals rather than an assumed oil schedule. Battery care, cooling vents, trigger operation, fasteners, and the drive assembly may be user-serviceable, while the gearcase remains sealed.
Signs an Impact Wrench Needs Service
Performance changes can point to lubrication trouble, but they can also indicate a failing motor, worn hammer parts, inadequate air pressure, or a weak battery. Diagnose the complete system before adding more lubricant.
- Dry rattling or grinding: Internal grease may be depleted, contaminated, or displaced, but damaged bearings or hammer parts can produce similar sounds.
- Reduced impact force: Check air pressure under load, hose restrictions, couplers, battery charge, and socket fit before opening the wrench.
- Slow air-tool operation: A blocked inlet screen, dirty filter, water in the line, or insufficient flow may be responsible.
- Excessive heat: Too much grease, overloading, electrical faults, or restricted ventilation can all create heat.
- Oil leaking from the housing: A damaged seal or loose cover needs attention; adding more oil can worsen the leak.
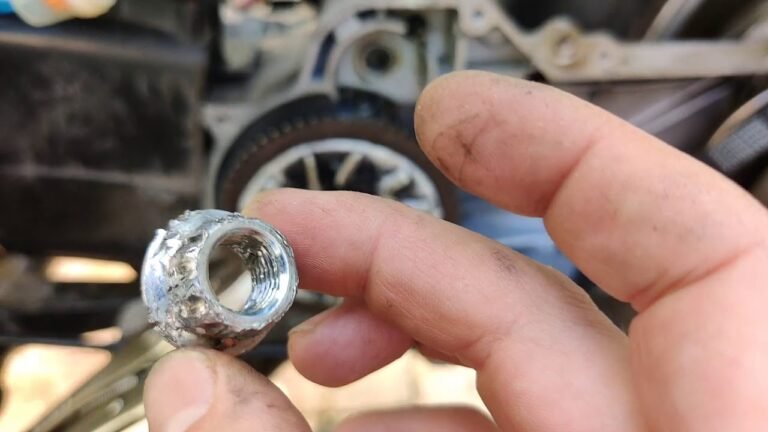
- Metal flakes in old grease: This is a warning of wear in the hammer, anvil, gears, or bearings and may require parts replacement.
Stop using the wrench if it sparks, smells electrically burnt, binds, throws parts, or develops severe vibration. Continuing to operate a damaged impact mechanism can turn a repairable problem into a broken housing or unsafe failure.
Safety Precautions Before and After Lubrication
Disconnect the energy source before servicing: remove the battery, unplug the cord, or disconnect the air hose. Wear eye protection when testing a pneumatic tool, and keep the drive end pointed away from people, animals, and loose materials.
Use lubricant in a ventilated area and keep it away from ignition sources. Follow the product label for handling and disposal, and wipe spills from the tool, floor, sockets, and workpiece.
Do not operate a wrench with a damaged socket, cracked housing, loose anvil, or missing retaining ring. Lubrication cannot compensate for a socket that does not fully engage the fastener or for a drive assembly that is mechanically unsafe.
After service, test the tool without a fastener first. Confirm that the trigger, forward/reverse selector, drive, and impact action work normally before applying torque to a vehicle or machine.
Common Lubrication Mistakes to Avoid
The most damaging mistake is putting lubricant into every opening that looks accessible. Exhaust ports, cooling vents, battery compartments, and electrical seams are not automatically service points.
- Do not use penetrating oil as a replacement for pneumatic tool oil.
- Do not use thin oil where the impact mechanism requires grease.
- Do not fill a sealed electric housing without documented instructions.
- Do not ignore moisture, dirty air, restricted flow, or a weak battery.
- Do not mix old contaminated grease with fresh lubricant.
- Do not spray lubricant onto a spinning tool while holding it in your hand.
Using the wrong product can soften seals, wash grease away from loaded surfaces, collect abrasive dust, or migrate into an electric motor. Correct quantity matters as much as correct type.
When to Use a Repair Shop
Professional service is the safer choice when the wrench requires full disassembly, contains damaged gears, or has a sealed gearcase with no published lubrication procedure. It is also appropriate when the tool has a warranty or when metal debris appears in the old grease.
For pneumatic models, a repair technician can inspect vanes, bearings, seals, the hammer, and the anvil. For electric models, service may include electrical testing, switch inspection, battery or controller diagnosis, and replacement of gearcase components.
Before taking the tool in, record the symptoms and note when they occur. Mention whether the problem appears under load, after warming up, with a particular socket, or only when using one air hose or battery.
FAQ About Lubricating an Impact Wrench
How often should I lubricate a pneumatic impact wrench?
Follow the manufacturer’s air-oil interval, usually checking lubrication more often when the tool is used heavily. Frequent professional use, poor air filtration, moisture, and long operating periods increase the need for inspection, but adding excessive oil is not a substitute for clean, properly regulated air.
Can I use WD-40 or penetrating oil in an impact
Do not use general penetrating sprays as the regular lubricant for a pneumatic impact wrench. Use oil specifically made for pneumatic tools, and use impact-rated grease for the hammer and anvil when the manual calls for grease. Penetrating products may not provide the required protection for air-motor components or loaded impact surfaces.
Where does the oil go in a cordless impact wrench?
Usually, no user-applied oil goes into a cordless impact wrench. The motor and gearcase may be factory lubricated or sealed, and the manual may specify a service procedure for the impact assembly. A thin coating on the square drive may be acceptable if documented, but never pour oil through vents, the trigger, or the battery opening.
How much oil should I put in a pneumatic impact
Use only the amount specified by the tool manufacturer, commonly a few drops for manual air-inlet lubrication. Too much oil can spray from the exhaust, contaminate the work area, and contribute to seal or performance problems. If the tool needs oil repeatedly during a short session, inspect the air system and internal condition.
Should grease be put on the impact wrench anvil?
A thin layer of the specified impact-tool grease may be used on the anvil when the manufacturer permits it. Clean away abrasive debris first, and do not pack the housing with excess grease. Some retaining systems may require the drive area to remain relatively clean, so follow the service instructions for that model.
Why is my impact wrench still weak after lubrication?
Weak output after lubrication often points to an air-supply, battery, socket, or mechanical problem rather than a lack of lubricant. Check pressure and airflow under load on pneumatic tools, confirm battery condition on cordless models, and inspect the socket, anvil, hammer, gears, and bearings if the symptom continues.
Can over-lubrication damage an impact wrench?
Yes, excess lubricant can increase drag, trap abrasive dust, contaminate seals, and interfere with the impact mechanism. Electric tools may also suffer if oil reaches electrical parts. Wipe away excess and use the manufacturer’s stated quantity rather than filling available space.
Conclusion: Lubricate the Right Parts, Not Every Opening
To lubricate an impact wrench correctly, first identify whether it is pneumatic or electric, then use air-tool oil for the pneumatic inlet and the specified grease for an accessible impact mechanism. The major limitation is that many electric models have sealed gearcases, so adding lubricant without model-specific instructions can cause damage.
Disconnect the power source, clean the service area, apply the correct amount, and test the wrench carefully. If unusual noise, metal debris, heat, electrical odor, or weak output remains, stop adding lubricant and arrange a qualified inspection.