How to Find Studs on Exterior Walls: A Simple Step-by-Step Guide
Learning how to find studs on exterior walls is useful for many home projects. You may need a solid point for a light, camera, mailbox, trim piece, hose reel, or other item. Exterior walls can be harder than inside walls because siding, brick, stone, insulation, and other layers can hide the framing.
The safest approach is to combine more than one clue. A stud finder can help from inside the house. Wall measurements, corners, windows, doors, siding patterns, and fastener lines can also help. In my experience, the best results come from confirming the stud location with a second method instead of trusting one clue alone.
Before you drill into an exterior wall, think about what may be inside it. Electrical wires, water pipes, gas lines, vents, and other services may run through wall cavities. A correct stud location does not by itself mean that every drilling point is safe.

Why Finding Exterior Wall Studs Can Be Hard
Exterior walls have more layers than most interior walls. A typical U.S. wood-framed wall may have drywall on the inside, framing in the middle, and sheathing, weather protection, siding, or masonry on the outside. Each layer can make the framing harder to see or detect.
The exterior finish also affects your method. Vinyl siding may reveal fastener lines and panel patterns. Brick and stone can hide the frame almost completely. Stucco can make a simple stud finder much less useful.
This is why how to find studs on exterior walls depends on the wall surface. Start by identifying the wall type. Then choose a method that fits that construction.
- ✦ Exterior finish
Siding, brick, stone, stucco, and other finishes can block or weaken signals from stud finders.
- ✦ Different framing
Most U.S. wood-framed homes use regular stud spacing, but framing can vary near openings, corners, and load-bearing areas.
- ✦ Hidden services
Wires and pipes may pass through exterior wall cavities, so drilling needs more care than simply finding a stud.
What Is an Exterior Wall Stud?
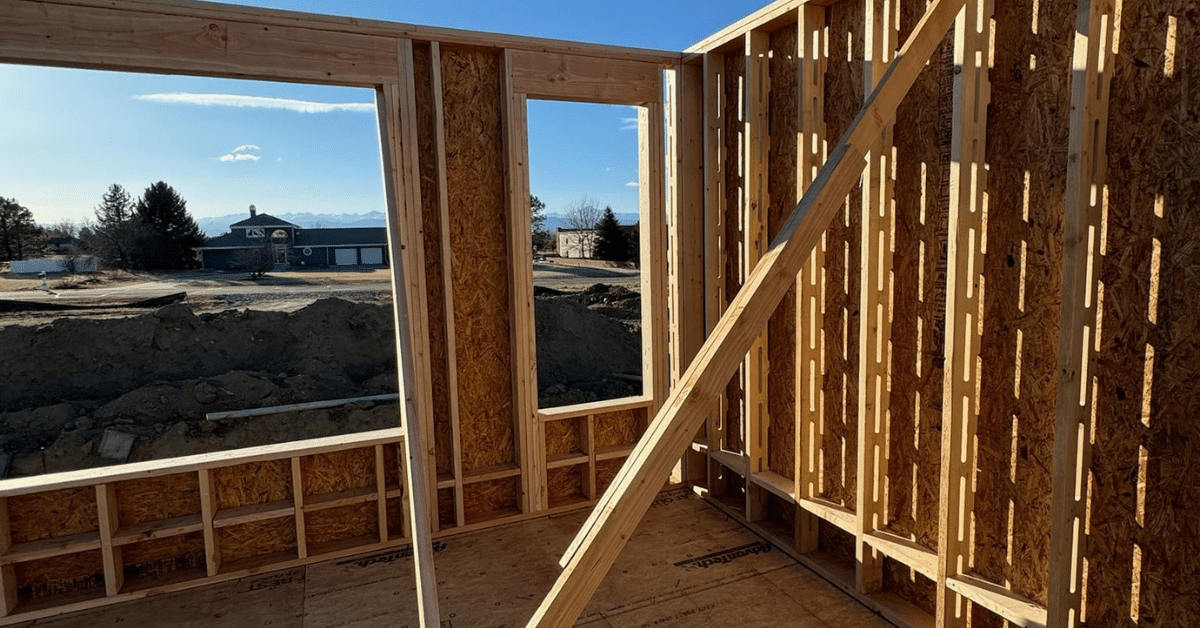
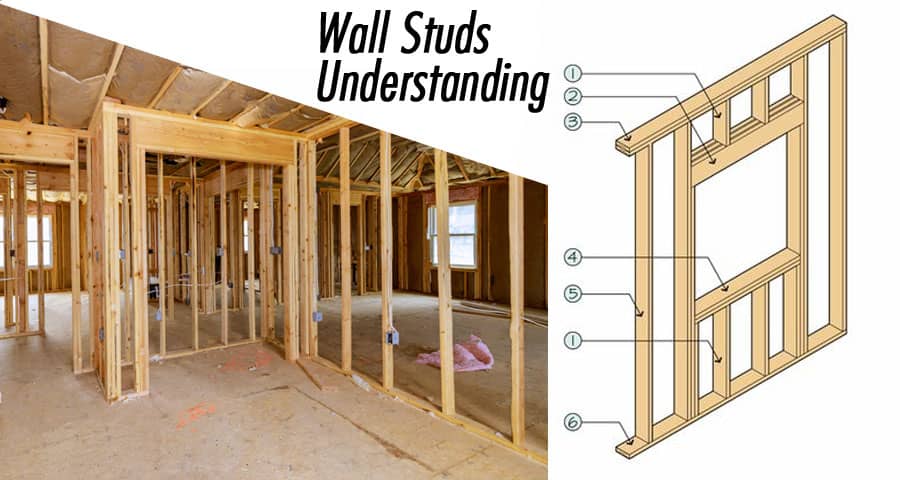
A stud is a vertical framing member inside a wall. In many U.S. homes, studs are made from wood or metal. They support the wall and provide a place to attach sheathing, drywall, and other materials.
Common wood framing uses nominal 2-by-4 or 2-by-6 lumber. The actual size is smaller than the name suggests. Stud spacing is often 16 inches on center, though 24-inch spacing and other layouts are also used.
- ✦ On-center spacing
A 16-inch on-center layout means the centers of two neighboring studs are 16 inches apart.
- ✦ Framing changes
Corners, windows, doors, and wall intersections often require extra framing members or different spacing.
How to Find Studs on Exterior Walls From Inside
If you can reach the inside face of the exterior wall, this is often the easiest way to locate the framing. Interior drywall gives a stud finder a better surface to scan than many exterior finishes do.
Run the stud finder across the wall and mark the points where it detects the edge or center of a stud. Move slowly and make more than one pass. If the finder gives different results, check its settings and scan again.
Once you find one stud, measure from it to look for the next one. Do not assume that every stud will match a perfect 16-inch pattern. Use the measurement as a guide, then confirm each location.

- ✦ Calibrate first
Follow the tool instructions and calibrate it on the wall surface before scanning.
- ✦ Scan slowly
Move the tool at a steady pace so it has time to detect changes in the wall.
- ✦ Mark both edges
If the finder detects both edges of a stud, mark both and use the midpoint as a better estimate of the stud center.
- ✦ Confirm the pattern
Measure from a known stud and compare the next likely locations before making a hole.
Use a Magnetic Stud Finder as a Simple Backup
A strong magnet can help locate drywall screws or nails that attach the wall surface to framing. It does not detect the wood itself. Instead, it helps you find a line of fasteners that may follow a stud.
Move the magnet slowly across the wall. Several fasteners in a vertical line are a useful clue. Confirm the line with measurements or another method before drilling.
- ✦ Look for a vertical line
Several fasteners that line up from top to bottom can indicate the position of a stud.
- ✦ Treat it as a clue
Fasteners may not always sit exactly where you expect, so do not use one magnetic response as final proof.
How to Find Studs on Exterior Walls From the Outside
Finding a stud from the outside is more difficult because the exterior finish may cover the framing. Still, several construction clues can help. Look at corners, windows, doors, siding seams, and visible fasteners before choosing a drilling point.
If the home has siding, inspect the pattern closely. Fasteners often attach siding or trim to framing or other solid backing. A visible vertical fastener line can provide a useful clue about where a stud sits behind the siding.
For brick, stone, or stucco walls, do not assume the visible surface tells you where the wood studs are. The masonry may have a separate support system or may sit over a framed wall. Wall plans, building records, an accessible unfinished area, or a professional inspection may give better information.

- ✦ Start at a corner
Exterior wall corners usually contain framing, making them useful reference points for measurements.
- ✦ Check window and door trim
Openings need structural framing, so nearby areas often contain solid framing members.
- ✦ Follow fastener lines
Visible rows of siding fasteners can sometimes reveal the framing layout behind the finish.
- ✦ Inspect wall transitions
Changes in siding, trim, or wall sections can reveal framing locations and useful measurement points.
Using the 16-Inch Pattern
Many wood-framed homes use studs spaced 16 inches on center. If you can identify one reliable stud location, measure in 16-inch steps to find likely neighboring studs. Some walls use 24-inch spacing, so the pattern should always be confirmed.
The 16-inch rule becomes less reliable near corners and openings. Builders may add studs or shift spacing to support doors, windows, wall intersections, and other loads. Use the pattern as a starting point, not as proof.
- ✦ Measure from a known point
A verified stud, corner, or other framing point gives you a better starting reference.
- ✦ Check several locations
If several marks line up with the expected spacing, your estimate becomes more useful.
How to Find Studs Behind Vinyl Siding
Vinyl siding can make exterior stud detection easier because its installation often follows the wall framing. Look for vertical rows of siding fasteners, trim attachment points, and other repeated patterns. Avoid removing siding unless you know how to reinstall it without damage.
A stud finder designed for use through thick exterior materials may help, but results can vary. Moisture, sheathing, insulation, siding thickness, and the tool itself can affect detection.
For a light attachment or other small project, you can often use visible construction clues to narrow the location. Confirm the point before drilling, and use a fastener long enough to reach solid framing without penetrating farther than needed.

- ✦ Inspect fastener rows
Look for repeated vertical lines that may match the framing below the siding.
- ✦ Use trim as a clue
Corner posts, window trim, and door trim often attach near framing members.
- ✦ Do not rely on siding seams alone
A siding joint shows how the siding was installed, not necessarily where a wall stud sits.
How to Find Studs Through Brick, Stone, and Stucco
Masonry and stucco require extra care. A visible brick or stone wall may be structural masonry, veneer over wood framing, or part of another wall system. Those cases can look similar from the outside but need different mounting methods.
If the wall has brick veneer over wood framing, the wood studs may sit behind an air space, sheathing, and veneer. A standard stud finder may not reach them reliably from the outside. In this case, inside-wall measurements or construction drawings can be more useful.
Stucco can also interfere with electronic stud finders. If you cannot confirm the framing, avoid drilling based on a guess. For a heavy load, a professional can identify the wall construction and choose a safe attachment point.
- ✦ Brick veneer
Wood framing may sit behind the masonry, so the outside surface does not directly show the stud location.
- ✦ Structural masonry
The wall may not contain wood studs in the way a wood-framed wall does.
- ✦ Stucco
The thick finish can make ordinary stud detection tools less reliable.
- ✦ Heavy attachments
Use a professional assessment when the item is heavy or the wall construction is uncertain.
How to Confirm a Stud Before You Drill
Finding a likely stud is only the first step. Before drilling, confirm the location and think about what may be inside the wall. A stud can give you a strong anchor, but the area may still contain wires, pipes, ducts, or other hidden components.
One useful approach is to combine three clues. For example, you might find a stud from inside, confirm its spacing with measurements, and compare the location with exterior trim or siding. Agreement between several clues is much safer than relying on one signal.
For a small screw, a tiny pilot hole can help confirm the expected resistance, but it should not be treated as a safety test for hidden utilities. Stop if you meet unexpected resistance, see unusual material, or have any reason to think a service may be present.
:strip_icc()/wall-terminology-d5eba4878255473fb68c3f3aced105c3.jpg "Wall framing and exterior wall terminology")
- ✦ Use more than one method
Combine a stud finder, measurements, visible clues, or construction plans when possible.
- ✦ Check the planned drilling depth
Use the shortest suitable fastener and account for the thickness of siding, sheathing, and the item being mounted.
- ✦ Avoid utility zones
Be cautious near outlets, switches, plumbing fixtures, vents, exterior lights, and other places where services may run.
- ✦ Stop when unsure
If the wall construction or hidden utilities are unclear, get professional help before drilling.
How to Avoid Electrical and Plumbing Damage
Never assume that finding a stud makes a drilling location safe. Electrical cables and plumbing can pass through or near framing. Protective metal plates may also cover some areas, but you should not rely on them to protect every possible drilling point.
For important or deep drilling work, use an appropriate wire and pipe detection tool when suitable. If you are unsure about the wall or the service layout, an electrician, plumber, or qualified contractor can help before you make the hole.
- ✦ Watch for electrical clues
Outlets, switches, lights, and electrical equipment can indicate nearby wiring.
- ✦ Watch for plumbing clues
Sinks, hose connections, bathrooms, and other water fixtures can indicate nearby pipes.
- ✦ Avoid unnecessary depth
A shorter fastener reduces the amount of material you must penetrate.
Common Mistakes When Finding Exterior Wall Studs
The most common mistake is assuming that a standard spacing pattern always applies. Studs often follow a regular layout, but openings, corners, and changes in wall design can break that pattern.
Another mistake is treating a stud finder reading as exact. Different wall materials can change how the tool responds. Paint, insulation, moisture, thick finishes, and other layers may affect the result.
A third mistake is drilling as soon as a likely location appears. Take a few extra minutes to confirm the spot and consider hidden utilities. That small step can prevent a damaged wall, broken pipe, or electrical problem.
- ✦ Mistake: Assuming every wall uses 16-inch spacing
Some walls use 24-inch spacing or have irregular framing near openings and corners.
- ✦ Mistake: Trusting one reading
Use a second method when possible, especially on thick or unusual exterior finishes.
- ✦ Mistake: Drilling too deep
Use an appropriate fastener and limit penetration to what the project needs.
- ✦ Mistake: Ignoring the wall type
Brick, stone, stucco, vinyl siding, and wood siding can require different methods.
- ✦ Mistake: Skipping utility checks
Always consider electrical, plumbing, and other hidden services before drilling.
A Simple Two-Method Check
If you want a practical way to reduce mistakes, use two independent clues. For example, find a likely stud from inside with a stud finder, then measure its position from a known corner and compare that point with exterior features.
If the two methods disagree, do not drill yet. Recheck the wall, look for a framing plan, or get professional help if the project requires a strong or deep attachment.
- ✦ Method one
Locate the likely stud with a suitable detection tool or visible construction clue.
- ✦ Method two
Confirm the location with measurements, framing patterns, plans, or another detection method.
Tools That Can Help You Find Exterior Wall Studs
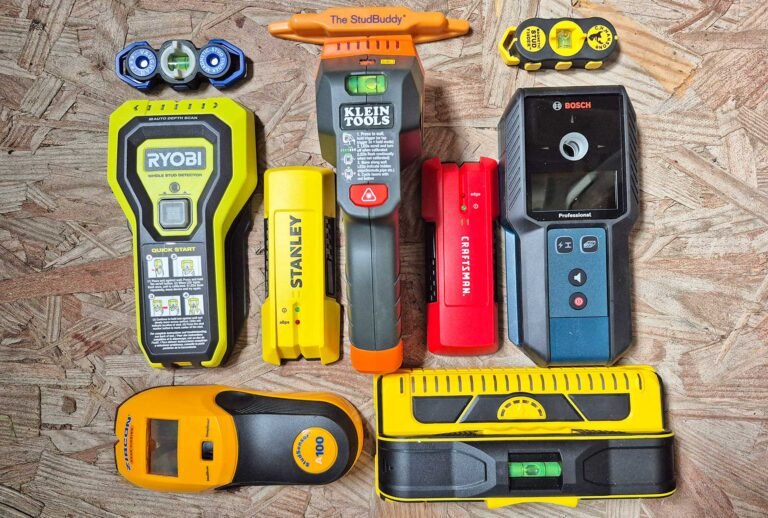
The right tool depends on the wall and the job. A basic electronic stud finder is often useful from inside the house. A strong magnet can help locate metal fasteners in drywall. For difficult exterior finishes, specialized scanners may provide more information.
A tape measure is one of the most useful tools because framing often follows a repeatable layout. A pencil or removable marker can help you record likely stud centers without leaving a large mark.
No tool can replace good judgment. Read the tool instructions, understand its limits, and confirm important locations before drilling.
- ✦ Electronic stud finder
Useful for detecting changes behind drywall and some other surfaces when used within the tool’s limits.
- ✦ Strong magnet
Can help locate steel screws or nails that may attach wall materials to studs.
- ✦ Tape measure
Helps test common framing spacing from a known corner or confirmed stud.
- ✦ Flashlight
Helps reveal fastener lines, trim details, seams, and other construction clues.
- ✦ Utility detector
Some advanced tools can detect electrical wires or other hidden materials and may add another layer of information.
When a Professional Should Check the Wall
Consider professional help when the wall has thick masonry, unusual construction, or a high risk of hidden utilities. This is also wise when you plan to install a heavy object or make a deep hole.
A contractor can inspect the wall system and select a mounting method that fits the structure. For electrical or plumbing concerns, use the appropriate licensed professional for the work required in your area.
- ✦ Heavy loads
Large awnings, heavy equipment, major shelves, and similar loads may need more than a simple stud attachment.
- ✦ Unknown construction
Older homes and remodeled walls may not follow the framing pattern you expect.
- ✦ Possible hidden services
Get professional advice when drilling could affect electrical, plumbing, gas, or other critical systems.
A Quick Step-by-Step Method for Finding Exterior Wall Studs
If you need a simple process, start from the inside whenever possible. The inside face of an exterior wall usually gives you better access to the framing than the outside finish does.
Once you have a likely stud, transfer the location carefully if your project must be completed from outside. Account for wall thickness, corners, trim, and the exact point where the item will attach.
This method keeps the process simple while reducing guesswork. The goal is not just to find a stud. The goal is to find a suitable mounting point and make sure the drilling plan is safe.
- ✦ Step 1: Identify the wall type
Determine whether the exterior has vinyl siding, wood siding, brick, stone, stucco, or another finish.
- ✦ Step 2: Find a reference point
Use a corner, window, door, or confirmed stud as your starting point.
- ✦ Step 3: Scan from inside
Use a suitable stud finder on the interior wall when access allows.
- ✦ Step 4: Measure the pattern
Check common 16-inch or 24-inch spacing, but do not assume it is correct without confirmation.
- ✦ Step 5: Compare exterior clues
Look at siding fasteners, trim, corners, and other visible construction features.
- ✦ Step 6: Check for hidden services
Consider wires, pipes, vents, and other systems before drilling.
- ✦ Step 7: Choose the correct fastener
Select hardware based on the wall materials, load, and required embedment.
- ✦ Step 8: Drill carefully
Use the smallest suitable pilot hole and controlled depth when the project calls for one.
Why This Process Works
This approach combines detection, measurement, visual inspection, and safety checks. Each step answers a different question. Together, they give you a more reliable picture of what is behind the exterior surface.
The key lesson in how to find studs on exterior walls is simple: do not treat one clue as absolute proof. Confirm the location, understand the wall, and plan the drilling depth before you begin.
- ✦ Less guesswork
Several clues give you more information than a single measurement or tool reading.
- ✦ Better mounting
Knowing the framing location helps you place the fastener where it can provide useful support.
- ✦ Safer drilling
A careful inspection helps reduce the chance of damaging hidden systems.