How to Find Studs Behind Wood Paneling: 7 Easy Methods
Learning how to find studs behind wood paneling can seem harder than finding studs behind drywall. Wood panels can hide screw heads, seams, and other clues that normally help. The good news is that you often do not need to remove the paneling.
In home repair work, the key is to use more than one clue. A stud finder may give you a good starting point, while an outlet, trim board, or known stud can help confirm the location. This simple two-step check can prevent a badly placed hole.
This guide explains how to find studs behind wood paneling with both tools and simple methods. It also covers older homes, unusual framing, thick panels, safety checks, and what to do when a stud finder gives poor results.

Why Finding Studs Behind Wood Paneling Can Be Tricky
A wall stud is a vertical framing member inside a wall. In many U.S. homes, studs support the wall and provide a solid place to attach shelves, cabinets, TVs, and other items. Wood paneling can cover the clues that make these studs easy to locate.
Panel thickness matters. Thin decorative paneling may let a stud finder sense the framing below. Thick boards, multiple wall layers, foil-backed panels, or other materials can make the reading less clear.
The wall may also use framing that does not follow a perfect pattern. Older homes can have uneven spacing, altered walls, or added framing around doors and windows. That is why a measurement alone should not be treated as proof.
- ✦ Panel thickness
Thin panels are usually easier to scan than thick boards or walls with several layers.
- ✦ Old construction
Older walls may have stud spacing that differs from the common 16-inch pattern.
- ✦ Added framing
Repairs can add blocking, sister studs, furring strips, or other framing that changes what you find.
- ✦ Hidden services
Electrical wires and plumbing may run inside the wall, so a stud location does not make every drilling spot safe.
What Is the Common Stud Spacing?
Many wood-framed walls use studs placed about 16 inches on center. That means the measurement runs from the center of one stud to the center of the next. Some walls use 24-inch spacing, and special areas can have different layouts.
Use this spacing as a clue, not a rule. Once you find one confirmed stud, measure from it and scan for the next one. Confirm each location before you drill.
- ✦ 16-inch spacing
A common layout in residential wood framing.
- ✦ 24-inch spacing
Another common layout, especially in some walls and construction systems.
How to Find Studs Behind Wood Paneling With a Stud Finder
A stud finder is usually the fastest method for learning how to find studs behind wood paneling. Electronic models can detect changes in wall density, while some models offer deeper scanning modes. Read the instructions for your specific tool before you begin.
Start by placing the finder on the wall according to the manufacturer’s instructions. Calibrate it on the panel surface if the model requires calibration. Move it slowly from side to side rather than sweeping quickly across the wall.
Mark both edges of the detected area. The center between those marks is a better target than the first point where the tool beeps. Scan the same area again from the opposite direction to see if the result stays consistent.
Wood paneling can affect a stud finder’s reading. If the tool gives wide, weak, or changing signals, do not assume the first mark is correct. Use another method to confirm the stud.

- ✦ Calibrate first
Set up the tool on the actual wall surface so the paneling is part of the reading.
- ✦ Move slowly
A slow, steady pass gives the tool more time to detect changes behind the panel.
- ✦ Mark both edges
Finding both sides of the signal helps you estimate the center of the stud.
- ✦ Scan twice
Repeat the scan from another direction or nearby area to check the result.
What If the Stud Finder Does Not Work Through the Paneling?
Do not force the tool to give you an answer. Thick wood can make electronic readings less useful. In that case, switch to magnets, wall clues, measurements, or a very small confirmation hole.
A deep-scan setting may help with some walls, but it is not a guarantee. Different tools work in different ways, so a result should always be treated as a clue until you confirm it.
- ✦ Try another scan mode
If your tool has a deep or thick-wall setting, follow its instructions and scan again.
- ✦ Use a second method
Check an outlet, trim, fastener, or other framing clue before drilling.
How to Find Studs Behind Wood Paneling Without a Stud Finder
You can still learn how to find studs behind wood paneling without an electronic tool. Several simple clues can point to the framing. The most useful approach is to combine two or three clues before making a hole.
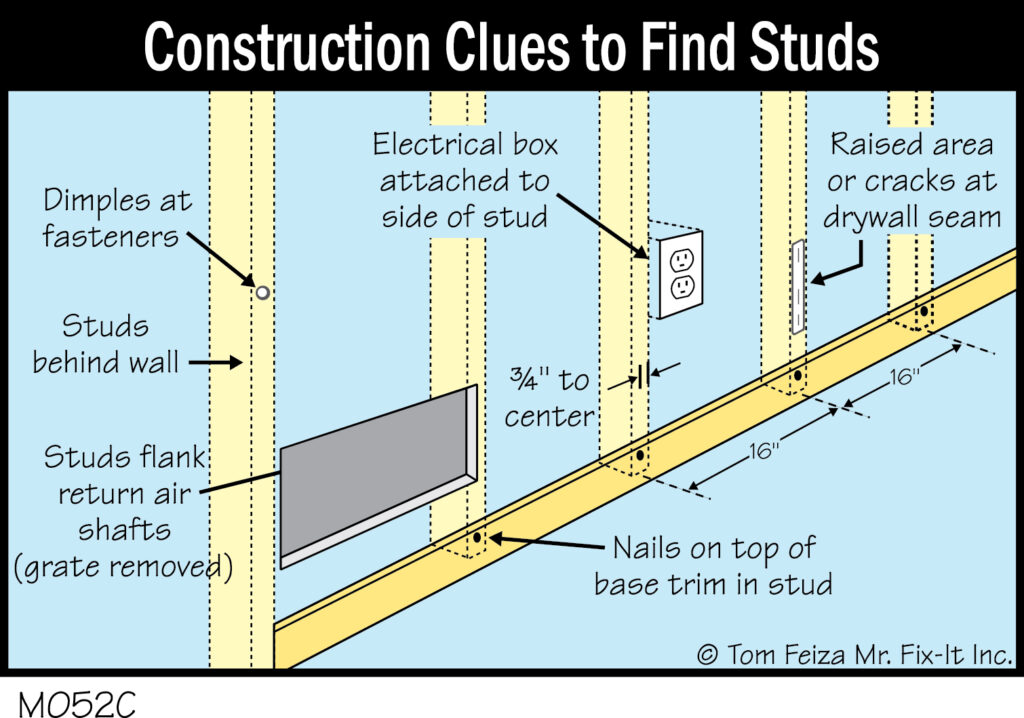
Start with anything attached to the wall. Electrical outlets and switches are often mounted to an electrical box that is attached to a stud or framing member. This does not mean every box sits on the same side of the stud, so use the box as a reference rather than an exact drilling point.
Next, inspect the paneling itself. Look for seams, nail heads, screw heads, or small changes in the panel surface. Older paneling may have visible fasteners that follow the framing below.
A small magnet can also help. Move it across the wall and watch for spots where it sticks. The magnet may detect steel nails or screws used to attach the paneling. Follow a vertical line of fasteners to estimate where a stud runs.
- ✦ Check outlets and switches
Use the electrical box as a framing reference, but do not assume its exact edge marks the center of a stud.
- ✦ Look for fasteners
Rows of nails or screws can reveal the framing line behind the panel.
- ✦ Use a magnet
A strong magnet may detect steel fasteners hidden under the panel surface.
- ✦ Inspect panel seams
A vertical seam may sometimes line up with framing, but seams can also be installed for other reasons.
Using a Small Test Hole
A tiny test hole can confirm a suspected stud when other methods disagree. Choose a low-visibility area if possible. Use care because drilling or probing can hit hidden wiring or plumbing.
If the drill meets firm wood at the expected depth, you may have found the stud. If the space stays hollow, stop and reassess the location instead of drilling a larger hole.
- ✦ Keep it small
Use the smallest practical opening needed to confirm the wall material.
- ✦ Choose the spot carefully
Avoid areas where electrical or plumbing lines are likely to run.
- ✦ Stop if unsure
An unexpected resistance or empty cavity is a reason to reassess, not push harder.
Use Outlets, Switches, Trim, and Corners as Stud Clues
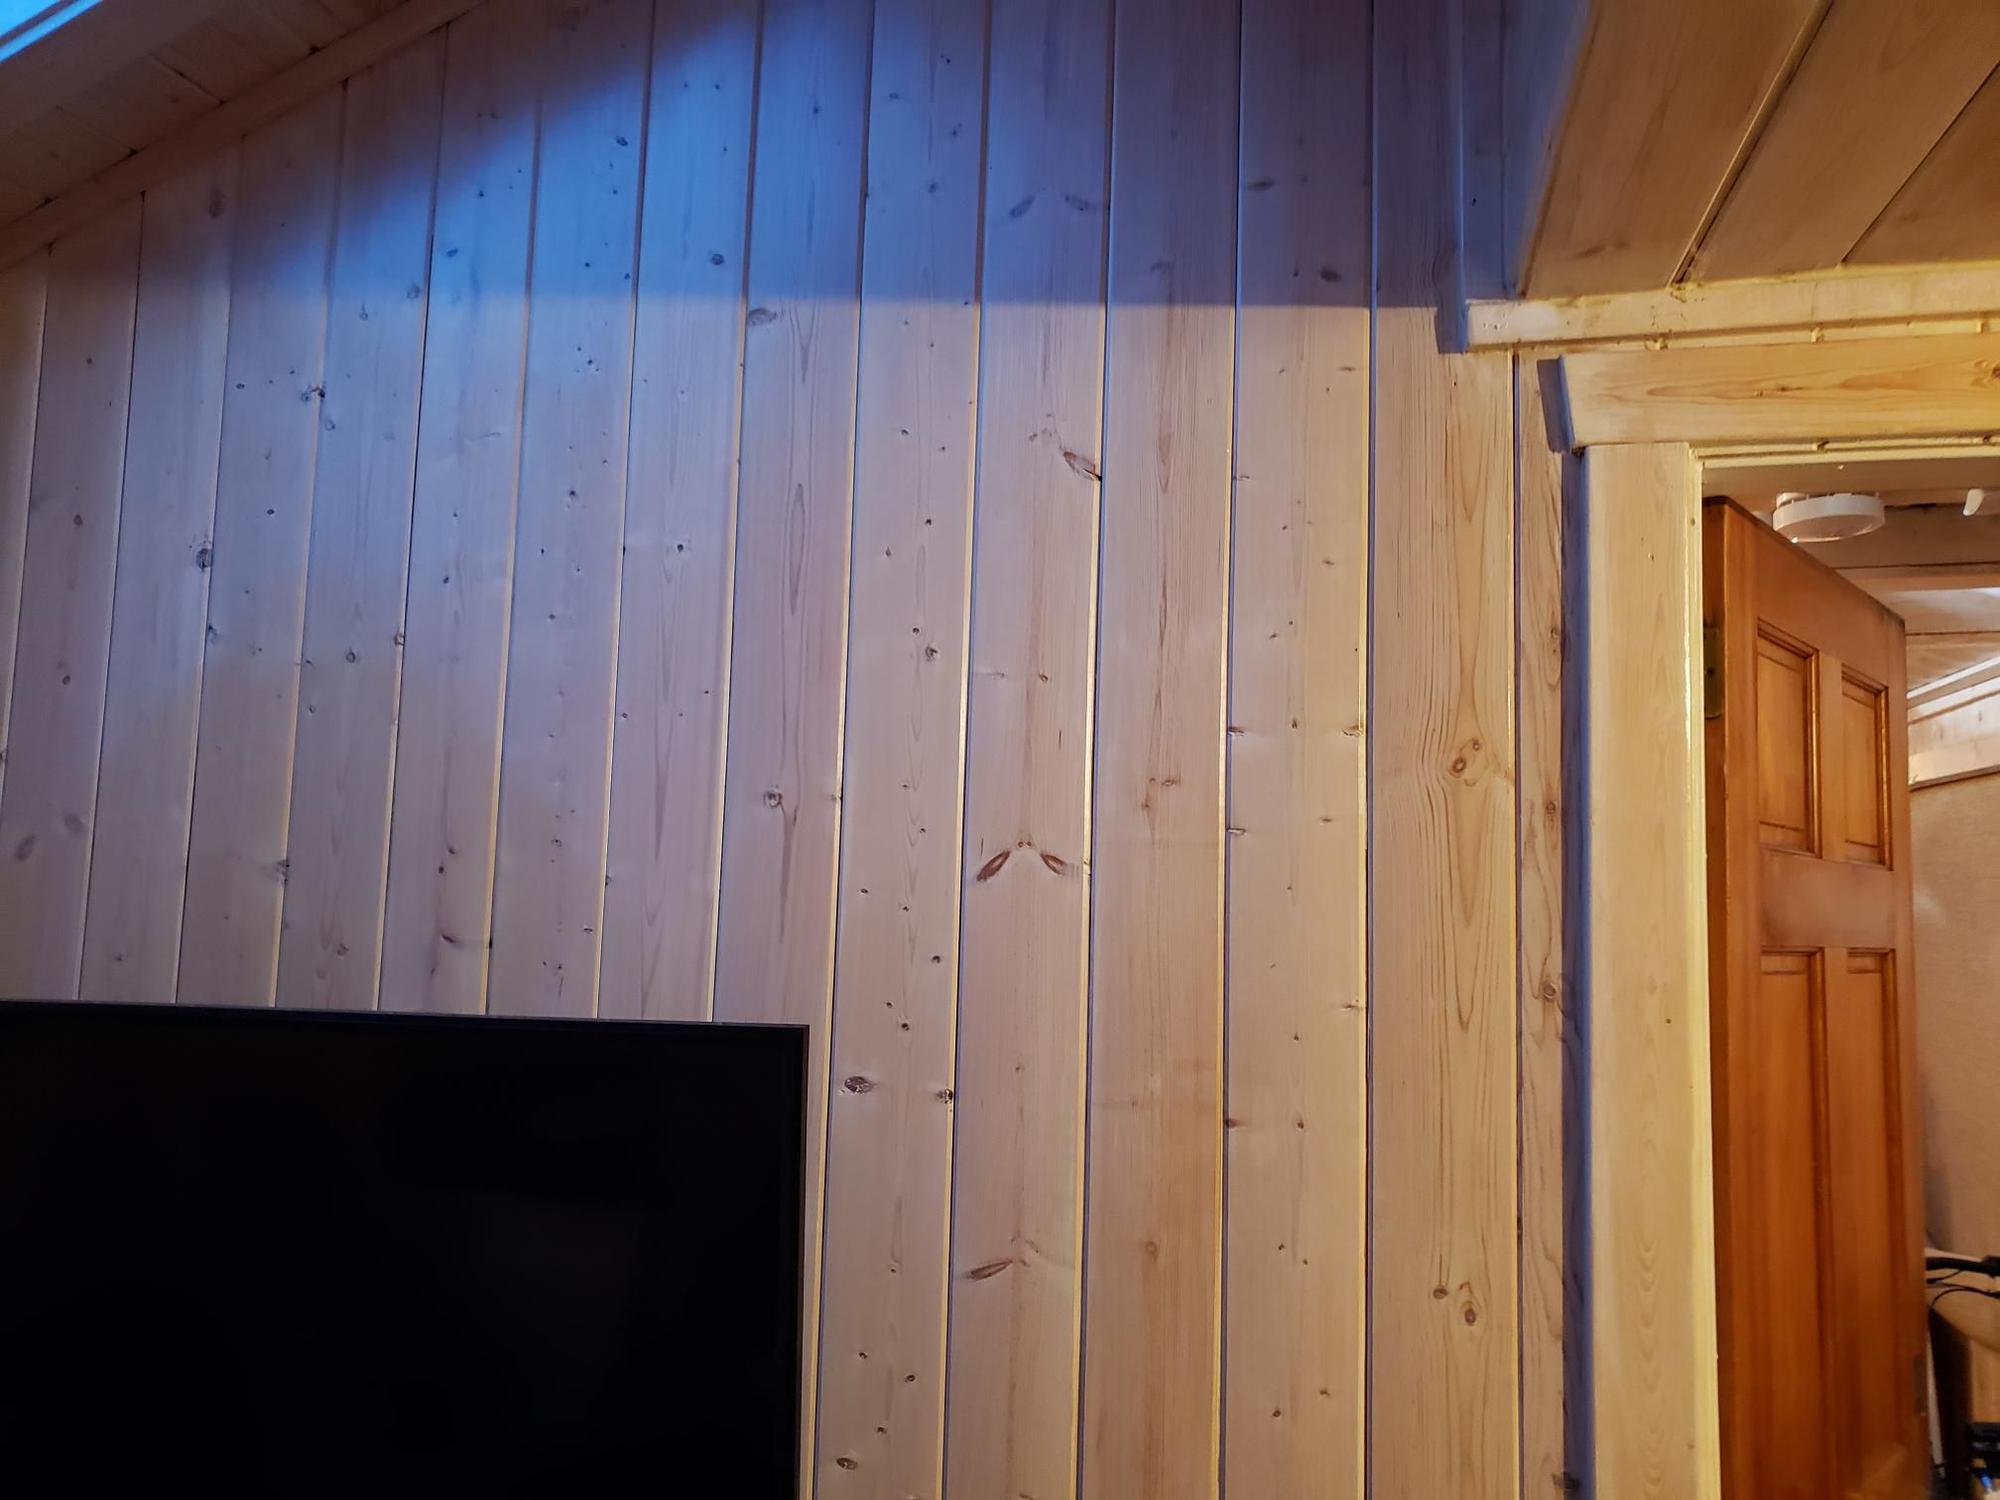
When a wall is covered with paneling, nearby features can reveal how it was framed. Electrical outlets and switches are especially useful because their boxes are often attached to wall framing. Remove only the cover plate when appropriate, and never touch exposed electrical parts.
Door and window openings are also useful reference points. Framing around openings is often more complex than a normal section of wall. Once you identify a known framing member near an opening, you can scan outward for the next stud.
Corners can provide another clue. Wall framing must connect at corners, so there is usually solid framing nearby. However, the exact position can vary with the wall design and the way the paneling was installed.
Baseboards and other trim may hide fasteners. If you can see or safely detect a line of fasteners, it can help show where the framing sits. Do not assume that every trim fastener hits a stud.
- ✦ Electrical boxes
Use the position of an outlet or switch box as a nearby framing reference.
- ✦ Door frames
Framing around doors often provides known solid areas from which you can measure.
- ✦ Window frames
Window openings contain framing that can help establish a reference point.
- ✦ Corners
Corners usually contain framing, although the exact layout varies.
- ✦ Baseboards and trim
Visible fasteners or consistent attachment points may help trace the framing.
Why Electrical Boxes Need Extra Care
Electrical boxes can help you locate framing, but they also warn you that wiring is nearby. Never use an outlet or switch as permission to drill into the wall. Turn off power when working around electrical devices and use a qualified electrician when you are unsure about the wiring.
- ✦ Treat wiring as a hazard
A wall can contain live electrical conductors near a stud, so stud location and safe drilling location are not the same thing.
Measure From a Confirmed Stud to Find More Studs
Once you confirm one stud, measuring can make the rest much easier. Start at the center of the confirmed stud. Measure across the wall and check common framing intervals such as 16 or 24 inches on center.
Do not mark every interval and assume the work is done. Scan each expected location with your available method. Framing can change around doors, windows, corners, cabinets, repairs, and other openings.
This method works especially well when you need several attachment points for a shelf, wall cabinet, or other long item. A straight level or tape measure can help keep the marks aligned.

- ✦ Find one known stud
Confirm the first stud with more than one clue when possible.
- ✦ Measure from the center
Use the center of the confirmed stud as your reference point.
- ✦ Check common spacing
Look around 16 or 24 inches on center, while remembering that actual framing may differ.
- ✦ Confirm each mark
Use a stud finder, magnet, visible fastener, or another clue to verify the predicted locations.
Why Stud Spacing Is Only a Starting Point
Framing patterns are useful because builders often repeat them. Still, walls contain openings, corners, pipes, ducts, and other features that can change the pattern. A measured guess is not enough for a high-value or heavy installation.
If the wall does not match the expected spacing, trust the physical evidence over the pattern. Continue scanning until you identify the actual framing.
- ✦ Around openings
Doors and windows often have extra or altered framing.
- ✦ At corners
Corner framing can make normal spacing look different.
- ✦ Near repairs
Past remodeling can change the original stud layout.
How to Find Studs Behind Wood Paneling When the Wall Is Old
Older homes can make how to find studs behind wood paneling more challenging. The wall may have uneven stud spacing, different framing sizes, or several layers added over time. Some paneling may also be installed over drywall, plaster, furring strips, or older wall coverings.
Start by looking for signs of later work. Changes in panel style, seams that stop suddenly, patched areas, or trim that does not match can suggest that the wall has been remodeled. These clues can explain why a simple 16-inch measurement does not work.
If the wall feels unusually thick, use a method that can account for the extra material. A deep-scan stud finder may help, but you should still confirm the result. For important structural or electrical work, a professional inspection can save time and reduce risk.
- ✦ Expect uneven spacing
Older framing may not follow modern spacing patterns.
- ✦ Look for multiple layers
Paneling may cover drywall, plaster, furring strips, or older finishes.
- ✦ Watch for remodeling clues
Mixed materials and patched areas can show where the original wall was changed.
- ✦ Use extra confirmation
When the wall is unusual, verify the stud with several independent clues.
Furring Strips Can Change What You Detect
Some paneling is attached to thin strips of wood called furring strips rather than directly to the main wall studs. In that case, a fastener may seem to indicate a stud even though it only reaches the strip.
This matters when you need a strong attachment. A light decoration may work with a furring strip, while a heavy load may need to connect to the main framing behind it.
- ✦ Light loads
A suitable surface fastener may be enough for some small items.
- ✦ Heavy loads
Connect to substantial framing when the item’s weight and mounting system require it.
How to Confirm a Stud Before You Drill
Finding a likely stud is only half the job. Before drilling, confirm the location and think about what may be inside the wall. This step matters most when you are mounting something heavy or making a permanent hole.
Use at least two clues when practical. For example, a stud finder signal can line up with a row of fasteners and also match the expected framing pattern. When all three agree, you have stronger evidence than any one method can provide.
Even a confirmed stud does not tell you that the entire area is safe to drill. Wires and pipes can run through or near framing. Use appropriate caution, avoid unnecessary depth, and follow local electrical and building requirements.

- ✦ Confirm the center
Mark the center of the suspected stud rather than relying on one edge of a detector reading.
- ✦ Use two or more clues
Combine a tool reading with a physical clue or measured framing pattern.
- ✦ Consider hidden utilities
Check for possible electrical, plumbing, heating, or other services before drilling.
- ✦ Match the fastener to the load
Choose a screw, anchor, or mounting system that suits both the wall and the item’s weight.
Safety Checks Before Drilling
Never assume that a stud means a drilling point is safe. Electrical cables and pipes can pass through framing members or run in nearby cavities. If you have any doubt about what is behind the paneling, stop and get professional help.
Be especially careful near outlets, switches, plumbing fixtures, radiators, HVAC equipment, and areas where pipes or cables are likely to run. A small amount of planning can prevent serious damage.
- ✦ Near electrical devices
Assume wiring may be present and use appropriate electrical safety practices.
- ✦ Near plumbing
Water lines may be hidden behind walls and can be damaged by drilling.
- ✦ When uncertain
Stop work and consult a qualified professional rather than guessing.
Common Mistakes When Finding Studs Behind Paneling
The most common mistake is trusting one signal. A stud finder can react to changes in wall density, while a magnet can detect fasteners. Neither method should be treated as perfect in every wall.
Another mistake is assuming that every wall uses 16-inch stud spacing. That pattern is common, but openings, corners, remodels, and older construction can change the layout.
People also sometimes drill too far because they expect to hit wood at a certain depth. Start with the least invasive method and use a suitable fastener depth for the wall and project.
:max_bytes(150000):strip_icc()/must-know-wall-terminology-9c7865a3067e4929bff92a44ae83a888.jpg "Wood stud wall terminology and framing details")
- ✦ Trusting one clue
Confirm a suspected stud with another method before making a permanent hole.
- ✦ Assuming 16 inches
Treat common spacing as a guide rather than a guarantee.
- ✦ Ignoring panel thickness
Remember that thick wood or multiple wall layers can affect readings.
- ✦ Drilling too deep
Use only the depth needed for the fastener and remain alert to hidden utilities.
- ✦ Skipping safety checks
A correct stud location does not remove the risk of hidden wires or pipes.
A Simple Confirmation Routine
For many projects, a simple routine works well. First, scan the wall and mark a likely stud. Next, check for a second clue such as a fastener line, outlet position, or expected spacing. Finally, confirm the location before choosing your fastener and drilling depth.
This routine keeps the process simple while reducing avoidable mistakes. It is especially useful when the paneling cannot be removed because you want to preserve the finished wall.
- ✦ Scan
Find a likely framing location with your best available method.
- ✦ Cross-check
Use a second clue to support or reject the first result.
- ✦ Mark
Clearly mark the confirmed stud center.
- ✦ Drill carefully
Use a suitable fastener and safe drilling depth for the project.