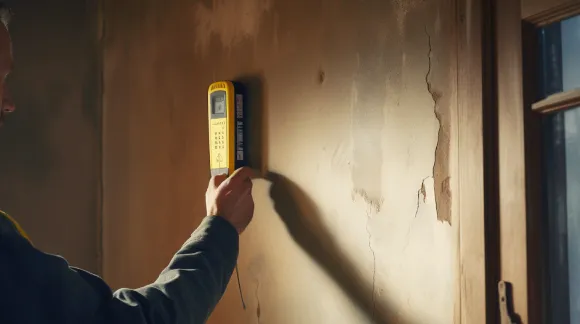
How to Change Battery in Zircon Stud Finder: Practical Guide
Most Zircon stud finders use a replaceable battery, but the battery type and compartment design depend on the model. Turn the tool off, open the battery door on the back or handle, remove the old battery, match the new battery to the polarity markings, and close the compartment securely before testing it.
That process sounds simple, yet a rushed replacement can create problems that look like a defective sensor. Installing the wrong battery, forcing a cover, reversing the terminals, or using a weak battery may leave the display blank, trigger false readings, or make calibration unreliable. Some Zircon models also use a sliding cover, a screw-secured compartment, or a battery that is not accessed in exactly the same way as another model in the product line.
This guide explains how to identify the correct battery, open and close the compartment without damaging the tool, check the contacts, and confirm that the stud finder works afterward. It also covers what to do when the battery does not seem to solve the issue, when a model-specific manual matters, and which symptoms indicate that professional repair or replacement is more sensible.
Before Replacing the Battery
Start by identifying the exact Zircon stud finder model. The model name or number is usually printed on the front, side, handle, battery door, or a label near the serial information. Different versions may use different batteries, and even similar-looking stud finders can have different compartment layouts.
Look for the battery specification printed inside the compartment, on the packaging, in the instruction manual, or on the manufacturer’s model information. Common household battery formats may include a 9-volt battery or cylindrical AA or AAA batteries, but do not assume the size based only on the tool’s appearance.
Have the following items ready:
- The correct new battery or batteries for the specific model
- A clean, dry work surface with enough light to see the polarity markings
- A small screwdriver only if the battery door uses a screw
- A soft, dry cloth for cleaning dust from the compartment
Remove the battery before storing the stud finder for a long period, especially if the existing battery is old. A leaking battery can corrode the contacts and damage the internal electronics.
How to Change Battery in Zircon Stud Finder
The exact cover design varies, but the replacement procedure follows the same general sequence. Do not force the cover if it does not move easily; inspect it for a latch, groove, retaining screw, or release tab first.
- Turn the stud finder off. If it has an automatic shutoff, do not rely on that feature. Switching it off reduces the chance of an unexpected activation while the battery is being changed.
- Place the tool face down or in the position shown by the compartment design. Keep the scanning surface away from hard debris that could scratch it.
- Locate the battery door. It is commonly on the rear housing or lower handle. Look for a seam, molded battery symbol, sliding panel, or small screw.
- Open the compartment gently. Slide the cover in the indicated direction, press the release tab, or loosen the retaining screw. Keep the screw in a safe place.
- Note the battery orientation. Check the plus and minus symbols before removing the old battery. If the markings are difficult to see, take a quick photo for reference.
- Remove the old battery. Pull the connector from the terminals or lift the cells from the holder without tugging on wires. Do not use a sharp metal object to pry against the electronics.
- Install the replacement. Match every positive and negative terminal to the markings in the compartment. For a 9-volt battery, press the connector onto the two terminals in the correct shape and position; for AA or AAA cells, place each end according to the diagram.
- Inspect the fit. The battery should sit securely without excessive pressure. Wires should not be pinched, and the connector should not be trapped between the housing and cover.
- Close the door completely. Slide or snap the cover into place, or reinstall the screw without overtightening it. A loose cover can interrupt power when the tool is moved.
- Turn the tool on and test it. Check for a normal display, audible signal, or calibration response before using it to locate a stud.
Some Zircon devices may have a battery compartment integrated into the handle rather than a separate rear panel. The same principles apply, but the model instructions take priority if the compartment contains a removable cartridge or a special connector.
Choosing the Correct Replacement Battery
Battery size is the first requirement, but it is not the only one. Use the voltage and battery format specified for the stud finder. A battery that physically fits may still provide the wrong voltage or terminal arrangement.
For ordinary replaceable batteries, a reputable alkaline battery is usually a practical choice when the manual permits it. Rechargeable batteries can have a different nominal voltage or charging behavior, so do not substitute one unless the model documentation specifically supports that type.
Check the expiration date and package condition before installation. A battery that has been stored in high heat, shows corrosion, or has damaged insulation should not be used.
When a model uses multiple batteries, replace the full set at the same time. Mixing old and new batteries, or combining different brands and chemistries, can shorten operating time and create uneven power delivery.
How to Handle a Stuck or Damaged Battery Door
A battery cover can become difficult to open when dust collects in the track or when a screw has been overtightened. First, remove visible debris with a soft, dry cloth and confirm that any locking tab is fully released.
Apply only gentle, even pressure in the direction indicated by the molded arrows or the cover’s track. Do not pry aggressively with a knife, drill bit, or other sharp tool because the housing can crack and the internal circuit board can be damaged.
If an old battery has leaked, wear disposable gloves and avoid touching the residue with bare skin. Remove the battery carefully, keep the residue away from your eyes and mouth, and clean the compartment only in a manner appropriate for the battery leakage and the manufacturer’s instructions.
Corroded contacts may appear dull, green, white, or flaky. Light surface contamination can sometimes be addressed with careful cleaning, but deep corrosion, broken springs, loose wires, or a swollen battery require more caution. Do not reinstall a leaking or swollen cell, and do not operate the tool if the battery has damaged the housing.
Testing the Stud Finder After Battery Replacement
A new battery does not automatically confirm that the scanner is ready for accurate use. Turn it on in a location away from the wall you plan to scan, then follow the model’s normal calibration procedure.
Many electronic stud finders need to be held flat against the wall or started away from the target before scanning. The correct starting position matters because the tool measures changes in the material in front of its sensor. Beginning over a stud, dense trim, metal, or an unusually thick area can affect the initial reading.
Test the tool in a known or easily interpreted area before relying on it for drilling. Move it slowly and steadily, watch for the center indication if the model provides one, and mark the location only after the signal repeats consistently.
Use this quick post-replacement check:
- The power indicator or display turns on normally.
- The buttons respond without repeated resets.
- The battery cover remains closed during movement.
- The tool completes its normal calibration or startup routine.
- The signal is stable when the scanner is moved at a steady pace.
If the screen remains blank, remove the battery and inspect the terminals again. A connector may be reversed, a cell may not be seated fully, or the cover may be preventing proper contact.
What to Do If the New Battery Does Not Fix
Begin with the simplest possibilities. Confirm that the replacement battery is fresh, the polarity is correct, and the battery type matches the model. If the unit uses more than one cell, verify that every battery is installed in the direction shown by the symbols.
Next, examine the contacts. Dirt, oxidation, or a bent terminal can interrupt the circuit even when the battery is new. Clean only with a dry cloth unless the model’s instructions specify another safe method, and never scrape aggressively against delicate contacts.
Check the power button and housing for physical damage. A stud finder that was dropped may have a cracked solder joint, displaced connector, damaged screen, or sensor problem that a battery replacement cannot correct.
False readings do not always indicate low power. Moisture in the wall, foil-backed insulation, metal mesh, plumbing, wiring, textured surfaces, and unusually thick wall materials can affect electronic scanning. A new battery may restore normal power while the surrounding material still limits detection accuracy.
Stop using the tool and consult the model documentation or an authorized service option when you notice any of the following:
- Heat, smoke, a burning odor, or visible melting
- A swollen battery or severe battery leakage
- Cracked housing near the battery compartment
- Exposed wires or a loose internal connector
- Power that cuts out whenever the tool is moved
- A display or alarm that remains abnormal with a confirmed battery
For a low-cost basic scanner, replacement may be more practical than repair when the housing or circuit board is damaged. Do not open a sealed section of the tool unless the manufacturer’s instructions specifically permit it.
Common Battery-Replacement Mistakes
Installing the Battery Backward
Polarity markings are easy to overlook in a small, dark compartment. Reversing a battery may prevent operation and, depending on the device design, can stress the electronics. Always match the plus and minus symbols rather than relying on the position of the old battery alone.
Using the Wrong Battery Format
A battery that fits loosely, requires force, or uses a different voltage is not an acceptable substitute. Check the model number and compartment label before buying a replacement, particularly when shopping for a similar Zircon device.
Forcing the Cover Closed
The cover should close with normal hand pressure. Resistance often means the battery, connector, or wiring is positioned incorrectly. Forcing the panel can break its retaining tabs and leave the tool unable to hold the battery securely.
Testing Over a Known Obstruction
Immediately scanning over a metal corner bead, outlet, pipe, or dense construction material can produce confusing results. Test the startup and calibration behavior first, then scan slowly in a suitable area.
Leaving an Old Battery Inside
Even if the tool is rarely used, an aging battery can leak and damage the contacts. Remove batteries before long-term storage and keep them in a cool, dry place according to the battery maker’s handling guidance.
Frequently Asked Questions
Where is the battery located on a Zircon stud finder?
The battery is usually behind a cover on the back or lower handle. Look for a sliding panel, latch, screw, or molded battery symbol, and confirm the exact location in the instructions for the model number printed on your tool.
What battery does a Zircon stud finder use?
The required battery depends on the specific Zircon model. Some versions use a 9-volt battery, while others may use cylindrical cells or another specified format. Read the compartment label or model manual instead of guessing from the tool’s size.
How do I change battery in Zircon stud finder without
Turn it off, open the correct cover gently, match the polarity markings, and close the panel without forcing it. Do not pry against the circuit board, pull on wires, or use a battery with a different voltage or chemistry unless the manufacturer allows it.
Why will my Zircon stud finder not turn on after
Check the battery orientation, terminal connection, battery freshness, and cover fit first. A bent contact, corroded terminal, loose connector, or damaged power switch can also prevent startup even with a new battery.
Should I replace all batteries at once in a Zircon
Yes, replace the entire set together when the model uses multiple batteries. Mixing new and old cells can reduce performance and may cause inconsistent voltage or shorter operating time.
Can I use rechargeable batteries in a Zircon stud finder?
Use rechargeable batteries only if the model documentation supports them. Rechargeable cells can have different voltage characteristics and may not provide the operating conditions intended for the scanner.
What if the stud finder still gives false readings after
Recalibrate it correctly and consider wall conditions before assuming the battery failed. Metal, wiring, plumbing, moisture, thick materials, and textured surfaces can interfere with electronic detection, while physical damage may require service or replacement.
Final Battery Replacement Takeaway
Changing the battery in a Zircon stud finder is normally a straightforward task: identify the exact model, use the specified battery, observe polarity, protect the contacts, and test calibration afterward. The major limitation is that a fresh battery cannot correct a damaged sensor, corroded compartment, unsuitable wall material, or an incorrect scanning technique.
If the tool remains unreliable after a careful replacement and proper startup, stop before drilling and consult the model-specific instructions or an authorized repair option. A confirmed battery connection and a repeatable test on the wall are the next practical checks.