How to Find Studs in Popcorn Ceiling: 7 Easy Methods That Work
Learning how to find studs in popcorn ceiling areas can feel harder than finding studs on a flat wall. The rough texture can make an electronic stud finder jump, give false readings, or slide unevenly. The good news is that you have several simple ways to confirm where the framing sits.
One key detail comes first: ceilings usually have **joists**, not studs. Joists are the wood or metal framing members that run above the ceiling drywall. If you plan to hang a light fixture, plant hook, storage item, or other load, finding a joist gives you a much stronger anchor than fastening only into drywall.
When I work through a ceiling-framing problem, I do not trust one reading alone. I look for a pattern, check the likely spacing, and confirm the location with a second method. That extra step can save a damaged popcorn finish and prevent a misplaced hole.

What You Are Actually Looking for Above a Popcorn Ceiling
Before learning how to find studs in popcorn ceiling areas, it helps to know what is above the drywall. In most wood-framed homes, ceiling joists support the ceiling drywall and connect to the rest of the building frame. They may run from one wall to another, or they may meet larger beams or other framing.
The joists can sit at different spacing. Many homes use regular framing layouts, but older homes, remodeled rooms, and unusual roof designs may not follow a simple pattern. Do not assume that every ceiling uses the same spacing or direction.
The popcorn coating adds another challenge. It can hide small surface clues, and it can make a stud finder harder to keep flat. The safest approach is to combine a tool reading with measurements or another physical clue.
- ✦ Ceiling joist
A horizontal framing member above the ceiling that supports the ceiling structure and often provides a solid place for a fastener.
- ✦ Drywall
The sheet material below the joists. A screw placed only in drywall has much less holding power than one driven into solid framing.
- ✦ Popcorn texture
A textured coating on the ceiling surface. It can interfere with smooth tool movement and may crumble when pressed or drilled.
Why Joist Direction Matters
Finding one joist makes the next one easier to locate. Once you know the direction of the framing, you can scan across the ceiling instead of searching in every direction. This turns a large ceiling into a much smaller search area.
- ✦ Look for a pattern
Several matching readings in a straight line are more useful than one isolated reading.
- ✦ Expect some variation
Walls, beams, ducts, vents, and remodeled areas can change the framing pattern.
How to Find Studs in Popcorn Ceiling With an Electronic Stud Finder
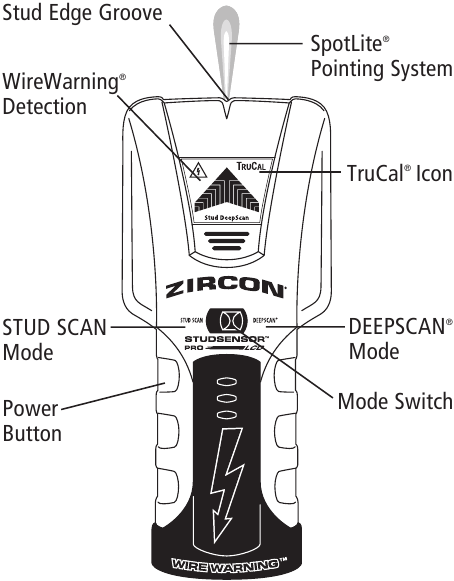
An electronic stud finder is often the quickest place to start. For a popcorn ceiling, choose a model that can handle thicker or uneven surfaces if possible. The goal is to detect a change in density behind the drywall, not to scan the popcorn texture itself.
Before scanning, read the tool instructions and make sure the device is set for the correct mode. Hold it as flat and steady as the texture allows. Move it slowly rather than sweeping it back and forth at high speed.
When the tool signals an edge or center, mark the spot lightly with removable tape or a pencil on a nearby smooth area. Then scan from the other direction. If both passes point to the same framing member, confidence in the reading goes up.

- ✦ Calibrate first
Follow the manufacturer’s calibration steps. A wrong starting point can cause false readings.
- ✦ Move slowly
Slow passes make it easier to notice a consistent change and reduce missed readings.
- ✦ Scan both directions
Approaching the same area from opposite directions can help confirm the location of a joist.
- ✦ Confirm the pattern
Do not drill after one reading. Look for a straight run that makes sense for normal framing.
How to Use a Stud Finder on Uneven Texture
Popcorn texture can create a gap between the sensor and the ceiling. If the tool struggles, place a thin, flat piece of cardboard or similar smooth material against the surface if the tool instructions allow it. Keep the setup steady and use the same technique during each pass.
Some tools may not work well over thick texture. If readings seem random, switch to a magnet, measurement method, or another way to confirm the framing instead of repeatedly scanning the same spot.
- ✦ Do not press hard
Heavy pressure can crush the popcorn texture and may not improve the electronic reading.
- ✦ Watch for false positives
Metal parts, fasteners, pipes, and electrical components can sometimes affect readings.
Use a Strong Magnet to Find Ceiling Fasteners
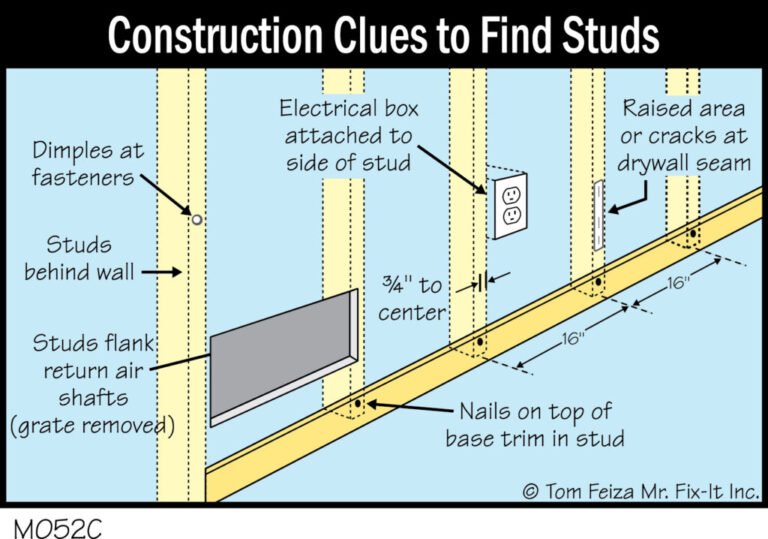
A strong magnet offers a simple way to find the screws or nails that attach drywall to the framing. It does not detect the wood itself. Instead, it finds the metal fasteners that often sit along the joists.
This method works best when you move the magnet slowly across the ceiling. When you feel a pull, mark the spot. Then look for more fasteners in a straight line. A row of fasteners can reveal the path of a joist.
A magnet can be especially useful when an electronic stud finder gives poor results on thick popcorn texture. It is also a useful second check before you make a hole.

- ✦ Use a strong magnet
A small but strong magnet can detect drywall fasteners without requiring a hole in the ceiling.
- ✦ Move in a grid
Scan in straight passes so you do not miss a fastener hidden among the texture.
- ✦ Find several points
Multiple fasteners that line up are more useful than one magnetic spot.
Why the Magnet Method Works
Drywall installers normally place screws or nails into the framing. These fasteners often form lines that follow the joists. Once you find a few points along one line, you can use that line as a guide for the framing.
- ✦ Important limit
A magnet cannot prove that wood sits behind every point. It shows where metal is located, so confirm the pattern before drilling.
How to Find Ceiling Joists by Measuring From Walls
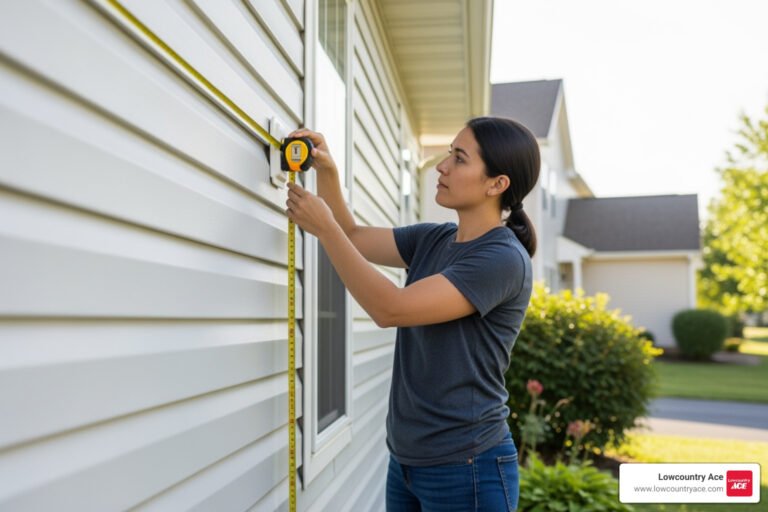
If you do not have a reliable stud finder, measurements can narrow the search. Start at a wall where the ceiling framing likely begins. Measure outward in a straight line and check for a regular framing pattern.
This method works best when you can confirm the direction of the joists from another clue. A visible ceiling beam, attic access, light fixture, vent, or other opening may reveal the framing direction. Once you know the direction, measurements become much more useful.
Do not assume that a standard spacing pattern proves the location. Older houses and remodeled rooms can have unusual layouts. Use measurements as a guide, then confirm the actual framing with a second method.

- ✦ Start at a known edge
A wall can provide a useful reference point for measuring across the ceiling.
- ✦ Keep the line straight
A crooked measurement can shift your mark enough to miss a joist.
- ✦ Confirm before drilling
Measurements predict where framing may be. A tool or fastener pattern gives stronger confirmation.
Check Nearby Openings and Fixtures
Existing fixtures can offer useful clues. A ceiling light box, vent opening, attic hatch, or previous repair may expose part of the framing. Look carefully without pulling down the popcorn coating.
An existing fixture does not always sit directly under the joist you need. Use it as a reference point, not as proof.
- ✦ Attic access
If you can safely enter the attic, you may be able to see the joists directly.
- ✦ Existing fixture
A light or other fixture can provide a clue about framing, but its position alone does not confirm a joist.
Use a Tiny Test Hole Only When You Need to Confirm the Location
Sometimes the safest way to confirm a suspected joist is a very small test hole. This should be a last confirmation step, not the first method you try. Popcorn texture can chip or break around a hole, so take care before touching the ceiling.
Choose a spot where a small mark will be easy to repair if the framing is not where expected. Use a small drill bit or another suitable tool and apply gentle pressure. Stop if you meet unexpected resistance or if you suspect a wire, pipe, metal plate, or other hidden object.
If the bit enters a solid wood member after passing through the drywall, you have strong evidence that you found a wood joist. Do not keep drilling deeper than needed for the task.

- ✦ Use a small bit
A small test hole creates less damage and is easier to patch than a large opening.
- ✦ Stop at unusual resistance
Unexpected metal or resistance can signal a hidden component. Do not force the drill.
- ✦ Protect the surface
Work slowly because popcorn texture can loosen or fall when disturbed.
When a Test Hole Is Not a Good Idea
Do not drill simply to test a location if you have reason to suspect hidden wiring or plumbing. Be extra careful near bathrooms, kitchens, utility areas, electrical fixtures, and places with plumbing above the ceiling.
If the ceiling is damaged, sagging, wet, or otherwise unusual, fix the underlying problem before adding a new load. A ceiling that looks stable from below may still have a structural or moisture issue.
- ✦ Near electrical wiring
Avoid drilling where wires may run. Turn off power when appropriate, but remember that power-off does not make hidden wiring safe to hit.
- ✦ Near plumbing
Pipes may sit above the ceiling. Avoid guessing when a plumbing path is possible.
How to Find Studs in Popcorn Ceiling Without Damaging the Texture
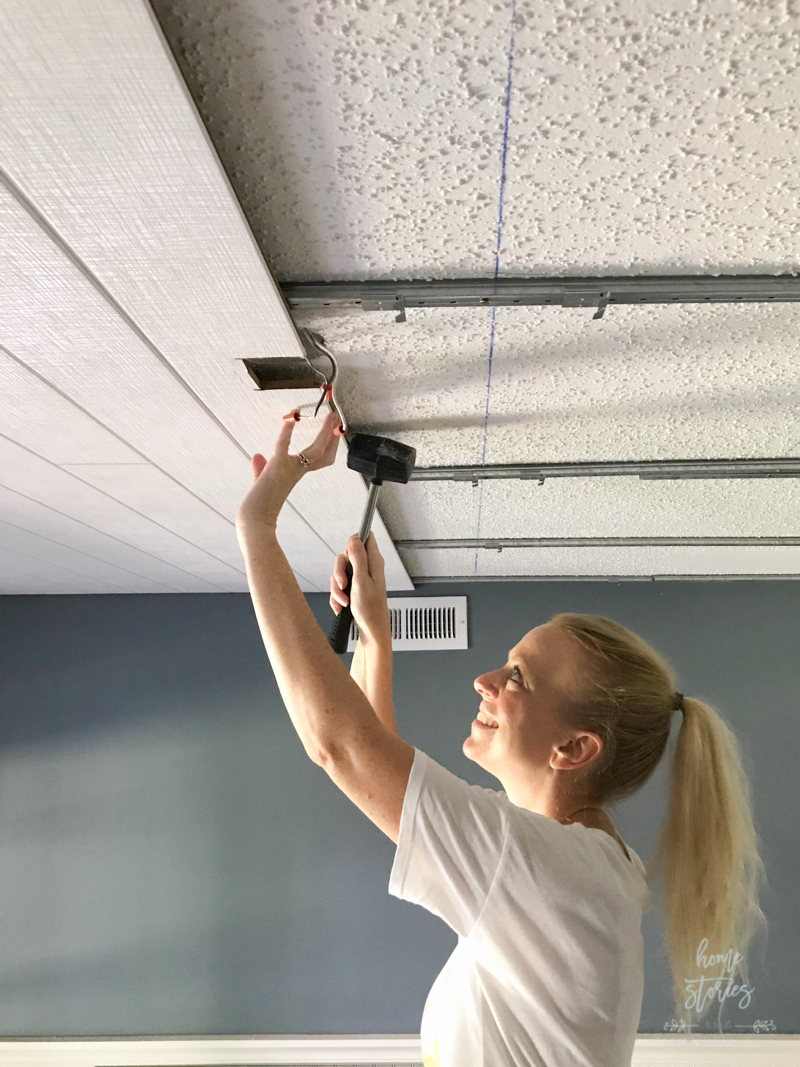
If keeping the ceiling intact matters, use non-invasive methods first. A magnet, careful electronic scan, and measurements can often locate a joist without making a hole. Mark suspected locations with small pieces of removable tape rather than pressing a pencil into the texture.
Keep your hands and tools clean. Oils, dirt, and pressure can leave marks on an older popcorn finish. When moving a tool, use a light touch and avoid dragging it across the bumps.
If you need to mount something heavy, do not sacrifice safety to protect the texture. A tiny repair is better than a failed anchor or damaged fixture. The best method balances surface protection with a solid, verified connection.
- ✦ Use tape for marks
Removable tape can make temporary marks without digging into the textured finish.
- ✦ Avoid repeated scanning
Too much tool movement can loosen delicate texture and still may not improve the reading.
- ✦ Confirm before loading
A small amount of extra checking is worthwhile when the final installation will support weight.
What If the Popcorn Texture Comes Off?
A small amount of loose texture may fall during scanning or drilling. Do not keep rubbing the area. Clean the loose material gently and plan a proper patch if needed.
If the texture is loose across a large area, stop and assess the ceiling before continuing. Older popcorn ceilings can require extra care because some older textured products may contain asbestos.
- ✦ Avoid scraping casually
Do not scrape or sand old popcorn texture just to make a stud finder work better.
- ✦ Consider testing
If an older ceiling may contain asbestos, consider professional testing before disturbing the material.
How to Find Studs in Popcorn Ceiling When the Stud Finder Gives False Readings
False readings are common when a ceiling has thick texture, multiple layers, metal components, or unusual construction. If the tool seems to detect framing everywhere, stop and change your approach. Repeatedly scanning the same area with the same settings rarely solves the problem.
Try a magnet to locate drywall fasteners. Then compare the fastener pattern with the electronic reading. If both methods point to the same line, you have a stronger clue that the framing runs there.
You can also scan several feet along the suspected line. A real joist should normally create a repeatable pattern rather than a single isolated signal. If the pattern does not make sense, investigate before drilling.

- ✦ Thick texture
A large gap between the sensor and drywall can reduce accuracy.
- ✦ Metal components
Metal channels, fasteners, protective plates, and other parts can affect readings.
- ✦ Multiple layers
Extra drywall or other ceiling materials can make electronic detection harder.
- ✦ Irregular framing
Remodeling can create framing patterns that do not match a simple spacing rule.
A Simple Confirmation Routine
For a reliable result, use at least two clues. For example, locate a line with the stud finder, find fasteners along that same line with a magnet, and then check the expected joist direction. This layered approach is more dependable than trusting a single beep.
- ✦ First pass
Scan slowly with the electronic finder.
- ✦ Second pass
Approach the suspected location from another direction.
- ✦ Final check
Use a magnet, measurement, attic view, or carefully chosen test point to confirm the result.
How to Find Studs in Popcorn Ceiling Before Hanging Something Heavy
Finding the joist is only one part of a safe ceiling installation. You also need to know how much weight the framing and fastener can support. A joist can provide a strong attachment point, but the correct hardware depends on the item, load, framing type, and installation method.
For a light fixture or ceiling fan, use an electrical box that is rated and properly secured for that application. Do not assume that a random screw into a joist is enough. Follow the fixture instructions and applicable electrical requirements.
For shelves, swings, hanging chairs, heavy storage, or other high-load items, the framing and attachment need special attention. When the load or structure is uncertain, a qualified professional can verify the framing and mounting method.

- ✦ Light items
Some light objects may work with suitable drywall anchors, but the anchor rating must match the load and ceiling material.
- ✦ Heavy items
Heavy or dynamic loads should attach to suitable structural framing with hardware designed for the job.
- ✦ Electrical fixtures
Use an electrical box and mounting method approved for the fixture and its weight.
- ✦ Dynamic loads
Items that swing, move, or receive sudden force need more careful structural planning than static decorations.
Check for Hidden Hazards Before Drilling
A joist location does not tell you everything about what lies nearby. Electrical cables and plumbing can pass through or beside framing. Protective metal plates may also cover areas where utilities pass through wood.
Never treat a stud finder as a complete safety scan. If you do not know the path of utilities, stop and investigate before drilling. When in doubt, use a qualified electrician, plumber, or contractor.
- ✦ Electrical
Look for nearby switches, outlets, lights, junction boxes, and other clues that suggest wiring paths.
- ✦ Plumbing
Bathrooms, kitchens, laundry areas, and rooms below plumbing lines deserve extra caution.
- ✦ Structural changes
Be cautious in remodeled spaces where the original framing pattern may have changed.
A Practical Step-by-Step Method for Finding Ceiling Joists
If you want one simple process, start with the least damaging method and increase your level of confirmation only when needed. This is a practical way to approach how to find studs in popcorn ceiling areas without creating unnecessary holes.
First, inspect the room for clues. Look at light fixtures, vents, attic access panels, beams, and wall intersections. Next, use an electronic stud finder if it works well on the texture, then confirm the suspected line with a magnet or measurements.
Once you have a likely joist, check several points along its path. If the readings form a straight and consistent line, you can be much more confident. Only use a small test hole when you need physical confirmation and you have considered hidden utilities.
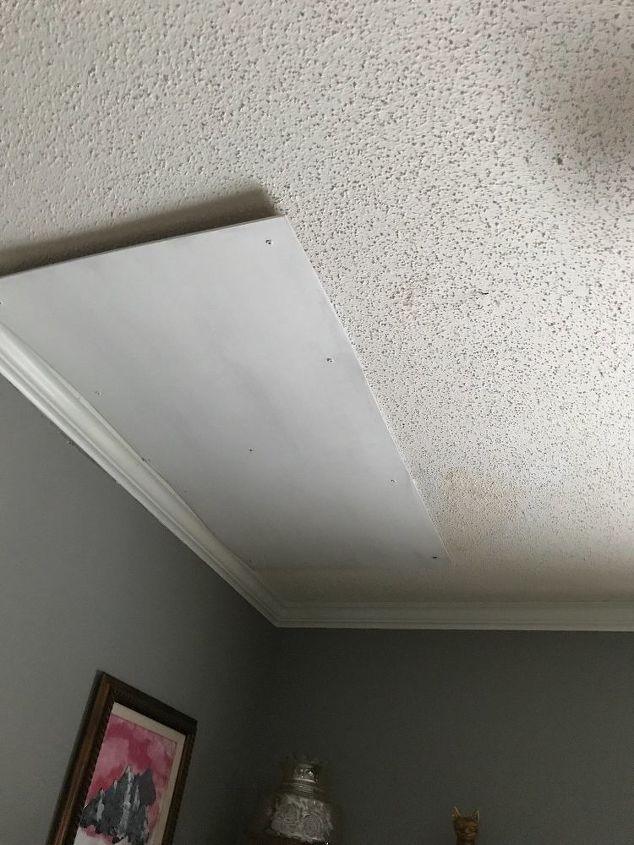
- ✦ 1. Inspect the ceiling
Look for fixtures, openings, beams, and other clues that can reveal framing direction.
- ✦ 2. Choose a detection method
Start with an electronic stud finder, magnet, or careful measurement based on the ceiling condition.
- ✦ 3. Mark suspected locations
Use removable tape or another gentle marking method to protect the popcorn finish.
- ✦ 4. Confirm the line
Check several points along the suspected joist rather than relying on one reading.
- ✦ 5. Check for hazards
Consider electrical wiring, plumbing, and metal protection plates before drilling.
- ✦ 6. Make the installation
Use hardware suited to the framing, load, and item you are mounting.
Best Method for Most DIY Projects
For many homeowners, the best routine is electronic detection followed by magnetic confirmation. If those methods disagree, use measurements or inspect an accessible attic area instead of guessing.
The goal is not simply to make the tool beep. The goal is to build a clear picture of where the framing runs. That mindset makes how to find studs in popcorn ceiling projects safer and more accurate.
- ✦ Use more than one clue
Two matching methods are stronger than one uncertain reading.
- ✦ Protect the finish
Use light pressure and avoid unnecessary holes or scraping.
- ✦ Know when to stop
Unexpected resistance, damaged texture, suspected utilities, or uncertain framing are good reasons to pause.