How Does a Cordless Drill Work: Key Facts and Helpful Guidance
A cordless drill uses battery power to turn an electric motor, which transfers torque through gears to a chuck that spins a drill bit or driver bit. A trigger controls speed, while the clutch, gearbox, and direction switch let the user match the tool’s force and rotation to the job.
To use one confidently, a person needs to follow the energy path from the battery to the bit and understand what each control changes. That knowledge helps with choosing the correct speed, setting clutch resistance, recognizing performance problems, and avoiding damage to the tool, fastener, material, or hands.
This article explains the motor, battery, gears, chuck, trigger, clutch, and electronic controls that make the tool work. It also covers charging and runtime, drill-versus-driver settings, common limitations, safe operating habits, and the practical checks that reveal whether a cordless drill is suitable for a particular task.
The Basic Operating Sequence
When a charged battery is attached, it supplies direct-current electricity to the drill’s control system. Pressing the trigger closes an electronic circuit, allowing current to reach the motor; pressing farther generally increases motor speed.
The motor’s rotating shaft turns a set of gears. Those gears transfer the motor’s high-speed rotation into usable torque at a lower speed, depending on the selected gearbox setting. The final output shaft rotates the chuck, which grips the bit.
This sequence can be summarized as:
- The battery supplies electrical energy.
- The trigger meters power to the motor.
- The motor converts electrical energy into rotation.
- The gearbox changes speed and torque.
- The chuck transfers rotation to the bit.
- The bit drills a hole or turns a fastener.
A drill does not create unlimited force. If the bit binds, the fastener stops, or the user applies too much load, the motor draws more current and the tool may slow, shut down, overheat, or trigger an electronic protection feature.
How the Battery and Motor Provide Power
Most modern cordless drills use a rechargeable lithium-ion battery pack. The pack contains multiple cells, electrical connections, and a battery-management circuit that helps monitor temperature, charging, and discharge conditions.
Battery voltage affects the tool’s power potential, but voltage alone does not determine performance. Motor design, gear reduction, battery capacity, electronics, and the drill’s overall construction also matter. A higher-capacity battery may run longer, but it can add weight and change the tool’s balance.
When the trigger is pressed, the battery sends current through electronic controls to the motor. Many drills use a brushless motor, while others use a brushed motor.
Brushed and brushless motors
A brushed motor uses carbon brushes and a commutator to deliver current to the rotating part of the motor. It is a proven design, but the brushes gradually wear and create friction, heat, and some electrical sparking inside the motor.
A brushless motor uses electronic switching instead of physical brushes. The design can reduce mechanical wear and improve efficiency, although the drill still depends on electronic controls and may cost more to repair if those controls fail.
In either design, electrical energy becomes rotational motion through magnetic forces. The motor itself typically spins much faster than a drill bit should spin under heavy load, which is why the gearbox is essential.
What the Gearbox and Speed Settings Do
A cordless drill commonly has a two-speed mechanical gearbox selected by a slider near the top of the housing. Low gear provides slower rotation with greater torque; high gear provides faster rotation with less torque at the chuck.
Low gear is useful for driving large screws, starting holes carefully, or handling tasks that demand controlled force. High gear is generally better for drilling smaller holes in suitable materials, where cutting speed matters more than maximum torque.
The trigger still controls speed within the selected range. A gentle squeeze provides slow rotation, while a deeper squeeze increases speed. This variable-speed control helps a bit start without wandering and lets the operator ease off when resistance rises.
Using the wrong gear can create problems. High gear may stall or strain during heavy screwdriving, while low gear can make ordinary drilling unnecessarily slow and may encourage excessive pressure.
How the Chuck Holds a Bit
The chuck is the adjustable front section that grips the drill bit or driver bit. Most general-purpose cordless drills use a keyless chuck, which tightens by hand around the bit’s shank.
To install a bit, open the chuck, insert the bit straight, and tighten the chuck firmly. The jaws should grip the solid shank rather than a damaged, angled, or contaminated section. A bit that is not centered or fully secured may wobble, slip, or produce an oversized hole.
Many drills accept round-shank bits and hex-shank driver accessories. An ordinary keyless chuck is not the same as an impact-driver chuck, and accessories should be used only with a chuck or adapter designed to hold them.
Remove the battery before clearing a jammed bit or making adjustments near the rotating chuck. Releasing the trigger is not always enough protection, because an accidental trigger press can restart the motor.
How the Clutch Controls Driving Force
The numbered ring behind the chuck is the adjustable clutch. It limits how much torque the chuck receives before the tool slips or disengages. Lower settings allow less driving force, while higher settings permit more.
The clutch is mainly for driving screws, not for determining ordinary drilling speed. A low setting can prevent a screw from sinking too deeply, stripping its head, or damaging a softer material. The correct setting depends on screw size, material, pilot-hole size, and the desired depth.
When drilling, the clutch is usually set to a drill position marked with a bit symbol, if the tool has one. This bypasses or greatly reduces the clutch’s limiting action so the drill can deliver steady rotation. The exact markings and behavior vary by model, so the tool’s instructions remain the final reference.
A clutch cannot replace a proper bit, pilot hole, or controlled technique. If a screw repeatedly stops before reaching the desired depth, increasing the clutch may hide a dull bit, excessive friction, or an unsuitable fastener.
What the Direction Switch and Trigger Control
A small slide switch near the trigger selects forward or reverse rotation. Forward is used for drilling and driving most fasteners; reverse removes screws and backs a bit out of a hole.
The direction switch often includes a center position that locks the trigger. This is useful when carrying the tool, changing accessories, or storing it. The motor should be fully stopped before changing direction, because reversing while the chuck is still spinning can stress the drivetrain and electronics.
The trigger controls more than simple on and off operation. Its variable-speed response lets the user:
- Start a hole slowly and keep the bit aligned.
- Seat a screw without instantly applying full power.
- Reduce heat and friction near the end of a cut.
- React quickly if the bit begins to bind.
Some drills include electronic braking. When the trigger is released, the controls rapidly stop the motor, although the chuck and bit may still coast briefly. The bit should never be touched until all movement has stopped.
Drilling and Driving: Matching the Tool to the Job
A standard cordless drill is designed for rotating accessories. It can drill wood, many plastics, and metal with the correct bit and technique, and it can drive screws with suitable control.
For wood, a brad-point, twist, auger, or spade bit may be appropriate depending on hole size and finish. For metal, a sharp metal-cutting bit and cutting speed suited to the material are important. Excessive speed and pressure can overheat a bit, damage its cutting edges, or harden some metals.
Masonry requires a masonry bit, but ordinary drill-only action may be slow in concrete or brick. A hammer drill adds an impact function that helps fracture masonry as the bit turns. A rotary hammer is a different, more powerful tool intended for demanding masonry work.
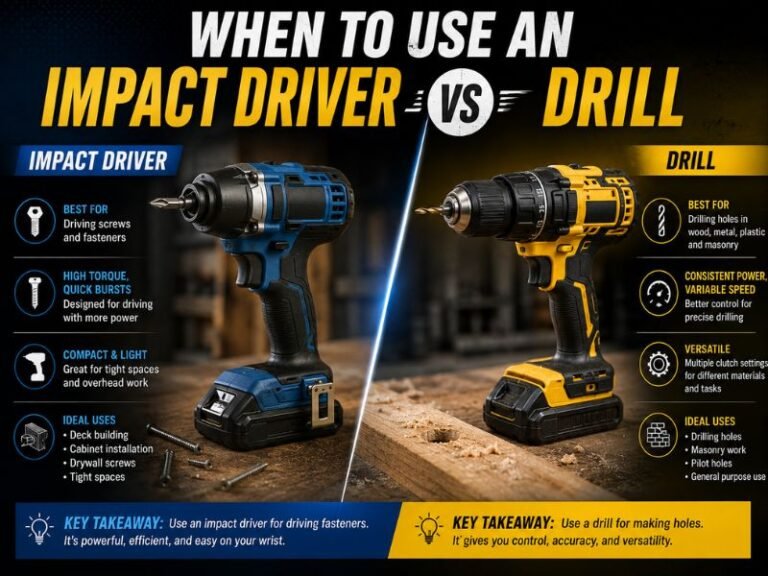
A cordless drill is also not an impact driver. An impact driver combines rotation with rapid hammering impacts that increase fastening torque and help resist bit cam-out. It can be excellent for long or large fasteners, but it may be less suitable when delicate materials require fine clutch control.
Choosing a useful starting setup
Before pulling the trigger, select the accessory, gear, direction, and clutch setting for the task. Clamp or otherwise secure the workpiece, mark the location, and confirm that the bit can reach the material without contacting hidden wiring, plumbing, or other hazards.
Start slowly with the drill held square to the surface. Increase speed only when the bit is cutting cleanly, and reduce pressure when the bit exits the far side of the material to limit splintering or sudden breakthrough.
Runtime, Charging, and Performance Limits
Runtime depends on battery capacity, material resistance, bit size, drilling speed, fastening torque, temperature, and the condition of the battery. Driving many long screws or drilling large holes demands more current than occasional small pilot holes.
A battery that is low, cold, old, or overheated may cause reduced speed, weak torque, or an automatic shutdown. Letting a hot battery or tool cool can restore normal operation, but repeated overheating deserves attention rather than continued heavy use.
Keep battery contacts clean and dry, and use the charger and battery combination approved for the tool. Do not use a pack with a damaged case, exposed cells, swelling, leaking, burning odor, or unusual heat. A damaged lithium-ion battery can present a fire hazard and should be isolated and handled according to local hazardous-waste guidance.
Storage conditions also matter. Long-term storage in extreme heat, freezing conditions, or a fully depleted state can shorten battery life. Follow the battery maker’s charging and storage instructions instead of relying on a universal charging rule.
Common Problems and What They Mean
A drill that runs but produces little force may be in high gear, have a nearly empty battery, or be limited by a low clutch setting. A slipping bit can also make the tool seem weak when the real problem is poor chuck tightening or a worn accessory.
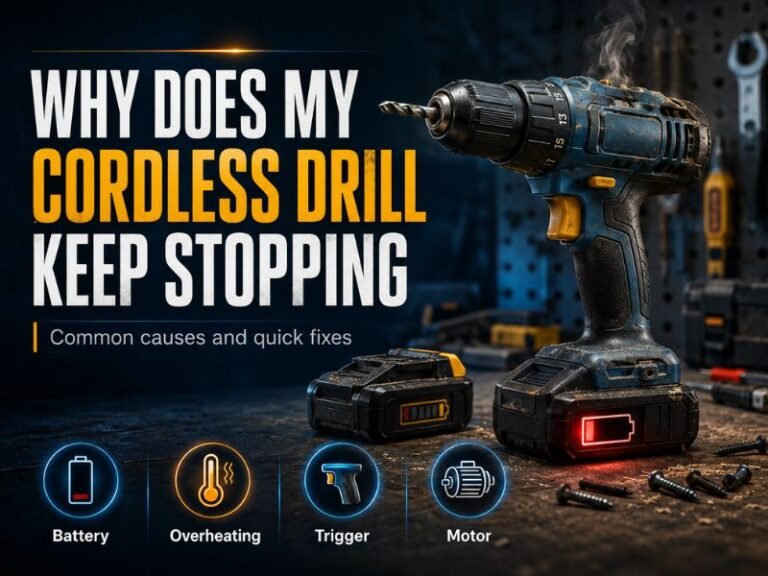
A drill that stops suddenly may have encountered a jam, overheated, reached a battery protection limit, or developed a fault. Release the trigger, remove the battery, and inspect the bit and workpiece before trying again.
Unusual grinding, rattling, burning smells, visible sparks, smoke, or a chuck that wobbles significantly can indicate mechanical or electrical damage. Stop using the tool rather than repeatedly testing it under load.
- Check the battery charge and inspect the pack for damage.
- Confirm the gear and clutch settings match the task.
- Inspect the bit for dull edges, bending, buildup, or wear.
- Make sure the chuck grips the bit evenly and tightly.
- Allow a hot tool or battery to cool in a safe, dry place.
- Seek qualified service when symptoms continue or involve smoke, damaged wiring, or internal noise.
Safety Practices for Cordless Drills
Wear eye protection because chips, broken bits, and fastener fragments can travel unexpectedly. Tie back long hair, avoid loose clothing and jewelry, and keep fingers away from the rotating chuck and bit.
Secure the workpiece instead of holding it in one hand while drilling with the other. A bit can catch suddenly, causing the material or tool to twist. Larger bits and high-torque settings increase the chance of kickback, especially when drilling through tough material or when the bit binds.
Use the correct bit at a controlled speed, and do not force a dull accessory. Locate hidden utilities before drilling into walls, floors, ceilings, or other finished surfaces. Remove the battery before changing bits, clearing debris, cleaning the tool, or transporting it where the trigger could be pressed.
Professional help is appropriate when a battery is damaged, the charger behaves abnormally, the tool emits smoke, or internal repairs are required. Opening a battery pack or bypassing its protective electronics creates risks that routine user maintenance does not justify.
Frequently Asked Questions About How a Cordless Drill Works
Does a cordless drill use electricity?
Yes, it uses electricity stored in a rechargeable battery. The battery supplies direct-current power to the motor and electronic controls, which convert that energy into controlled rotation at the chuck.
How does a cordless drill work without being plugged in?
It carries its electrical power in a removable battery pack. Rechargeable cells release stored energy through the trigger and motor-control system, so the tool does not need a wall outlet during operation.
What makes a cordless drill turn slowly or quickly?
The trigger and gearbox determine the available speed range. Trigger pressure varies motor speed, while the gear selector chooses a faster, lower-torque range or a slower, higher-torque range.
What does the numbered clutch on a drill do?
The clutch limits torque during screwdriving. It helps prevent overdriving screws and stripping fastener heads, but it is normally bypassed or set to the drill symbol when making holes.
Why does a cordless drill stop when the bit gets
A jam can overload the motor or activate electronic protection. The tool may stop to limit excessive current, heat, or mechanical stress; release the trigger and remove the battery before freeing the bit.
Can a cordless drill drill into concrete?
It can handle light masonry work only when the drill and bit are suitable. A hammer-drill function and masonry bit are generally more effective for brick or concrete, while heavy concrete work may require a rotary hammer.
How long does a cordless drill battery last?
Runtime varies with battery capacity and workload. Large holes, long screws, high resistance, cold temperatures, and an aging battery reduce operating time compared with light drilling and occasional fastening.
Conclusion: Use the Controls to Match the Work
A cordless drill works by sending battery power through a trigger-controlled motor, gearbox, clutch, and chuck to produce useful rotation. The main limitation is available battery energy and torque, while binding, overheating, damaged batteries, and hidden utilities create the most important safety concerns.
Before the next task, inspect the battery and bit, choose the correct gear and clutch setting, secure the material, and begin at controlled speed. If the drill shows smoke, abnormal noise, severe heat, or battery damage, stop using it and arrange qualified service.